
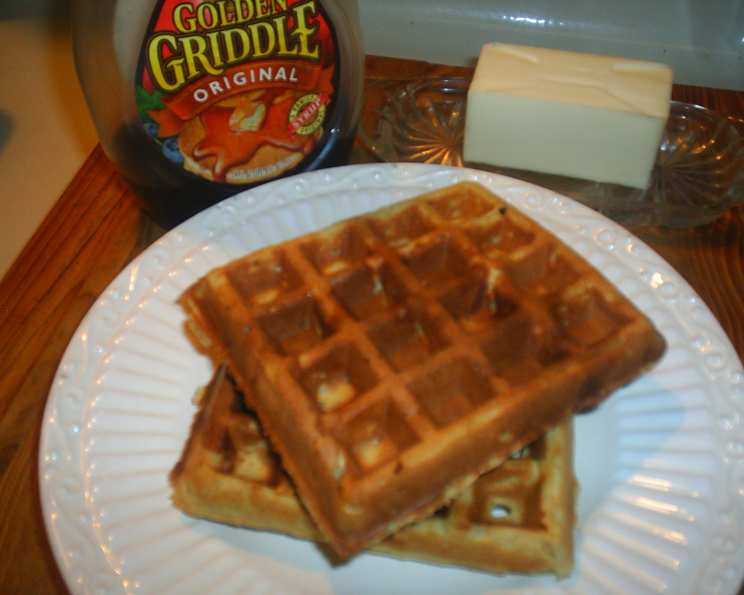
Peanut Butter Waffles: A Nutty Twist on a Breakfast Classic
I remember the first time I tasted peanut butter waffles. It was a rainy Saturday morning, and the aroma of freshly brewed coffee mingled with something distinctly nutty and sweet wafting from the kitchen. My aunt, a woman known for her adventurous palate, had decided to surprise us with this unconventional breakfast. The golden-brown waffles, infused with the unmistakable flavor of peanut butter, were a revelation. The slight tang from the warmed jelly she served alongside cut through the richness perfectly, creating a symphony of flavors that danced on my tongue. It was comfort food elevated, a reminder that even familiar favorites could be transformed into something extraordinary.
Recipe Overview
- Prep Time: 15 minutes
- Cook Time: 10 minutes
- Total Time: 25 minutes
- Servings: 5
- Yield: 10 waffles
- Dietary Type: Vegetarian
Ingredients
- 1 1/4 cups flour
- 3 tablespoons sugar
- 1 tablespoon baking powder
- 1/4 teaspoon baking soda
- 1/4 teaspoon ground cinnamon
- 2 eggs, separated
- 1 1/4 cups milk (I used 1% milk)
- 1/3 cup peanut butter, creamy
- 3 tablespoons butter, melted
Equipment Needed
- Large bowl
- Small bowl
- Whisk
- Electric mixer or whisk
- Preheated waffle iron
- Cooking spray
Instructions
-
In a large bowl, combine the flour, sugar, baking powder, baking soda, and cinnamon. Whisk to ensure all dry ingredients are evenly distributed. This helps prevent pockets of baking powder that can lead to an uneven texture.
-
In another bowl, carefully separate the egg yolks into the bowl, reserving the egg whites in a separate small bowl. It’s crucial to avoid any yolk contaminating the whites, as this will hinder their ability to whip properly.
-
Whisk the egg yolks, milk, peanut butter, and melted butter together until the mixture is smooth and well combined. The peanut butter might require a little extra whisking to fully incorporate.
-
Stir the egg yolk mixture into the dry ingredients just until moistened. Be careful not to overmix, as this can develop the gluten in the flour, resulting in tough waffles. A few lumps are perfectly fine.
-
In the small bowl containing the egg whites, use an electric mixer or a whisk to beat the egg whites until stiff peaks form. The peaks should hold their shape when the whisk is lifted. This step is crucial for creating light and airy waffles.
-
Gently fold the whipped egg whites into the batter. Use a spatula and a light hand to avoid deflating the egg whites. Work in batches, folding until just combined. Streaks of egg white are fine; avoid overmixing at this stage.
-
Preheat your waffle iron and lightly spray it with cooking spray. The cooking spray ensures that the waffles release easily without sticking.
-
Bake the waffles in the preheated waffle iron according to the manufacturer’s instructions. The cooking time will vary depending on your waffle iron and your desired level of doneness. We prefer ours golden brown, but my husband likes his a bit more cooked, resulting in a crispier texture. Adjust the temperature setting accordingly.
-
Serve immediately with your favorite toppings.
Expert Tips & Tricks
- Bloom the batter: Let the batter rest for 5-10 minutes after mixing. This allows the flour to fully absorb the liquid, resulting in a more tender waffle.
- Melt the peanut butter: For easier incorporation, slightly warm the peanut butter in the microwave before adding it to the wet ingredients.
- Don’t overmix: Overmixing develops gluten and leads to tough waffles. Mix until just combined.
- Crisp waffles: For extra crispy waffles, try adding a tablespoon of cornstarch to the dry ingredients.
- Keep warm: Keep cooked waffles warm in a preheated oven (200°F/93°C) until ready to serve. Place them on a wire rack to prevent them from becoming soggy.
Serving & Storage Suggestions
Serve these peanut butter waffles immediately for the best texture. They are delicious with warmed mixed jelly (warmed gently in a saucepan until it becomes more syrupy), fruit-flavored syrup, fresh fruit, yogurt, or a dusting of powdered sugar.
Leftover waffles can be stored in an airtight container in the refrigerator for up to 3 days. For longer storage, freeze them individually on a baking sheet before transferring them to a freezer bag. This prevents them from sticking together. Reheat frozen waffles in a toaster, oven, or waffle iron.
Nutritional Information
| Nutrient | Amount per Serving | % Daily Value |
|---|---|---|
| Calories | 374.5 kcal | N/A |
| Calories from Fat | 180 g | 48% |
| Total Fat | 20 g | 30% |
| Saturated Fat | 8.2 g | 41% |
| Cholesterol | 101.3 mg | 33% |
| Sodium | 479.5 mg | 19% |
| Total Carbohydrate | 38.5 g | 12% |
| Dietary Fiber | 1.9 g | 7% |
| Sugars | 9.3 g | N/A |
| Protein | 12.1 g | 24% |
Note: Nutritional information is an estimate and may vary based on specific ingredients and preparation methods.
Variations & Substitutions
- Gluten-free: Substitute the all-purpose flour with a gluten-free blend. Be sure to use a blend that is designed for baking.
- Dairy-free: Use a non-dairy milk alternative like almond milk, soy milk, or oat milk. Ensure the melted butter is also substituted for a dairy-free alternative.
- Different nut butters: Experiment with other nut butters like almond butter, cashew butter, or sunflower seed butter.
- Chocolate chips: Add 1/2 cup of chocolate chips to the batter for a chocolate peanut butter twist.
- Spices: Add a pinch of nutmeg or cardamom to the batter for a warm, aromatic flavor.
FAQs (Frequently Asked Questions)
Q: Can I make the batter ahead of time?
A: Yes, you can make the batter up to 24 hours in advance. Store it in the refrigerator and gently stir it before using. Be aware that the batter may thicken slightly, so you might need to add a splash of milk to thin it out.
Q: Why are my waffles soggy?
A: Soggy waffles are often caused by overmixing the batter or not preheating the waffle iron sufficiently. Ensure you mix until just combined and that the waffle iron is hot before adding the batter.
Q: Can I freeze these waffles?
A: Absolutely! Freeze them individually on a baking sheet before transferring them to a freezer bag for easy reheating.
Q: What if I don’t have any peanut butter?
A: You can substitute with another nut butter or sunflower seed butter, or you can omit it altogether for a more traditional waffle. The texture and flavor will be different, but still delicious.
Q: Can I use a different type of milk?
A: Yes, you can use any type of milk you prefer, including dairy or non-dairy alternatives. The fat content of the milk may slightly affect the texture of the waffles.
Final Thoughts
These peanut butter waffles are a delightful way to elevate your breakfast or brunch game. The nutty flavor pairs perfectly with a variety of toppings, making them a versatile and satisfying treat. Don’t be afraid to experiment with different nut butters, spices, or additions to create your own signature version. Give this recipe a try and share your creations with friends and family. I’m sure you will all enjoy them.