
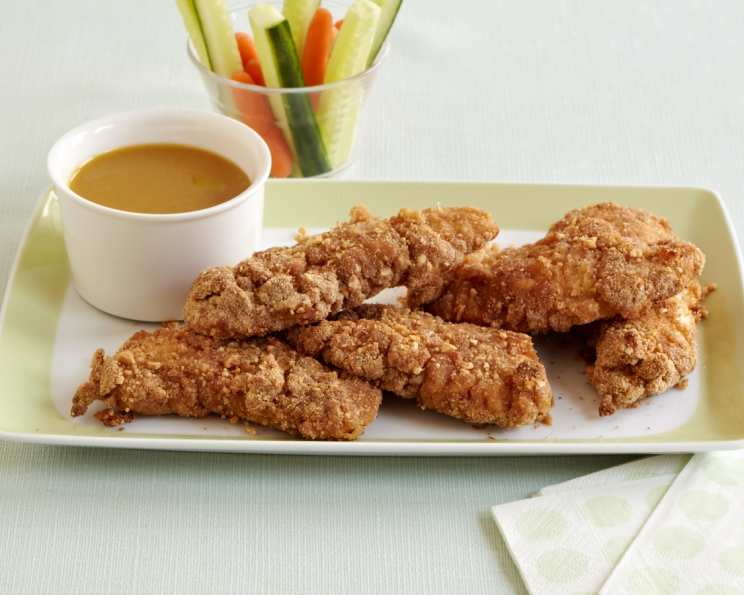
Peanut Crusted Chicken Tenders: A Crunchy Comfort Classic
I remember countless summer afternoons spent at my grandmother’s house, the air thick with the scent of frying chicken. But one day, she surprised us all. Instead of her usual recipe, she unveiled a new creation: chicken tenders coated in a glorious, crunchy peanut crust. The unexpected nutty flavor mingled with the savory chicken, creating a symphony of textures and tastes that instantly became a family favorite. To this day, that first bite brings me right back to her sun-drenched kitchen, a testament to how a simple dish can hold so much love and warmth.
Recipe Overview
- Prep Time: 45 minutes
- Cook Time: 20-25 minutes
- Total Time: 1 hour 15 minutes
- Servings: 4
- Dietary Type: Gluten Optional (Use gluten-free breadcrumbs)
Ingredients
- 2 1⁄2 lbs chicken tenders or 4 boneless skinless chicken breasts, cut into thick fingers
- 1⁄2 teaspoon salt
- 1⁄4 teaspoon fresh ground black pepper
- 1⁄4 teaspoon paprika
- 2 cups buttermilk
- 2 cups peanuts
- 1⁄2 cup breadcrumbs (plain or Italian seasoned)
- 1 cup all-purpose flour
- 3 large eggs
Equipment Needed
- Large bowl or zip-lock bag
- Food processor
- 3 separate bowls for dredging
- 2 baking sheets
- Aluminum foil
- Oven
Instructions
- Begin by seasoning the chicken tenders with salt, pepper, and paprika. Ensure each piece is evenly coated with the spices for maximum flavor.
- Place the seasoned chicken tenders in a large bowl or a large plastic bag with a zip-lock closure.
- Pour the buttermilk over the chicken. Mix well to ensure all pieces are submerged in the buttermilk. Marinate at room temperature for 30 minutes or, for a deeper flavor, refrigerate for up to one day in advance. The buttermilk tenderizes the chicken, creating a more succulent final product.
- Preheat your oven to 350°F (175°C). While the oven heats, line 2 baking sheets with aluminum foil. Lightly oil the foil to prevent the chicken tenders from sticking during baking. This ensures even cooking and easy cleanup.
- Now, prepare the peanut crust. Combine the peanuts and the breadcrumbs in the bowl of a food processor. Pulse until the peanuts are finely ground. Be careful not to over-process into peanut butter! You want a coarse, crumbly texture.
- Empty the peanut and breadcrumb mixture into a large bowl for dipping.
- Place the flour in a separate bowl.
- In another bowl, beat the eggs until frothy. Whisking air into the eggs helps them adhere to the chicken, creating a better crust.
- Now, the dredging process begins. Working with one chicken tender at a time, lift it from the buttermilk marinade, allowing excess buttermilk to drip off.
- Roll the chicken tender in the flour, ensuring it is thoroughly coated. The flour helps the egg adhere better, leading to a crispier crust.
- Transfer the floured chicken tender to the bowl with the beaten eggs and turn to coat completely.
- Finally, roll the egg-coated chicken tender in the peanut mixture, pressing gently to ensure the peanuts adhere to all surfaces.
- Place the coated chicken tender on the prepared baking sheets. Repeat steps 9-12 with the remaining chicken tenders.
- Bake in the preheated oven, turning the chicken tenders once halfway through, until firm to the touch and lightly browned, approximately 20 to 25 minutes.
- Once baked, season the chicken tenders with additional salt and pepper to taste.
- Serve warm and enjoy the delightful crunch and flavor!
Expert Tips & Tricks
- Pounding the chicken breasts: If using chicken breasts, pound them lightly to an even thickness before cutting into tenders. This ensures even cooking.
- Spice it up: Add a pinch of cayenne pepper to the peanut mixture for a subtle kick.
- Don’t overcrowd the pan: Ensure there’s enough space between the chicken tenders on the baking sheet. Overcrowding can lead to steaming instead of browning.
- Crispy perfection: For extra crispiness, broil the chicken tenders for the last 1-2 minutes, watching carefully to prevent burning.
- Make ahead: You can prepare the peanut mixture and marinate the chicken tenders a day in advance. Store them separately in the refrigerator.
Serving & Storage Suggestions
These Peanut Crusted Chicken Tenders are delicious served with a variety of dipping sauces. Honey mustard, BBQ sauce, or a creamy ranch dressing are all excellent choices. They also pair well with sides like coleslaw, mashed potatoes, or a fresh salad.
Storage:
- Room Temperature: Do not leave the chicken tenders at room temperature for more than 2 hours.
- Refrigerator: Store leftover chicken tenders in an airtight container in the refrigerator for up to 3-4 days.
- Freezer: For longer storage, freeze the chicken tenders in a single layer on a baking sheet before transferring them to a freezer-safe bag or container. They can be frozen for up to 2 months.
Reheating:
- Oven: Preheat oven to 350°F (175°C) and reheat for 10-15 minutes, or until heated through.
- Air Fryer: Reheat in an air fryer at 350°F (175°C) for 5-7 minutes, or until heated through.
- Microwave: While not ideal for maintaining the crispness, you can reheat in the microwave in 30-second intervals until heated through.
Nutritional Information
| Nutrient | Amount per Serving | % Daily Value |
|---|---|---|
| Calories | 1007.9 kcal | N/A |
| Calories from Fat | 440 g | 44% |
| Total Fat | 49 g | 75% |
| Saturated Fat | 8.7 g | 43% |
| Cholesterol | 326 mg | 108% |
| Sodium | 914.4 mg | 38% |
| Total Carbohydrate | 51.6 g | 17% |
| Dietary Fiber | 7.7 g | 30% |
| Sugars | 9.8 g | 39% |
| Protein | 92.9 g | 185% |
Note: Nutritional information is an estimate and may vary based on specific ingredients and cooking methods.
Variations & Substitutions
- Gluten-Free: Use gluten-free breadcrumbs and a gluten-free flour blend to make this recipe gluten-free.
- Nut Allergy: Substitute the peanuts with crushed pretzels or sunflower seeds for a nut-free option.
- Spicy: Add a dash of cayenne pepper or hot sauce to the buttermilk marinade for a spicy kick.
- Herb Crusted: Mix dried herbs like thyme, rosemary, or oregano into the peanut mixture for an herbaceous twist.
- Air Fryer: For a healthier version, cook these tenders in an air fryer at 375°F (190°C) for 12-15 minutes, flipping halfway through.
- Different Nuts: Try using almonds, cashews, or macadamia nuts instead of peanuts for a unique flavor profile.
FAQs (Frequently Asked Questions)
Q: Can I use pre-ground peanuts instead of processing them myself?
A: While you can use pre-ground peanuts, grinding them yourself in a food processor allows for a coarser texture, resulting in a crispier crust.
Q: Can I marinate the chicken for longer than one day?
A: It’s best not to marinate the chicken for longer than 24 hours, as the buttermilk can start to break down the chicken fibers too much, resulting in a mushy texture.
Q: How do I prevent the peanut crust from falling off during baking?
A: Ensuring that you thoroughly coat the chicken in flour and egg before coating it in the peanut mixture helps the crust adhere better. Press the peanut mixture firmly onto the chicken.
Q: Can I freeze the peanut-crusted chicken tenders before baking?
A: Yes, you can freeze the tenders before baking. Place them on a baking sheet lined with parchment paper and freeze until solid. Then, transfer them to a freezer bag. Bake from frozen, adding a few extra minutes to the cooking time.
Q: How do I know when the chicken tenders are fully cooked?
A: The internal temperature of the chicken should reach 165°F (74°C). You can use a meat thermometer to check for doneness. The chicken should also be firm to the touch and the juices should run clear when pierced with a fork.
Final Thoughts
These Peanut Crusted Chicken Tenders are a guaranteed crowd-pleaser, offering a delightful combination of textures and flavors that will leave everyone wanting more. Don’t be afraid to experiment with different variations and dipping sauces to create your own signature version. Gather your ingredients, put on your apron, and get ready to experience the joy of creating this crunchy, comforting classic. I’d love to hear about your experience and any creative twists you add to the recipe, so please share your feedback! Consider pairing these tenders with a crisp, refreshing coleslaw and a side of sweet potato fries for a complete and satisfying meal.