
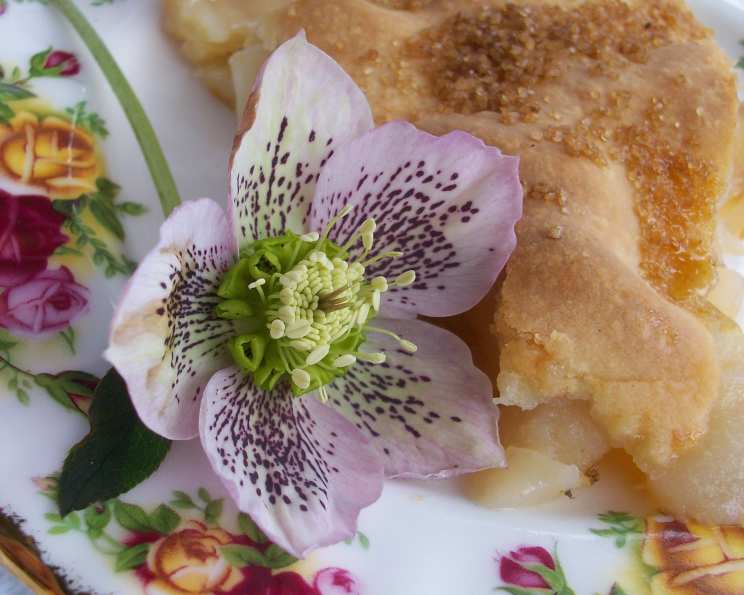
Pear Tarte: A Taste of Medieval Times
The first time I ever tasted a pear tarte like this, it wasn’t in a fancy restaurant or a quaint bakery, but at a historical reenactment fair. The air was thick with woodsmoke, the sounds of lute music drifted on the breeze, and the vendor, dressed in full medieval garb, presented me with a slice still warm from a makeshift brick oven. The subtly spiced pears, bathed in a rich, fragrant syrup, encased in a perfectly golden crust, transported me back centuries. It wasn’t just dessert; it was a tangible connection to the past, a culinary time capsule that ignited a passion for historical cuisine that continues to this day.
Recipe Overview
- Prep Time: 30 minutes
- Cook Time: 40 minutes
- Total Time: 1 hour 10 minutes
- Servings: 8
- Yield: 1 pie
- Dietary Type: Vegetarian
Ingredients
- 3 cups dry white wine
- 1 cup sugar (plus additional for topping)
- 1 cinnamon stick
- 4-5 whole cloves
- 3 lbs firm ripe pears (Bosc or Anjou work well)
- ¼ cup sugar
- 1 teaspoon rose water
- Double crust pie crust (enough for a 9-inch pie)
Topping
- 1 tablespoon butter
- ½ teaspoon rose water
- 1 tablespoon sugar
Equipment Needed
- Large heavy pot
- Pie pan (9-inch)
- Peeler
- Knife
- Measuring cups and spoons
- Pastry brush (optional)
Instructions
-
Preheat your oven to 400 degrees Fahrenheit (200 degrees Celsius). Make sure your oven rack is positioned in the center.
-
In a large, heavy pot, combine the white wine and 1 cup of sugar over medium heat.
-
Stir the mixture until the sugar is completely dissolved. This is crucial to prevent grainy syrup later on.
-
Add the cinnamon stick and whole cloves to the wine mixture. These spices infuse the pears with warmth and depth, essential to the medieval character of the dish.
-
Peel the pears. Halve them from top to bottom and carefully remove the core with a small spoon or paring knife. A melon baller can also work well for this.
-
Add the prepared pear halves to the simmering wine mixture. Cook for approximately 5-7 minutes, or until the pears are just tender. You want them cooked through, but not mushy.
-
Remove the pears from the wine syrup with a slotted spoon and set them aside to cool slightly.
-
Turn up the heat on the remaining wine syrup and bring it to a rolling boil. Let it reduce slightly, about 5-10 minutes, to concentrate the flavors and thicken it. Watch it carefully to prevent burning.
-
Gently place the bottom pie crust into your pie pan. Crimp the edges, if desired, or simply trim and press with a fork.
-
Arrange the sliced pears attractively in the pie crust. Overlap the slices slightly for a visually appealing presentation.
-
Sprinkle the pears evenly with ¼ cup of sugar.
-
Remove the cinnamon stick and cloves from the wine syrup. Stir in 1 teaspoon of rose water into the wine syrup and mix thoroughly.
-
Take approximately ⅓ cup of the wine syrup and pour it evenly over the pears. Reserve the remaining syrup.
-
Place the top pie crust on the pie, sealing the edges by folding the crust of the top crust over the edge of the bottom crust and pressing firmly to seal. Alternatively, you can crimp the edges for a decorative touch.
-
Cut a vent hole (or several small slits) into the center of the pie to allow steam to escape during baking. This prevents the crust from becoming soggy.
-
Place the pie on the center rack in the preheated oven and bake for 20 minutes.
-
Remove the pie from the oven.
-
In a small bowl, melt 1 tablespoon of butter and mix in ½ teaspoon of rose water. Brush this mixture evenly over the top crust of the pie. This gives the crust a beautiful golden color and adds another layer of flavor.
-
Sprinkle the brushed crust with 1 tablespoon of sugar. This will caramelize during baking, adding sweetness and a delightful crunch.
-
Return the pie to the oven and bake for another 20 minutes, or until the crust is golden brown and the filling is bubbling.
-
Remove the pie from the oven and let it cool completely on a wire rack before serving. This allows the filling to set properly.
Expert Tips & Tricks
-
Pear Selection: Choose firm, ripe pears that hold their shape well during cooking. Bosc and Anjou pears are excellent choices. Avoid pears that are overly soft or bruised.
-
Crust Perfection: For a perfectly flaky crust, use cold butter and ice water when preparing your pie dough. Handle the dough as little as possible to prevent the gluten from developing too much.
-
Syrup Consistency: If the wine syrup is too thin after reducing, you can thicken it with a cornstarch slurry (1 tablespoon cornstarch mixed with 2 tablespoons cold water). Add the slurry gradually while stirring, until the desired consistency is reached.
-
Preventing a Soggy Bottom Crust: To avoid a soggy bottom crust, you can blind bake the bottom crust for 10-15 minutes before adding the filling. This involves lining the crust with parchment paper and weighing it down with pie weights or dried beans.
-
Make-Ahead Tip: The pear filling can be prepared a day in advance and stored in the refrigerator. This allows the flavors to meld together and saves time on the day you plan to bake the pie.
Serving & Storage Suggestions
This pear tarte is best served warm, either on its own or with a dollop of freshly whipped cream or a scoop of vanilla ice cream. The remaining reduced wine syrup can be served alongside for drizzling.
Store any leftover pie in the refrigerator, covered, for up to 3 days. Reheat individual slices in the oven at 350°F (175°C) for 10-15 minutes, or until warmed through. You can also gently reheat it in the microwave.
The pie can be frozen for longer storage. Wrap it tightly in plastic wrap and then in aluminum foil. Freeze for up to 2 months. Thaw overnight in the refrigerator before reheating.
Nutritional Information
| Nutrient | Amount per Serving | % Daily Value |
|---|---|---|
| Calories | 350 kcal | 18% |
| Total Fat | 12g | 15% |
| Saturated Fat | 7g | 35% |
| Cholesterol | 30mg | 10% |
| Sodium | 150mg | 7% |
| Total Carbohydrate | 55g | 20% |
| Dietary Fiber | 4g | 16% |
| Sugars | 30g | – |
| Protein | 3g | 6% |
Note: Nutritional information is an estimate and may vary based on specific ingredients and preparation methods.
Variations & Substitutions
-
Gluten-Free Option: Use a gluten-free pie crust recipe or store-bought gluten-free crust.
-
Different Fruits: Substitute apples, quince, or peaches for the pears. Adjust the cooking time accordingly.
-
Spice Variations: Experiment with different spices such as ginger, nutmeg, or cardamom.
-
Nutty Crust: Add chopped walnuts or pecans to the pie crust dough for a nutty flavor and texture.
-
Boozy Boost: Add a tablespoon of brandy or Calvados to the pear filling for an extra layer of flavor.
FAQs (Frequently Asked Questions)
Q: Can I use canned pears?
A: While fresh pears are preferred, you can use canned pears in a pinch. Be sure to drain them well and reduce the amount of sugar in the recipe, as canned pears are already sweetened.
Q: My crust is browning too quickly. What can I do?
A: If the crust is browning too quickly, tent it with aluminum foil during the last 15-20 minutes of baking.
Q: Can I make this pie without rose water?
A: Yes, if you don’t have rose water, you can omit it. However, it does add a distinctive floral aroma and flavor that is characteristic of medieval cuisine. You could substitute a teaspoon of vanilla extract, if you like.
Q: The filling seems too runny. What did I do wrong?
A: A runny filling can be caused by several factors, including using overly ripe pears, not reducing the wine syrup enough, or not allowing the pie to cool completely before slicing. Be sure to use firm pears, reduce the syrup until it thickens, and allow the pie to cool thoroughly.
Q: Can I freeze the unbaked pie?
A: Yes, you can freeze the unbaked pie. Wrap it tightly in plastic wrap and then in aluminum foil. Freeze for up to 2 months. Bake directly from frozen, adding about 15-20 minutes to the baking time.
Final Thoughts
This Medieval Pear Tarte is more than just a dessert; it’s a journey through time, a celebration of flavors and traditions passed down through generations. I encourage you to try this recipe and experience the magic of medieval cuisine for yourself. Don’t be afraid to experiment with variations and substitutions to create your own unique twist on this classic dish. And most importantly, share your creation with friends and family and savor the joy of baking and the pleasure of good food. Bon appétit!