
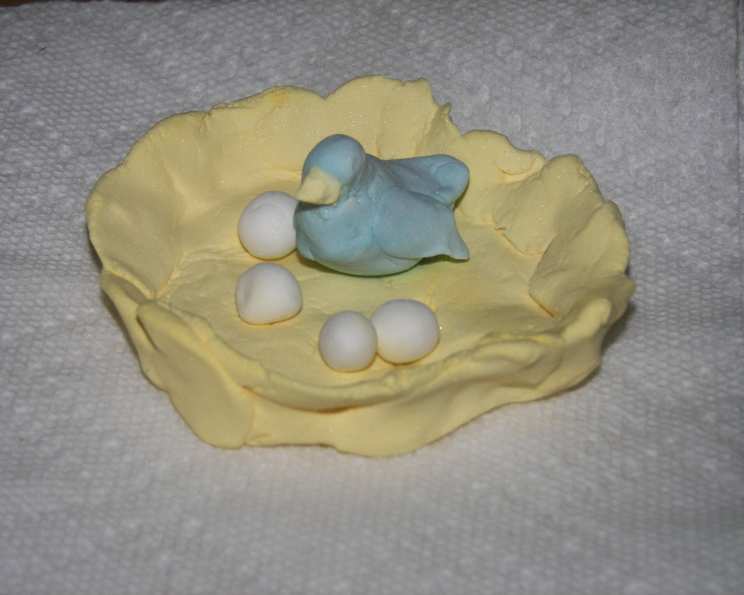
Pearly Soda Play Clay: A Chef’s Nostalgic Journey
The scent of this particular “recipe” takes me right back to my childhood. I remember rainy afternoons spent not in the kitchen whipping up a delectable dessert, but hunkered down at the kitchen table, the worn surface dusted with cornstarch, crafting misshapen animals and fantastical creatures from a batch of homemade play clay. The smooth, cool texture was endlessly fascinating, and the subtle shimmer always felt a touch magical. It wasn’t edible, but it certainly fed my imagination for hours.
Recipe Overview
- Prep Time: 5 minutes
- Cook Time: 5-10 minutes
- Total Time: 20 minutes (plus overnight drying)
- Yields: 1 batch
- Dietary Type: Not intended for consumption
Ingredients
- 1 cup baking soda
- ½ cup cornstarch
- ¾ cup water
- Food coloring (optional)
Equipment Needed
- Saucepan
- Spoon
- Floured breadboard or work surface
Instructions
- In a saucepan, thoroughly combine the baking soda and cornstarch. Ensure there are no lumps before adding the water.
- Pour the water into the saucepan and mix well with the baking soda and cornstarch mixture until everything is fully incorporated.
- Place the saucepan over low heat. Continuously stir the mixture for about 5 minutes. This prevents scorching and ensures even cooking.
- Continue cooking and stirring constantly for another 2-5 minutes. The mixture will start to thicken and transform into a consistency resembling mashed potatoes. Pay close attention during this stage as it can quickly become dry or lumpy if not stirred diligently.
- Remove the saucepan from the heat. Set it aside and allow the mixture to cool down completely. Cooling allows the clay to firm up, making it easier to handle and knead.
- Once cooled, transfer the mixture onto a floured breadboard or work surface. The cornstarch prevents the clay from sticking.
- Knead the clay, incorporating additional cornstarch as needed, until it achieves a smooth, workable consistency. The goal is to create a pliable clay that is not sticky or crumbly.
- If desired, knead in a few drops of food coloring to tint the clay. Add the color gradually until you achieve the desired shade. Remember that the color will appear more muted once the clay has dried.
- Now comes the fun part – unleash your creativity and craft your clay masterpieces! Roll out the clay and use cookie cutters to create shapes, or sculpt figurines and other designs.
- Allow your creations to dry overnight. As the clay dries, it will harden to a pearly, porcelain-like finish.
- Store any leftover clay in an airtight container in the refrigerator. It will stay good for a couple of days.
Expert Tips & Tricks
- For an even smoother clay, sift the baking soda and cornstarch before combining them in the saucepan. This will help prevent any lumps from forming during cooking.
- If the clay becomes too dry while you’re working with it, add a tiny amount of water and knead it in until the desired consistency is achieved. Be careful not to add too much water, as this can make the clay sticky.
- To add extra shimmer, mix in a pinch of cosmetic-grade glitter (make sure it is non-toxic!).
- Use a straw to poke a hole in the top of ornaments before drying, so you can easily hang them with string or ribbon later.
- If the clay cracks while drying, you can try patching it with a small amount of fresh clay. However, it’s best to avoid drafts and ensure the clay dries slowly and evenly to minimize cracking.
- Don’t let kids (or adults) put the clay in their mouth; although made with common food ingredients, it is not intended for consumption.
- Add a drop or two of essential oils when kneading for a subtle scent, like lavender, chamomile, or rose.
Serving & Storage Suggestions
While this clay isn’t for eating, the “serving” involves showcasing your finished creations! Once dry, these can be displayed on shelves, hung as ornaments, or given as heartfelt handmade gifts.
Store any unused clay in an airtight container in the refrigerator for up to two days. If it dries out, try adding a tiny bit of water and kneading it back to life. However, it’s best to use the clay as soon as possible to prevent it from drying out or becoming moldy.
Nutritional Information
| Nutrient | Amount per Serving | % Daily Value |
|---|---|---|
| Calories | Approximately 50 kcal | N/A |
| Total Fat | 0g | 0% |
| Saturated Fat | 0g | 0% |
| Cholesterol | 0mg | 0% |
| Sodium | 100mg | 4% |
| Total Carbohydrate | 12g | 4% |
| Dietary Fiber | 0g | 0% |
| Sugars | 0g | 0% |
| Protein | 0g | 0% |
Please note: Nutritional information is estimated and may vary. Since this clay is not intended for consumption, these values are for informational purposes only.
Variations & Substitutions
- Scented Clay: Add a few drops of essential oil, such as lavender or peppermint, during the kneading process.
- Textured Clay: Incorporate small amounts of sand, coffee grounds, or dried herbs for a unique tactile experience. Ensure these additions are well-mixed to avoid lumpiness.
- Edible Play Clay (for very young children under supervision): Replace the baking soda with powdered sugar. This makes a sweet, edible clay that’s safe (but still not encouraged) for tasting. Be aware that this version will not harden like the original.
FAQs (Frequently Asked Questions)
Q: How do I prevent the clay from cracking while drying?
A: Dry the clay slowly and evenly, away from drafts and direct sunlight. You can also try covering the creations with a damp cloth for the first few hours of drying to slow down the process.
Q: Can I bake the clay to speed up the drying process?
A: No, it’s not recommended to bake this clay. Baking can cause it to crack and become brittle. Air-drying is the best method for achieving a durable, pearly finish.
Q: Is this clay safe for children to play with?
A: Yes, this clay is made with non-toxic ingredients. However, it’s not intended for consumption, so supervise young children to ensure they don’t eat it.
Q: Can I paint the dried clay creations?
A: Absolutely! Once the clay is fully dry, you can paint it with acrylic paints, watercolors, or markers to add more detail and color.
Q: How long does the dried clay last?
A: If stored properly (away from moisture and direct sunlight), the dried clay creations can last for many years.
Final Thoughts
I truly hope you give this Pearly Soda Play Clay a try. It’s more than just a recipe; it’s a ticket to a world of creativity and tactile joy. Whether you’re a seasoned artist or just looking for a fun activity to do with your kids, this clay offers a unique and rewarding experience. So, gather your ingredients, dust off your imagination, and get ready to sculpt some memories! I would love to hear about your creations and any variations you might discover. Happy crafting!