
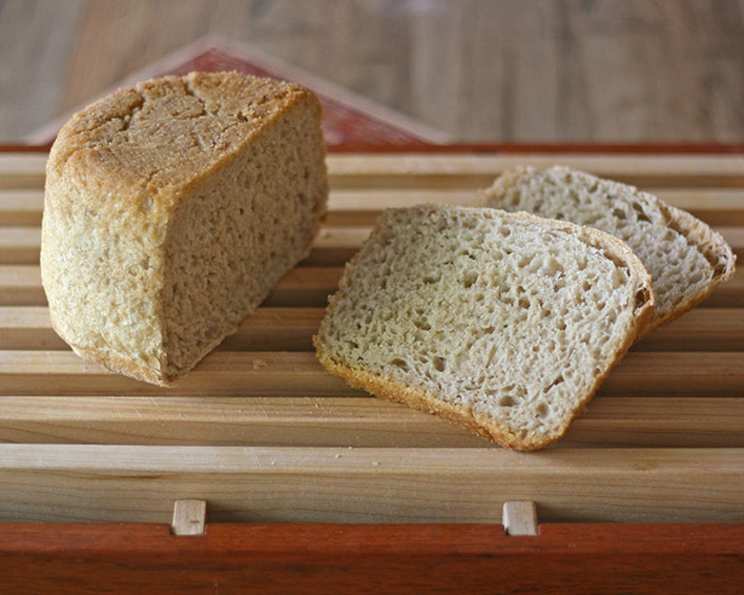
The Soul-Satisfying Simplicity of Peasant Bread
I can still remember the comforting aroma that filled my grandmother’s kitchen every Sunday morning. It was the unmistakable scent of freshly baked bread, a rustic loaf she affectionately called “Peasant Bread.” The crust was always perfectly golden, yielding to a soft, airy interior that begged to be slathered with butter. More than just food, it was a symbol of family, love, and the simple pleasures of life. This recipe is my attempt to recapture that magic and share it with you.
Recipe Overview
- Prep Time: 15 minutes
- Cook Time: 28-29 minutes
- Total Time: 1 hour 43-44 minutes + rising time (minimum 1 hour)
- Servings: Varies based on slicing
- Yield: 2 loaves
- Dietary Type: Vegetarian (easily made vegan by ensuring the butter is plant-based)
Ingredients
- 3 cups all-purpose flour
- 1 cup graham flour
- 2 teaspoons kosher salt
- 2 cups luke-warm water
- 1 tablespoon coconut sugar
- 2 teaspoons active dry yeast
- 2 tablespoons butter (at room temperature)
Equipment Needed
- Mixing bowl
- Large bowl for rising
- Standing mixer (optional, but recommended)
- Dough hook attachment (if using a mixer)
- 2 oven-safe bowls (approximately 6-8 inches in diameter)
- Towel or plastic wrap
- Cooling racks
Instructions
-
In a mixing bowl, thoroughly whisk together the all-purpose flour, graham flour, and kosher salt. Set this mixture aside.
-
Grease a separate large bowl with butter or olive oil (if you prefer a vegan version). This bowl will be used for the dough’s initial rise, so make sure it’s generously coated to prevent sticking.
-
In the bowl of a standing mixer, dissolve the coconut sugar into the luke-warm water. The water shouldn’t be too hot, or it will kill the yeast. Think bathwater temperature.
-
Sprinkle the active dry yeast over the sugary water. At this point, if you want to be absolutely sure your yeast is active, you can let the mixture stand for 10-15 minutes, or until it becomes foamy and/or bubbly. However, I typically skip this step and proceed directly.
-
Add the flour and salt mixture to the yeast and water.
-
Mix the ingredients. While the original recipe suggests stirring with a wooden spoon (which absolutely works), I prefer using my standing mixer fitted with the dough hook. Let it go for 4 or 5 minutes on medium speed. The dough will be on the wet side – don’t be alarmed. This is what gives the bread its wonderfully airy texture.
-
Transfer the wet dough to the prepared, greased bowl.
-
Cover the bowl with a clean kitchen towel or plastic wrap. Place the bowl in a warm spot to rise for at least an hour, or until the dough has roughly doubled in size. The rising time can vary depending on the temperature of your environment.
-
Don’t obsess over the precise timing. At my house, the dough usually takes 3 or 4 hours to double. The important thing is to let it rise until it has visibly increased in volume.
-
Grease two oven-safe bowls with about a tablespoon of butter each. These bowls will shape the loaves during baking.
-
Preheat your oven to 425ºF (220ºC).
-
Punch down the risen dough to release the accumulated gases. This step is important for preventing overly large air pockets in the finished bread.
-
Divide the dough into two equal parts.
-
One by one, place each half on a lightly floured countertop.
-
Quickly form each half into a ball and transfer them to your prepared, buttered bowls.
-
Traditionally, the recipe calls for letting the dough rise again in the bowls until doubled in size. While this method certainly works, I’ve found that putting the dough in the refrigerator overnight for its second rise yields even better results. The long, slow fermentation in a cool environment develops a deeper, more complex flavor.
-
Regardless of whether you choose a second room-temperature rise or an overnight refrigerated rise, ensure the dough has risen substantially before baking.
-
Preheat the oven to 425ºF (220ºC) if you refrigerated the dough overnight.
-
Bake the loaves for 10 minutes at 425ºF (220ºC).
-
Reduce the oven temperature to 375ºF (190ºC) and bake for an additional 18-19 minutes.
-
Remove the bowls from the oven and let the loaves sit in the bowls for 5-10 minutes before carefully turning them out onto cooling racks.
-
If the bowls were greased well, the loaves should easily release onto the racks.
-
The original recipe’s baking time is just a suggestion, because everyone’s oven is different. I tend to cook the loaves for a shorter time because we prefer them pale and soft.
-
If you prefer a darker, crustier loaf, you can place the loaves back into the oven (without the bowls) and bake for about 5 minutes longer, keeping a close eye to avoid burning.
-
Remove from the oven and let cool for at least 10 minutes before slicing and serving.
Expert Tips & Tricks
- For a tangier flavor: Use a portion of sourdough starter in place of some of the yeast. You’ll need to adjust the water and flour amounts accordingly.
- Get ahead: The dough can be prepared a day in advance and stored in the refrigerator for a slow, flavorful rise. Just punch it down before shaping and baking.
- Ensure even baking: Rotate the loaves halfway through the baking time to ensure even browning.
- Crispy crust: For an extra-crispy crust, brush the loaves with a mixture of water and cornstarch before baking.
- Flavor boost: Add herbs like rosemary, thyme, or oregano to the dough for a savory twist. You can also add roasted garlic or grated cheese.
- Dough too wet? Don’t panic! Resist the urge to add more flour during the initial mixing. The wet dough is key to the bread’s airy texture. However, if the dough is unmanageable, add flour 1 tablespoon at a time, kneading until it comes together.
- Troubleshooting: If the bread is browning too quickly, tent it with foil during the last few minutes of baking. If the bread is not browning enough, increase the oven temperature slightly for the last few minutes.
Serving & Storage Suggestions
This Peasant Bread is best served warm, straight from the oven. It’s delicious with a simple pat of butter, a drizzle of olive oil, or a generous dollop of your favorite jam. It also makes fantastic sandwiches, toast, or croutons.
Store leftover bread in an airtight container at room temperature for up to 3 days. For longer storage, freeze the bread in a freezer-safe bag for up to 2 months. To reheat frozen bread, thaw it completely and then warm it in a 350°F (175°C) oven for 5-10 minutes, or until heated through.
Nutritional Information
Note: Nutritional information is an estimate and may vary based on specific ingredients and portion sizes.
| Nutrient | Amount per Serving | % Daily Value |
|---|---|---|
| Calories | 161 kcal | N/A |
| Fat | 2.5g | 3% |
| Saturated Fat | 1.3g | 6% |
| Cholesterol | 5.1mg | 1% |
| Sodium | 406.8mg | 16% |
| Carbohydrates | 30.1g | 10% |
| Fiber | 1.9g | 7% |
| Sugar | 0.1g | 0% |
| Protein | 4.6g | 9% |
Variations & Substitutions
- Vegan Peasant Bread: Substitute the butter with a plant-based butter alternative.
- Whole Wheat Peasant Bread: Replace up to half of the all-purpose flour with whole wheat flour for a nuttier flavor and increased fiber.
- Gluten-Free Peasant Bread: This recipe would require significant alterations to become gluten-free. You’d need a gluten-free flour blend and possibly xanthan gum to mimic the texture of gluten. Experimentation would be needed!
- Seeded Peasant Bread: Sprinkle the loaves with sesame seeds, poppy seeds, or sunflower seeds before baking for added crunch and flavor.
- Herb & Garlic Peasant Bread: Add minced garlic and your favorite herbs (such as rosemary, thyme, or oregano) to the dough before the first rise.
FAQs (Frequently Asked Questions)
Q: Why is my dough so sticky?
A: This recipe is designed to produce a wet dough, which contributes to its airy texture. Avoid adding excessive flour, as it can result in a dense loaf.
Q: Can I use instant yeast instead of active dry yeast?
A: Yes, you can. Simply add the instant yeast directly to the flour mixture instead of dissolving it in water first.
Q: My bread is browning too quickly. What should I do?
A: Tent the loaves with foil during the last few minutes of baking to prevent them from browning too much.
Q: How do I know when the bread is done?
A: The bread is done when it is golden brown and sounds hollow when tapped on the bottom. An internal temperature of 200-210°F (93-99°C) is ideal.
Q: Can I freeze the dough instead of baking it right away?
A: Yes, you can freeze the dough after the first rise. Punch it down, shape it into loaves, and wrap them tightly in plastic wrap before freezing. Thaw the dough overnight in the refrigerator before baking.
Final Thoughts
This Peasant Bread recipe is more than just a set of instructions; it’s an invitation to slow down, embrace simplicity, and create something truly special. The aroma alone will transport you to a cozy kitchen filled with love and warmth. I encourage you to try this recipe and experience the satisfaction of baking your own bread. Don’t be afraid to experiment with different flours, herbs, or seeds to make it your own. And most importantly, share your creations with friends and family and let the simple joy of homemade bread bring you all closer together. Bon appétit!