
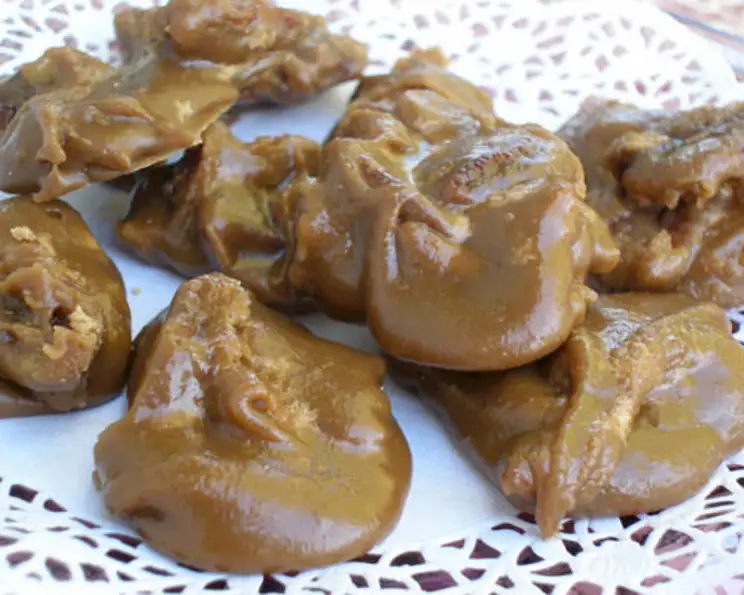
Southern Comfort: Mastering the Art of Pecan Pralines
The memory is etched in my mind: a bustling kitchen, the sweet, intoxicating aroma of caramel filling the air, and my grandmother, her hands moving with practiced grace, coaxing a bubbling pot of sugar and cream into golden-brown perfection. These weren’t just pralines; they were edible hugs, imbued with love and tradition, a taste of the South that instantly transported you home. Every Christmas, Easter, and Thanksgiving, a batch of these creamy, nutty delights would appear, and disappear just as quickly. Today, I’m thrilled to share the secrets to making these beloved Southern treats.
Recipe Overview
- Prep Time: 10 minutes
- Cook Time: 20 minutes
- Total Time: 30 minutes
- Servings: Approximately 18 pralines
- Yield: About 1 1/2 pounds
- Dietary Type: Not specified
Ingredients
- 2 cups sugar
- 1 cup brown sugar, lightly packed
- 1 cup evaporated milk
- 5 tablespoons vanilla
- 1 cup pecans
Equipment Needed
- Heavy-bottomed saucepan
- Candy thermometer
- Wooden spoon or heat-resistant spatula
- Wax paper or parchment paper
Instructions
-
In a heavy-bottomed saucepan, combine the sugar, brown sugar, and evaporated milk.
-
Place the saucepan over medium heat and cook, stirring constantly, until the sugars are completely dissolved. Use the wooden spoon or heat-resistant spatula to ensure no sugar crystals are sticking to the bottom of the pan.
-
Continue cooking, stirring occasionally, until the mixture reaches 240°F (115°C) on a candy thermometer. This is the “soft-ball” stage, crucial for achieving the right texture.
-
Once the mixture reaches 240°F, remove the saucepan from the heat.
-
Add the vanilla and pecans to the hot sugar mixture.
-
Now comes the arm workout! Using the wooden spoon or spatula, beat the mixture vigorously until it starts to thicken and loses some of its glossy sheen. This process can take a while – anywhere from 5 to 10 minutes. You’ll notice the mixture becoming less runny and more like a thick paste. Be patient! This step is essential for creating the creamy, melt-in-your-mouth texture.
-
Working quickly, drop the mixture by large spoonfuls onto wax paper or parchment paper. Try to create circular shapes for a classic praline appearance.
-
Allow the pralines to cool completely and set up on the wax paper. This usually takes about 30 minutes to an hour.
-
Once the pralines are firm, peel them off the wax paper and they are ready to enjoy or store.
Expert Tips & Tricks
- The Right Pan is Key: Using a heavy-bottomed saucepan is essential to prevent the sugar from scorching and ensure even heat distribution. A thin pan can lead to burnt sugar and ruined pralines.
- Master the Candy Thermometer: A reliable candy thermometer is your best friend. Ensure it’s calibrated correctly for accurate temperature readings. Clip it securely to the side of the pan, making sure the bulb isn’t touching the bottom.
- Don’t Rush the Beating: The beating step is critical for achieving the desired texture. If you stop too early, the pralines will be too runny. If you beat for too long, they’ll become grainy. Look for that sweet spot where the mixture thickens and loses its shine.
- Customize Your Nuts: While pecans are traditional, feel free to experiment with other nuts like walnuts, almonds, or even a mix. Just make sure they’re toasted for added flavor.
- Dealing with Graininess: If your pralines turn out grainy, it’s usually due to sugar crystals forming during the cooking process. A common trick is to add a small amount of cream of tartar (about 1/8 teaspoon) to the mixture at the beginning to prevent crystallization.
- High Altitude Adjustments: If you live at a high altitude, you may need to adjust the cooking temperature. Water boils at a lower temperature at higher altitudes, so the candy will cook faster. Reduce the target temperature by 2 degrees Fahrenheit for every 1,000 feet above sea level.
- Flavor Infusion: For an extra layer of flavor, consider adding a dash of bourbon or rum to the mixture along with the vanilla. A pinch of sea salt can also enhance the sweetness.
Serving & Storage Suggestions
Pecan pralines are delightful on their own as a sweet treat, but they also pair beautifully with coffee, tea, or even a glass of bourbon. For a more decadent dessert, crumble them over ice cream or use them as a topping for cheesecakes.
To store, wrap each praline individually in plastic wrap or place them in an airtight container. They will keep at room temperature for about a week, in the refrigerator for up to two weeks, or in the freezer for up to two months. If freezing, thaw them at room temperature before serving. They may become slightly sticky after thawing, but the flavor will remain intact.
Nutritional Information
Note: Nutritional information is an estimate and may vary based on specific ingredients and portion sizes.
| Nutrient | Amount per Serving | % Daily Value |
|---|---|---|
| Calories | 203 kcal | N/A |
| Total Fat | 5.4 g | 8% |
| Saturated Fat | 1 g | 5% |
| Cholesterol | 4.1 mg | 1% |
| Sodium | 19.9 mg | 0% |
| Total Carbohydrate | 36.8 g | 12% |
| Dietary Fiber | 0.6 g | 2% |
| Sugars | 34.7 g | N/A |
| Protein | 1.5 g | 3% |
Variations & Substitutions
- Spiced Pralines: Add a pinch of cinnamon, nutmeg, or cloves to the mixture for a warm, festive twist.
- Chocolate Pralines: Drizzle melted dark or milk chocolate over the cooled pralines for an extra layer of indulgence.
- Maple Pralines: Substitute some of the granulated sugar with maple syrup for a richer, more complex flavor.
- Salted Caramel Pralines: Sprinkle a generous amount of sea salt over the pralines as they cool for a delicious salty-sweet contrast.
- Vegan Pralines: Unfortunately, this recipe relies heavily on dairy and sugar, making a truly successful vegan substitution difficult without significantly altering the final product and texture. Consider searching specifically for vegan praline recipes for more reliable results.
FAQs (Frequently Asked Questions)
Q: Why are my pralines grainy?
A: Graininess is usually caused by sugar crystals forming during the cooking process. Ensure all the sugar is completely dissolved at the beginning, and consider adding a small amount of cream of tartar to prevent crystallization.
Q: How do I know when the pralines are ready to be dropped onto the wax paper?
A: The mixture should be thick and have lost some of its glossy sheen. It should mound slightly when you lift it with a spoon. If it’s still too runny, continue beating for a few more minutes.
Q: Can I use a stand mixer instead of beating by hand?
A: While a stand mixer can be used, it’s important to monitor the mixture closely to prevent over-beating. Use the paddle attachment and start on low speed, gradually increasing to medium.
Q: My pralines are too hard. What did I do wrong?
A: You likely cooked the mixture to too high of a temperature. Make sure your candy thermometer is accurate and aim for 240°F (115°C).
Q: Can I add other ingredients besides pecans?
A: Absolutely! Feel free to experiment with other nuts, dried fruits, or even spices. Just be sure to adjust the quantities accordingly.
Final Thoughts
Now it’s your turn to create some edible memories. This pecan praline recipe is more than just a set of instructions; it’s a journey back to a simpler time, a celebration of Southern hospitality, and a delicious way to share love with those you cherish. Don’t be intimidated by the candy thermometer or the arm workout – with a little patience and practice, you’ll be whipping up batches of these creamy, nutty delights in no time. I encourage you to try it, put your own spin on it, and most importantly, share your creations with the world. And if you’re feeling adventurous, pair these pralines with a scoop of vanilla bean ice cream and a drizzle of caramel sauce for an unforgettable dessert experience. Happy cooking!