
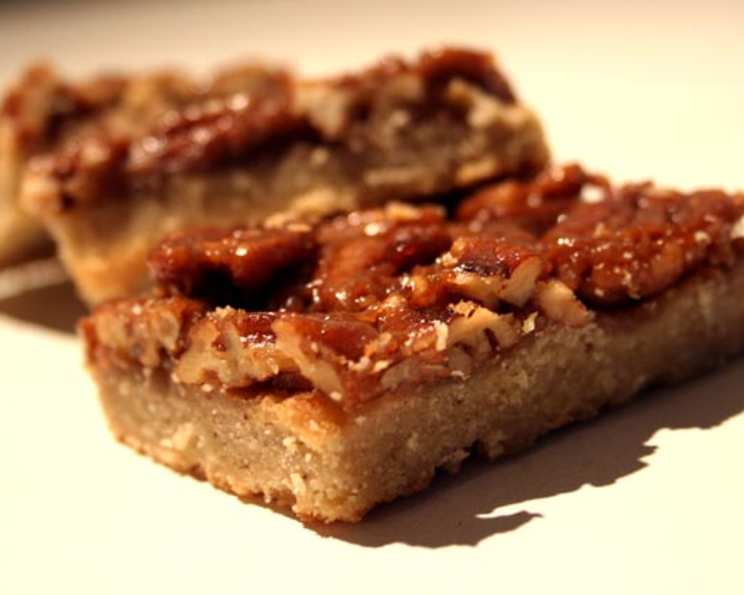
Delectable Pecan Squares: A Slice of Southern Comfort
My grandmother, bless her heart, wasn’t much for fancy desserts. But her pecan squares? Those were legendary. I remember countless afternoons spent perched on a stool in her sun-drenched kitchen, mesmerized as she transformed simple ingredients into these golden, nutty delights. The aroma alone – a heady mix of toasted pecans, butter, and vanilla – was enough to make my mouth water. Each bite was a sweet, crunchy, and utterly comforting taste of home. These squares weren’t just dessert; they were love baked into a pan.
Recipe Overview
- Prep Time: 20 minutes
- Cook Time: 45 minutes
- Total Time: 1 hour 5 minutes
- Yields: About 70 Squares
- Dietary Type: Vegetarian
Ingredients
For Crust:
- 3 cups all-purpose flour
- 6 tablespoons sugar
- ¾ cup butter, softened
- ¾ teaspoon salt
For Filling:
- 4 eggs, slightly beaten
- 1 ½ cups sugar
- 1 ½ cups light corn syrup or 1 ½ cups dark corn syrup
- 3 tablespoons butter, melted
- 1 ½ teaspoons vanilla
- 2 ½ cups chopped pecans
Equipment Needed
- Jelly roll pan
- Large bowl
- Electric mixer
- Measuring cups and spoons
- Rubber spatula
Instructions
-
Preheat your oven to 350°F (175°C). It’s crucial to ensure your oven is properly preheated for even baking.
-
Grease a jelly roll pan thoroughly. This will prevent the crust from sticking and make it easier to remove the pecan squares after baking.
-
Prepare the Crust: In a large bowl, combine the flour, sugar, butter, and salt.
-
Using an electric mixer on medium speed, beat the ingredients until the mixture becomes crumbly. The texture should resemble coarse sand. Don’t overmix; you want the butter to remain in small pieces for a tender crust.
-
Press the crumbly mixture firmly and evenly into the prepared jelly roll pan. This will form the base of your pecan squares.
-
Bake the crust in the preheated oven for approximately 20 minutes, or until it turns a light golden brown. Keep a close eye on it, as oven temperatures can vary. A slightly underbaked crust is better than an overbaked one at this stage.
-
While the crust is baking, prepare the filling.
-
For the Filling: In a separate bowl, combine the slightly beaten eggs, sugar, corn syrup (light or dark, depending on your preference for molasses flavor), melted butter, and vanilla. Mix all ingredients until they are well blended and the mixture is smooth.
-
Stir in the chopped pecans until they are evenly distributed throughout the filling.
-
Once the crust is baked, remove it from the oven. Pour the pecan filling evenly over the baked crust, spreading it out with a spatula to ensure it reaches all corners of the pan.
-
Return the pan to the oven and bake for another 25 minutes, or until the filling is set. To test for doneness, gently shake the pan; the filling should not jiggle excessively. It should have a slightly firm, golden-brown appearance.
-
Remove the baked pecan squares from the oven and let them cool completely in the pan. This allows the filling to set properly, making them easier to cut.
-
Once cooled, cut the pecan squares into 1 ½-inch squares. A sharp knife is recommended for clean cuts.
-
The recipe yields approximately 70 squares, perfect for sharing (or not!).
Expert Tips & Tricks
- Toast Your Pecans: For an even deeper, more pronounced pecan flavor, lightly toast the chopped pecans in a dry skillet over medium heat for a few minutes before adding them to the filling. Watch them closely to prevent burning.
- Don’t Overbake: Overbaking the pecan squares will result in a hard, brittle filling. Keep a close eye on them during the last few minutes of baking.
- Use a Parchment Paper Sling: For easy removal, line the jelly roll pan with parchment paper, leaving an overhang on the sides. After baking and cooling, lift the squares out of the pan using the parchment paper “sling.”
- Salted Butter: Using salted butter in the crust and filling can enhance the sweet and nutty flavors. If you only have unsalted butter, add a pinch of salt to the filling mixture.
- Room Temperature Ingredients: Using softened butter and slightly beaten eggs ensures that the crust and filling mix together evenly.
Serving & Storage Suggestions
Serve these delectable pecan squares at room temperature for optimal flavor and texture. They are a wonderful addition to any dessert platter, perfect with a cup of coffee or tea, or even as a sweet treat alongside a scoop of vanilla ice cream.
For storage, place the cooled pecan squares in an airtight container. They will keep at room temperature for up to 3 days, in the refrigerator for up to a week, or in the freezer for up to a month. To freeze, wrap the squares individually in plastic wrap before placing them in a freezer-safe container. Thaw at room temperature before serving.
Nutritional Information
| Nutrient | Amount per Serving | % Daily Value |
|---|---|---|
| Calories | 114.1 kcal | N/A |
| Calories from Fat | 50 g | 44% |
| Total Fat | 5.6 g | 8% |
| Saturated Fat | 1.9 g | 9% |
| Cholesterol | 18.6 mg | 6% |
| Sodium | 51.1 mg | 2% |
| Total Carbohydrate | 15.6 g | 5% |
| Dietary Fiber | 0.5 g | 2% |
| Sugars | 7.5 g | 30% |
| Protein | 1.3 g | 2% |
Variations & Substitutions
- Gluten-Free: Substitute the all-purpose flour with a gluten-free all-purpose blend. You may need to add a little extra liquid (such as water or milk) to the crust mixture to achieve the right consistency.
- Different Nuts: While pecans are the classic choice, you can experiment with other nuts like walnuts, almonds, or even a mix of different nuts.
- Maple Syrup: For a richer, more complex flavor, try substituting half of the corn syrup with pure maple syrup.
- Chocolate Chips: Add a handful of chocolate chips to the filling for a chocolate-pecan twist.
- Bourbon or Rum: A tablespoon or two of bourbon or dark rum added to the filling can enhance the flavor profile and add a touch of sophistication.
FAQs (Frequently Asked Questions)
Q: Can I use a different size pan?
A: Yes, you can use a 9×13 inch pan, but the squares will be thicker and may require a slightly longer baking time.
Q: Can I make the crust ahead of time?
A: Absolutely! You can prepare the crust, press it into the pan, and store it in the refrigerator for up to 2 days before baking.
Q: My filling is too runny. What did I do wrong?
A: Make sure you’re using the correct amount of eggs and corn syrup. Also, be sure to bake the squares until the filling is set and no longer jiggly.
Q: How do I prevent the pecans from sinking to the bottom?
A: Ensure the filling is thick enough to suspend the pecans. Using slightly beaten eggs and properly mixing the filling ingredients will help achieve the right consistency.
Q: Can I freeze these pecan squares?
A: Yes, these squares freeze well. Wrap them individually in plastic wrap and store them in a freezer-safe container for up to a month.
Final Thoughts
These pecan squares are more than just a dessert; they’re a slice of Southern tradition, a testament to the power of simple ingredients, and a reminder of cherished memories. I urge you to gather your ingredients, preheat your oven, and create your own batch of these golden delights. Whether you’re sharing them with loved ones or savoring them on your own, I hope these pecan squares bring you as much joy as they have brought me over the years. And please, let me know how they turn out! I’d love to hear your own personal twists and adaptations. Maybe pair them with a scoop of vanilla ice cream or a glass of sweet tea for the ultimate Southern experience. Happy baking!