
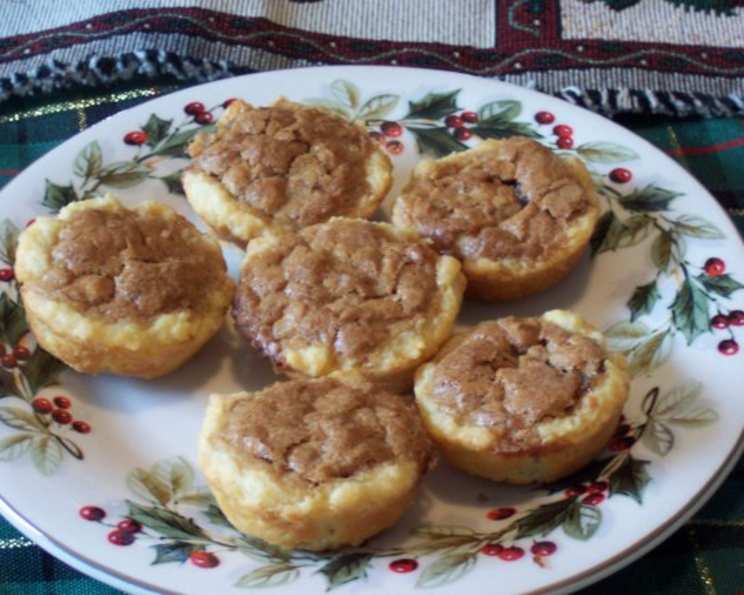
Pecan Tassies: Tiny Bites of Southern Comfort
The memory is etched in my mind: the annual Christmas cookie exchange at my grandmother’s house. The table groaned under the weight of gingerbread men, sugar cookies adorned with colorful sprinkles, and fudge so rich it practically melted on your tongue. But nestled among the more flamboyant treats were these unassuming little gems – Pecan Tassies. My grandmother, a true Southern belle, always made them. Their buttery, crumbly crust and intensely nutty, sweet filling were, to me, the epitome of holiday indulgence. Even now, the aroma of baking pecans instantly transports me back to that cozy, laughter-filled room, surrounded by family and the comforting scent of love and tradition.
Recipe Overview
- Prep Time: 30 minutes
- Cook Time: 15-18 minutes
- Total Time: 45-48 minutes
- Yields: 60-72 tassies
- Servings: 60-72
- Dietary Type: Vegetarian
Ingredients
For the Crust:
- 2 cups butter or margarine, softened
- 8 ounces (2 packages) cream cheese, softened
- 4 cups all-purpose flour
For the Filling:
- 3 large eggs
- 2 ½ cups packed light brown sugar
- 3 tablespoons butter, melted
- ½ teaspoon vanilla extract
- 1 pinch salt
- 1 ½ cups chopped pecans (or substitute with chopped dried cranberries or mini chocolate chips)
Equipment Needed
- Mixing bowls (medium and large)
- Electric mixer
- Plastic wrap
- Tart pans or mini muffin tins
- Measuring cups and spoons
- Spoon
Instructions
-
Preheat your oven to 375°F (190°C). Make sure your oven rack is positioned in the center.
-
In a medium mixing bowl, cream together the softened butter (or margarine) and softened cream cheese using an electric mixer until light and fluffy. This step is crucial for achieving a tender crust.
-
Gradually add the flour, one cup at a time, to the butter and cream cheese mixture. Beat until a smooth dough forms. Be careful not to overmix, as this can result in a tough crust.
-
Wrap the dough in plastic wrap and chill in the refrigerator for at least 30 minutes. This allows the gluten to relax, making the dough easier to work with. Longer chilling times are fine; you can even make the dough a day ahead.
-
While the dough is chilling, prepare the filling. In another bowl, whisk together the eggs, brown sugar, melted butter, vanilla extract, and salt until well combined.
-
Stir in the chopped pecans (or your preferred additions, such as dried cranberries or mini chocolate chips). Ensure the pecans are evenly distributed throughout the filling.
-
Remove the chilled dough from the refrigerator. Lightly grease your tart pans or mini muffin tins.
-
Roll the dough into small balls, about 1 inch in diameter.
-
Press each ball of dough into the bottom and up the sides of the prepared tart pans or mini muffin tins, making sure to bring the dough slightly over the lip of each cup. You can use your fingers or a small tart tamper to create a neat, even crust.
-
Using a spoon, carefully fill each crust with the pecan filling, about two-thirds full. Be cautious not to overfill, as the filling will puff up during baking and may overflow.
-
Bake in the preheated oven for 15-18 minutes, or until the crust is lightly browned and the filling has puffed up and is set. The edges of the filling should be slightly golden.
-
Remove the tassies from the oven and let them cool completely in the pans before carefully removing them. Cooling allows the filling to set properly, making them easier to handle.
Expert Tips & Tricks
- Softened Butter is Key: Make sure your butter and cream cheese are truly softened to room temperature. This ensures a smooth and creamy dough, which translates to a tender crust.
- Chilling is Crucial: Don’t skip the chilling step! Chilling the dough prevents it from shrinking during baking and makes it easier to handle.
- Prevent Overflow: Be mindful not to overfill the tassies. The filling will expand as it bakes, and you don’t want a sticky mess in your oven.
- Even Baking: To ensure even baking, rotate the pans halfway through the baking time.
- Nut Toasted Flavor: Briefly toast the pecans before chopping and adding to the filling for a deeper, more robust nutty flavor.
- Make-Ahead Tip: Prepare the dough and pecan filling separately, store in the refrigerator, and assemble/bake the tassies when ready. This is a perfect way to manage time during busy holidays.
- If you find the filling is browning too quickly, you can gently tent the tassies with foil during the last few minutes of baking.
Serving & Storage Suggestions
Pecan Tassies are best served at room temperature. Arrange them artfully on a platter for a beautiful presentation. They pair perfectly with a cup of hot coffee, tea, or a glass of milk.
To store leftover tassies, place them in an airtight container at room temperature for up to 3 days, in the refrigerator for up to a week, or in the freezer for up to a month. To reheat frozen tassies, thaw them at room temperature and then warm them gently in a low oven (around 300°F/150°C) for a few minutes until heated through.
Nutritional Information
| Nutrient | Amount per Serving | % Daily Value |
|---|---|---|
| Calories | 166 kcal | N/A |
| Total Fat | 11g | 16% |
| Saturated Fat | 6g | 28% |
| Cholesterol | 33mg | 11% |
| Sodium | 86mg | 3% |
| Total Carbohydrate | 16g | 5% |
| Dietary Fiber | 1g | 1% |
| Sugars | 9g | N/A |
| Protein | 2g | 3% |
Note: Nutritional information is an estimate and may vary based on specific ingredients and portion sizes.
Variations & Substitutions
- Gluten-Free: Substitute the all-purpose flour with a gluten-free blend. You may need to add a binder like xanthan gum.
- Different Nuts: Experiment with other nuts, such as walnuts or almonds, in place of pecans.
- Maple Syrup: Replace some of the brown sugar with maple syrup for a richer, more complex flavor.
- Citrus Zest: Add a touch of orange or lemon zest to the filling for a bright, refreshing twist.
- Bourbon: A tablespoon of bourbon added to the filling elevates the dessert’s warmth and sweetness.
- Chocolate Pecan Tassies: Add 1/2 cup of mini chocolate chips to the pecan filling.
FAQs (Frequently Asked Questions)
Q: Why is my crust tough?
A: Overmixing the dough can lead to a tough crust. Be careful not to overwork the dough after adding the flour. Also, ensure your butter and cream cheese are adequately softened before mixing.
Q: Can I make the dough ahead of time?
A: Absolutely! The dough can be made up to 2 days in advance and stored in the refrigerator, tightly wrapped in plastic wrap.
Q: What if my filling overflows?
A: Be careful not to overfill the tart shells. Two-thirds full is usually sufficient. If you experience overflow, reduce the amount of filling slightly in future batches.
Q: How do I prevent the crust from sticking to the pan?
A: Grease the tart pans or mini muffin tins thoroughly before pressing in the dough. You can also lightly flour the pans for extra insurance.
Q: Can I freeze these tassies?
A: Yes, Pecan Tassies freeze very well. Allow them to cool completely, then place them in an airtight container and freeze for up to a month. Thaw at room temperature before serving.
Final Thoughts
Pecan Tassies are more than just a dessert; they are a symbol of warmth, tradition, and the simple pleasures of life. Don’t be intimidated by the recipe; these tiny pecan pies are surprisingly easy to make and incredibly rewarding to share. I encourage you to try this recipe and create your own memories with these delightful treats. I’d love to hear about your experience – share your photos and any variations you try! Pair them with a scoop of vanilla ice cream or a dollop of whipped cream for an extra touch of indulgence. Happy baking!