
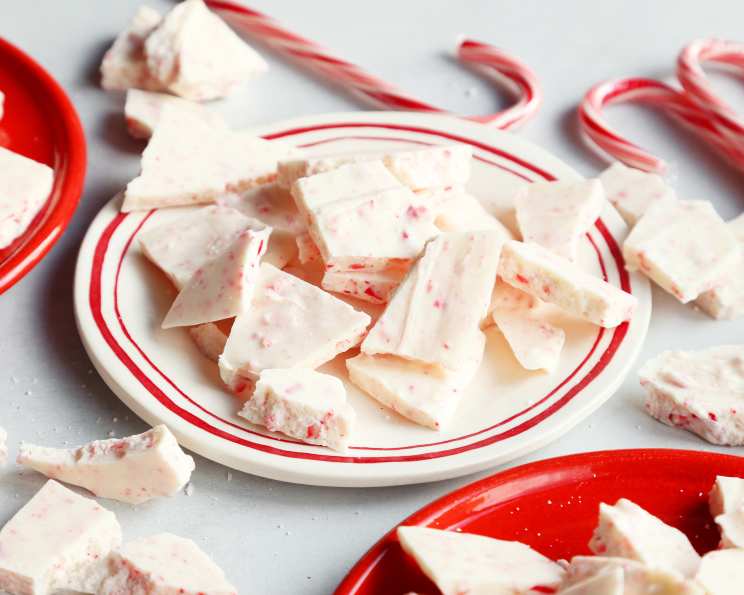
Peppermint Candy Cane Bark: A Holiday Tradition
The scent of peppermint always takes me back to my childhood Christmases. I remember helping my grandmother unwrap the red and white striped candy canes, carefully extracting them from their cellophane wrappers. The anticipation of that first sweet, minty taste, followed by the satisfying crunch as the candy shattered in my mouth… those are memories I cherish. This Peppermint Candy Cane Bark captures that same magic, transforming simple ingredients into a festive treat that’s perfect for sharing – or secretly enjoying all by yourself!
Recipe Overview
- Prep Time: 15 minutes
- Cook Time: 5 minutes
- Total Time: 20 minutes
- Servings: Varies
- Yield: 1 (11×17 inch) baking sheet
- Dietary Type: Vegetarian
Ingredients
- 2 lbs white chocolate (preferably Guittard brand white chocolate chips – they seem to melt smoother)
- 12 candy canes, crushed into 1/4 inch pieces
- 1 teaspoon peppermint extract (1/2 tsp. if using oil)
Equipment Needed
- Double boiler or large heat-safe bowl and saucepan
- 11×17 inch baking pan
- Wax paper
- Rolling pin or meat mallet (for crushing candy canes)
- Spatula or offset spatula
Instructions
-
Prepare the Candy Canes: Unwrap all 12 candy canes. Place them in a large zip-top bag. Using a rolling pin or meat mallet, crush the candy canes into pieces approximately 1/4 inch in size. Don’t pulverize them into dust; you want some nice, chunky bits for visual appeal and texture. Set aside.
-
Melt the White Chocolate: This is the most critical step. Gently melt the white chocolate using a double boiler or a bowl set over a pot of simmering (not boiling!) water. Ensure the bottom of the bowl doesn’t touch the water. Stir the chocolate frequently to prevent scorching. If you are using a microwave, melt in 30-second intervals, stirring in between each interval, until smooth. White chocolate is notorious for seizing if overheated, so be patient and use low heat.
-
Flavor and Combine: Once the white chocolate is completely melted and smooth, remove it from the heat. Immediately stir in the crushed candy canes and the peppermint extract. If you’re using peppermint oil instead of extract, use only 1/2 teaspoon, as it’s much more potent. Stir until the candy canes are evenly distributed throughout the melted chocolate.
-
Prepare the Baking Pan: Line an 11×17 inch baking pan with wax paper. Make sure the wax paper extends slightly over the edges of the pan for easy removal later.
-
Spread the Chocolate Mixture: Pour the white chocolate and candy cane mixture onto the prepared baking pan. Use a spatula or offset spatula to spread the mixture evenly into a thin layer. Aim for a uniform thickness for consistent cooling and breaking.
-
Chill Until Firm: Place the baking pan in the refrigerator. Chill for at least 30 minutes, or until the chocolate is completely firm and set. The chilling time may vary depending on the thickness of your bark and the temperature of your refrigerator. You can also place it in the freezer for a quicker set, but be careful not to freeze it solid.
-
Break into Pieces: Once the chocolate is firm, remove the bark from the refrigerator. Gently lift the wax paper with the bark out of the baking pan. Place the bark on a cutting board and carefully break it into irregular pieces. You can use a sharp knife to score the bark before chilling for more uniform pieces, but the rustic, broken look is part of its charm.
-
Refrigerate and Serve: Store the Peppermint Candy Cane Bark in the refrigerator until ready to serve. This helps keep the chocolate from melting, especially if you live in a warmer climate.
Expert Tips & Tricks
-
Chocolate Quality Matters: Using high-quality white chocolate, like Guittard, makes a huge difference in the flavor and texture of the bark. Cheaper white chocolate can sometimes be waxy and difficult to melt smoothly.
-
Tempering (Optional): For a truly professional finish, you can temper the white chocolate. This involves carefully controlling the temperature of the chocolate during melting and cooling, resulting in a glossy, snappy bark that’s less prone to melting at room temperature. However, for a simple recipe like this, it’s not strictly necessary.
-
Even Candy Cane Distribution: To ensure the candy canes are evenly distributed, you can sprinkle some extra crushed candy canes on top of the bark after spreading the chocolate mixture in the pan. Gently press them into the chocolate to secure them.
-
Preventing Seizing: Avoid getting any water into the white chocolate during melting, as this can cause it to seize and become grainy.
-
Adding Extracts: Always add extracts after the chocolate is melted and removed from the heat to prevent them from scorching and losing their flavor.
Serving & Storage Suggestions
Serve the Peppermint Candy Cane Bark chilled or at room temperature. It makes a beautiful addition to a holiday dessert platter or a thoughtful homemade gift.
- Storage: Store the bark in an airtight container in the refrigerator for up to 2 weeks. You can also freeze it for longer storage (up to 2 months), but the texture may change slightly upon thawing.
- Serving Ideas: Package the bark in cellophane bags tied with ribbon for a festive gift. Crumble it over ice cream or hot chocolate for a pepperminty treat.
Nutritional Information
Here’s an approximate nutritional breakdown per serving (serving size will vary based on how the bark is broken):
| Nutrient | Amount per Serving | % Daily Value |
|---|---|---|
| Calories | 816 kcal | 41% |
| Total Fat | 48.5g | 62% |
| Saturated Fat | 29.3g | 147% |
| Cholesterol | 31.7mg | 11% |
| Sodium | 136.1mg | 6% |
| Total Carbohydrate | 89.6g | 30% |
| Dietary Fiber | 0.3g | 1% |
| Sugars | 89.2g | 178% |
| Protein | 8.9g | 18% |
Note: Nutritional information is an estimate and can vary based on specific ingredients and serving sizes.
Variations & Substitutions
-
Dark Chocolate Bark: Use dark chocolate or semi-sweet chocolate instead of white chocolate for a richer, less sweet bark.
-
Vegan Bark: Use vegan white chocolate and ensure your candy canes are vegan-friendly (some contain confectioner’s glaze).
-
Other Extracts: Experiment with other extracts like vanilla extract, almond extract, or orange extract for different flavor combinations.
-
Nuts and Dried Fruit: Add chopped nuts (like pecans, walnuts, or almonds) or dried cranberries or cherries to the bark for added texture and flavor.
-
Different Toppings: Use other festive toppings like sprinkles, mini marshmallows, or chocolate chips.
FAQs (Frequently Asked Questions)
Q: My white chocolate seized up when I was melting it. What did I do wrong?
A: White chocolate is very sensitive to heat. It’s likely you overheated it or got some water into the chocolate. Start over with fresh chocolate and melt it very slowly and gently, ensuring no water comes into contact with it.
Q: Can I use regular candy canes or do I need to buy mini ones?
A: You can use any size candy canes. Regular-sized candy canes will just require a bit more crushing.
Q: How do I get the peppermint flavor to be stronger?
A: Use peppermint oil instead of peppermint extract, but remember to use only half the amount (1/2 teaspoon instead of 1 teaspoon), as it’s much more concentrated. You can also add a few drops of peppermint extract to the melted chocolate after you’ve already added the initial amount.
Q: Can I make this ahead of time?
A: Absolutely! Peppermint Candy Cane Bark can be made several days in advance and stored in the refrigerator in an airtight container.
Q: The candy canes are making the chocolate lumpy. Is that normal?
A: A little bit of lumpiness is normal, especially if you don’t crush the candy canes into a fine powder. However, if it’s excessively lumpy, you might be adding too many candy canes. Stick to the recommended amount in the recipe.
Final Thoughts
This Peppermint Candy Cane Bark is more than just a recipe; it’s a tradition, a memory in the making, and a delicious way to spread holiday cheer. Don’t be intimidated by the seemingly delicate nature of white chocolate; with a little patience and attention to detail, you’ll create a stunning and irresistible treat that everyone will love. I encourage you to gather your ingredients, put on some festive music, and get ready to create some holiday magic in your kitchen. Share your creations and let me know how it turns out! Happy baking!