
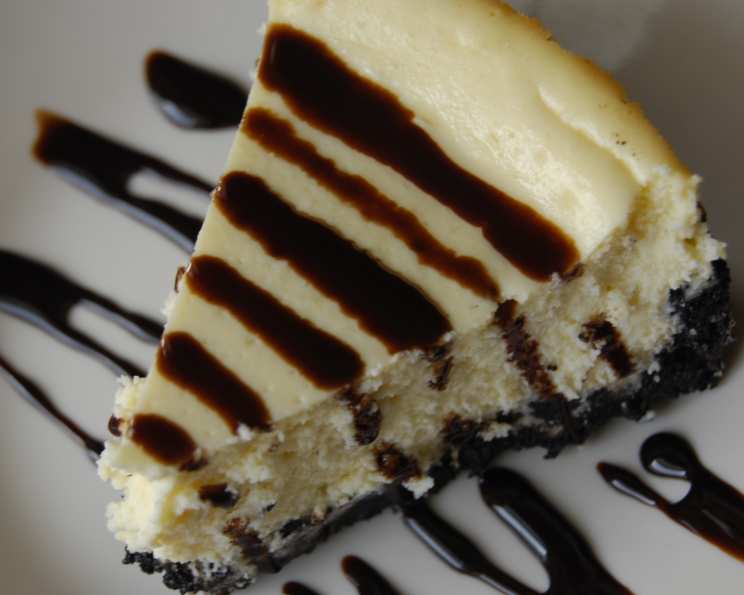
Peppermint Cheesecake: A Holiday Classic
The first time I tasted peppermint cheesecake, it was Christmas Eve at my grandmother’s house. The air was thick with the scent of pine and cinnamon, and the table groaned under the weight of holiday dishes. But it was the cheesecake, adorned with crushed candy canes like a snowy landscape, that stole the show. Its cool, creamy texture and invigorating peppermint flavor were the perfect counterpoint to the rich, savory feast. Each bite was a celebration, a reminder of the joy and warmth that filled that cozy home, and it became an instant holiday tradition I cherish to this day.
Recipe Overview
- Prep Time: 30 minutes
- Cook Time: 1 hour 10 minutes (includes crust baking)
- Total Time: 5 hours 40 minutes (includes chilling)
- Servings: 12
- Yield: 1 cheesecake
- Dietary Type: Not Gluten-Free
Ingredients
- 12 ounces cream-filled chocolate sandwich cookies, broken into pieces
- 3 tablespoons melted butter
- 1 1/2 lbs cream cheese, at room temperature
- 3/4 cup sugar
- 1/3 cup sour cream
- 4 eggs
- 2 tablespoons all-purpose flour
- 1 teaspoon vanilla extract
- 1/2 teaspoon peppermint extract
- 1/2 teaspoon salt
- 1/3 cup coarsely crushed candy cane
Equipment Needed
- 9-inch springform pan
- Heavy-duty zip-lock bag
- Rolling pin
- Mixer
- Mixing bowl
- Wire rack
Instructions
- Begin by preparing the Oreo crust. Place the broken cookies into a heavy-duty zip-lock bag. Use a rolling pin to crush the cookies into fine crumbs.
- Pour the cookie crumbs into a buttered 9-inch springform pan.
- Drizzle the melted butter over the cookie crumbs.
- Mix the crumbs and melted butter thoroughly to coat all the crumbs evenly.
- Press the cookie crumb mixture evenly over the bottom of the springform pan and about 1/2 inch up the sides, creating a firm, even crust.
- Bake the crust in a preheated 300-degree Fahrenheit oven until it is slightly darker in color and appears a bit dry, approximately 10 minutes. Remove from the oven and let it cool slightly. This step helps set the crust and prevent it from becoming soggy later.
- While the crust is baking, prepare the cream cheese filling. In a large mixing bowl, using a mixer on medium speed, beat the room-temperature cream cheese and sugar together until well blended and smooth. It’s crucial that the cream cheese is at room temperature to avoid lumps in the final mixture.
- Beat in the sour cream until fully incorporated. The sour cream adds richness and helps create a more tender texture.
- Add the eggs one at a time, beating well after each addition. Be careful not to overmix at this stage, as overmixing can incorporate too much air into the batter, which can cause the cheesecake to crack during baking.
- Beat in the all-purpose flour, vanilla extract, peppermint extract, and salt until the mixture is smooth and homogenous. The flour helps stabilize the cheesecake, preventing it from collapsing, while the vanilla and peppermint extracts add their signature flavors. The salt enhances the overall sweetness and balances the flavors.
- Pour the cream cheese mixture into the pan over the pre-baked crust, spreading it evenly.
- Bake the cheesecake in the 300-degree Fahrenheit oven until the edges are just golden and the center jiggles slightly when the pan is gently shaken, about 1 hour. It is important not to overbake the cheesecake; it should still have a slight wobble in the center when it’s done.
- Once baked, run a knife around the edge of the pan rim to loosen the cheesecake from the sides. This helps prevent cracking as it cools.
- Place the pan on a wire rack and cool the cheesecake completely in the pan. Allowing the cheesecake to cool slowly helps prevent it from sinking in the center.
- Once cooled, cover the pan with plastic wrap and chill in the refrigerator until cold, at least 4 hours or up to 2 days. Chilling allows the cheesecake to fully set and develop its flavor.
- Before serving, run a knife around the edge of the pan again, then release the rim of the springform pan.
- If any liquid has pooled on the surface of the cheesecake, gently blot it dry with a paper towel.
- Finally, decorate the top of the cheesecake with the coarsely crushed candy cane, gently pressing the candy cane pieces into the surface of the cheesecake with your hands.
Expert Tips & Tricks
- Water Bath: For an even more decadent and crack-free cheesecake, consider baking it in a water bath. Wrap the bottom of the springform pan tightly with heavy-duty aluminum foil, then place it in a larger roasting pan. Pour hot water into the roasting pan until it reaches about halfway up the sides of the springform pan. The steam from the water bath will help keep the cheesecake moist and prevent it from cracking.
- Room Temperature Ingredients: Ensure all ingredients, especially the cream cheese and eggs, are at room temperature. This will help them blend smoothly and evenly, resulting in a silky-smooth cheesecake.
- Gentle Mixing: Avoid overmixing the batter. Overmixing can incorporate too much air, which can cause the cheesecake to puff up during baking and then collapse or crack as it cools.
- Doneness Check: The cheesecake is done when the edges are set and the center jiggles slightly. It will continue to set as it cools.
Serving & Storage Suggestions
Serve the peppermint cheesecake chilled, ideally after it has been refrigerated for at least 4 hours. Garnish each slice with an extra sprinkle of crushed candy cane for added visual appeal and flavor. This cheesecake pairs beautifully with a cup of hot chocolate or coffee.
To store leftovers, cover the cheesecake tightly with plastic wrap or transfer it to an airtight container. It will keep in the refrigerator for up to 5 days. For longer storage, you can freeze the cheesecake. Wrap it tightly in plastic wrap and then in a layer of aluminum foil. Frozen cheesecake can be stored for up to 2 months. Thaw it in the refrigerator overnight before serving.
Nutritional Information
| Nutrient | Amount per Serving | % Daily Value |
|---|---|---|
| Calories | 449.1 kcal | N/A |
| Calories from Fat | 279 g | 62% |
| Total Fat | 31.1 g | 47% |
| Saturated Fat | 16.7 g | 83% |
| Cholesterol | 143.3 mg | 47% |
| Sodium | 450 mg | 18% |
| Total Carbohydrate | 35.9 g | 11% |
| Dietary Fiber | 0.9 g | 3% |
| Sugars | 24.4 g | N/A |
| Protein | 8.3 g | 16% |
Variations & Substitutions
- Gluten-Free: To make a gluten-free version, substitute the Oreo cookies with gluten-free chocolate sandwich cookies. You can also use a different gluten-free cookie crumb crust recipe. Substitute the all-purpose flour with a gluten-free all-purpose flour blend.
- Different Extracts: Experiment with different extracts to customize the flavor of the cheesecake. Almond extract or chocolate extract would both be delicious additions or substitutions.
- Chocolate Ganache: Drizzle the top of the cheesecake with a rich chocolate ganache for an extra layer of decadence.
- Candy Cane Swirl: Before baking, swirl a ribbon of melted candy cane syrup (made by dissolving crushed candy canes in a small amount of water) into the cream cheese batter for a festive look.
FAQs (Frequently Asked Questions)
Q: Why is it important for the cream cheese to be at room temperature?
A: Using room temperature cream cheese ensures that it blends smoothly with the other ingredients, preventing lumps and resulting in a creamy, even texture.
Q: How do I prevent my cheesecake from cracking?
A: Avoid overbaking, use room temperature ingredients, and consider baking the cheesecake in a water bath to provide moisture and even heat.
Q: Can I freeze this cheesecake?
A: Yes, you can freeze the cheesecake. Wrap it tightly in plastic wrap and then in a layer of aluminum foil. Thaw it in the refrigerator overnight before serving.
Q: How can I tell if the cheesecake is done?
A: The edges should be set and the center should jiggle slightly when the pan is gently shaken. It will continue to set as it cools.
Q: Can I use a graham cracker crust instead of an Oreo crust?
A: Absolutely! A graham cracker crust would be a delicious alternative. Simply substitute the Oreo crumbs with graham cracker crumbs and follow the same crust-making instructions.
Final Thoughts
This Peppermint Cheesecake is more than just a dessert; it’s a celebration of flavors and traditions, a reminder of cozy gatherings and shared moments. Its cool, creamy texture and invigorating peppermint flavor make it the perfect centerpiece for any holiday table or a delightful treat any time of year. I wholeheartedly encourage you to try this recipe and create your own memories. Feel free to experiment with variations and make it your own. Don’t hesitate to share your creations and feedback – I’d love to hear how it turns out! Perhaps pair it with a glass of chilled sparkling wine or a steaming mug of hot cocoa for the ultimate indulgence.