
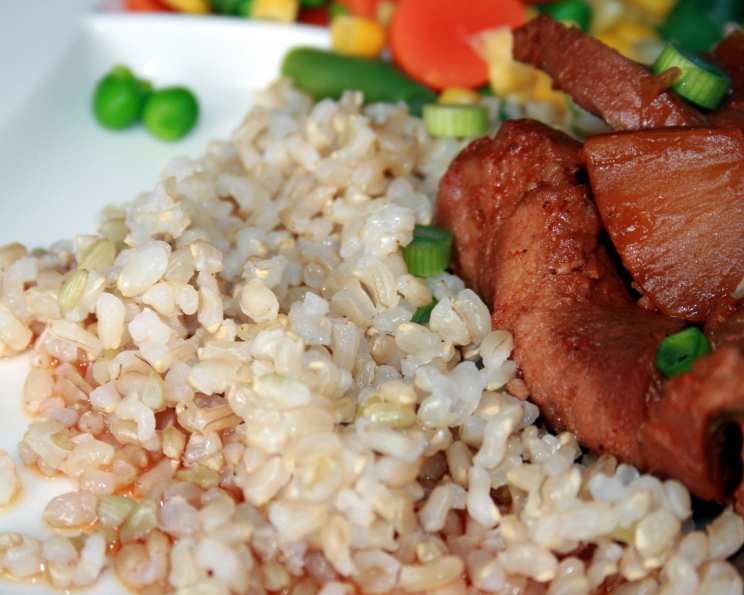
Perfect Basic Brown Rice: A Foolproof Method for Fluffy Grains
My earliest memories of brown rice involve a mushy, vaguely earthy-tasting disappointment. My mom, bless her heart, tried her best to incorporate healthy whole grains into our diet, but brown rice was always the culinary underdog compared to its fluffy white counterpart. It wasn’t until I stumbled upon this simple, almost counterintuitive method that brown rice transformed from a dietary obligation into a genuinely enjoyable part of my meals. Now, I can confidently whip up a batch of perfectly cooked, separate grains every time, and even my kids happily devour it. This technique, which involves boiling the rice like pasta and then steaming it to perfection, is a total game-changer.
Recipe Overview
- Prep Time: 5 minutes
- Cook Time: 40 minutes
- Total Time: 45 minutes
- Servings: 4-6
- Yield: About 3 cups cooked rice
- Dietary Type: Vegan, Gluten-Free, Dairy-Free
Ingredients
- 1 cup brown rice (short, medium, or long grain)
- Kosher salt
- 12 cups water
Equipment Needed
- Large pot with a tight-fitting lid
- Strainer or colander
Instructions
- Begin by rinsing the brown rice. Place the rice in a strainer under cold running water and rinse thoroughly for about 30 seconds. This step removes excess starch, which helps prevent the rice from becoming gummy.
- In a large pot, bring 12 cups of water to a rolling boil over high heat. Ensure the pot has a tight-fitting lid, as this will be crucial later for steaming.
- Once the water is boiling vigorously, add the rinsed brown rice to the pot. Stir the rice just once to prevent it from sticking to the bottom.
- Reduce the heat slightly to maintain a steady boil, but leave the pot uncovered. Cook the rice at a boil, uncovered, for exactly 30 minutes. Don’t be tempted to peek or stir frequently; just let it do its thing. The vigorous boiling action is key to properly cooking the rice.
- After 30 minutes, carefully pour the rice and water into a strainer or colander placed over the sink. Drain the rice thoroughly for about 10 seconds. This removes the excess water, leaving you with mostly cooked rice.
- Return the drained rice to the same pot you used for boiling. Remove the pot from the heat – it’s important the rice isn’t actively cooking at this stage.
- Immediately cover the pot tightly with the lid. This is the crucial steaming step. Let the rice sit, covered, for 10 minutes. During this time, the residual heat and moisture will create steam, gently finishing the cooking process and resulting in fluffy, separate grains.
- After the 10-minute steaming period, uncover the pot. Use a fork to gently fluff the rice, separating the grains. Season the rice to taste with kosher salt.
Expert Tips & Tricks
- Rice Variety: This method works beautifully with any type of brown rice, whether it’s short-grain, medium-grain, or long-grain. Each will have a slightly different texture, so experiment to find your favorite!
- Water Ratio: The high water ratio might seem excessive, but it’s essential for even cooking. Think of it like cooking pasta – the rice needs plenty of room to move and cook without becoming mushy.
- Don’t Stir Too Much: Over-stirring can release more starch and make the rice sticky. A single stir after adding the rice is all you need.
- Adjust Cooking Time: Depending on your stove and the specific type of brown rice, you might need to adjust the boiling time slightly. If the rice is still too firm after 30 minutes, boil it for another 2-3 minutes. If it seems too soft, reduce the initial boiling time by a minute or two next time.
- Salt Timing: While you can season with salt after cooking, adding a pinch of salt to the boiling water can also enhance the flavor of the rice.
- Aromatics: For extra flavor, try adding a bay leaf or a sprig of thyme to the boiling water. Remove it before draining the rice.
Serving & Storage Suggestions
Serve your perfectly cooked brown rice as a side dish to your favorite meals. It pairs well with grilled chicken, fish, stir-fries, and vegetarian curries. You can also use it as a base for grain bowls or salads.
Leftover brown rice can be stored in an airtight container in the refrigerator for up to 4 days. To reheat, add a tablespoon or two of water per cup of rice and microwave until heated through, fluffing with a fork before serving. You can also reheat it in a skillet over low heat, adding a little water or broth to prevent it from drying out.
For longer storage, freeze the cooked rice in individual portions in freezer-safe bags or containers. It can be stored in the freezer for up to 2 months. To reheat frozen rice, thaw it overnight in the refrigerator or microwave it directly from frozen, adding a little water to keep it moist.
Nutritional Information
Note: Nutritional information is an estimate and may vary based on specific ingredients and portion sizes.
| Nutrient | Amount per Serving | % Daily Value |
|---|---|---|
| Calories | 171 kcal | N/A |
| Total Fat | 1.4g | 2% |
| Saturated Fat | 0.3g | 1% |
| Cholesterol | 0mg | 0% |
| Sodium | 24.6mg | 1% |
| Total Carbohydrate | 35.7g | 11% |
| Dietary Fiber | 1.6g | 6% |
| Sugars | 0.4g | N/A |
| Protein | 3.7g | 7% |
Variations & Substitutions
- Coconut Rice: Replace a portion of the water with coconut milk for a richer, slightly sweet flavor.
- Herbed Rice: Add fresh herbs like parsley, cilantro, or chives to the cooked rice for a burst of freshness.
- Spiced Rice: Stir in spices like cumin, coriander, or turmeric to the cooked rice for a warm, aromatic flavor.
- Broth Instead of Water: Use vegetable or chicken broth instead of water for a more flavorful rice. Be mindful of salt content and adjust accordingly.
- Wild Rice Blend: Combine brown rice with wild rice for a more complex flavor and texture. You may need to adjust the cooking time slightly, as wild rice typically takes longer to cook.
FAQs (Frequently Asked Questions)
Q: Why do I need so much water to cook brown rice?
A: The excess water ensures the rice cooks evenly and prevents it from becoming mushy. It’s similar to cooking pasta, where ample water is needed for proper cooking.
Q: Can I use a rice cooker for this method?
A: While you can try, this method is specifically designed for stovetop cooking. The boiling and draining steps are difficult to replicate in a rice cooker.
Q: What if my rice is still hard after 30 minutes of boiling?
A: The cooking time can vary depending on your stove and the type of rice. If the rice is still too firm, continue boiling it for another 2-3 minutes, checking frequently until it reaches your desired tenderness.
Q: Can I skip the rinsing step?
A: Rinsing helps remove excess starch, which can prevent the rice from becoming sticky. While you can skip it, the final texture might be slightly different.
Q: How can I prevent the rice from sticking to the bottom of the pot?
A: A single stir after adding the rice to the boiling water is usually enough to prevent sticking. Avoid over-stirring, as this can release more starch.
Final Thoughts
Don’t let past brown rice experiences deter you! This simple, foolproof method guarantees perfectly cooked, fluffy brown rice every time. It’s a versatile and healthy grain that can elevate any meal. Experiment with different variations, find your favorite flavor combinations, and enjoy the satisfaction of mastering this kitchen staple. I encourage you to give this technique a try and share your feedback. Perhaps pair it with a vibrant vegetable stir-fry or a hearty lentil stew for a complete and satisfying meal. Happy cooking!