
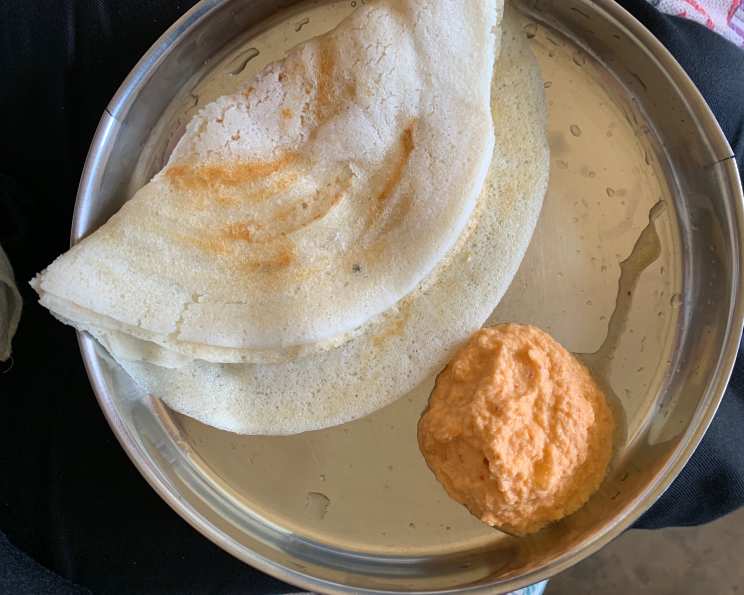
Perfect Dosa: A Culinary Journey
The first time I tasted a perfectly crisp dosa, it was at a bustling South Indian restaurant. The aroma of fermented batter mingling with sizzling oil was intoxicating. I remember the satisfying crackle as I broke off a piece and dipped it into the fragrant sambar. That single bite sparked a culinary curiosity that has stayed with me ever since. It’s a joy to share this recipe with you, born from that early fascination and refined over years of experimentation.
Recipe Overview
- Prep Time: 20 minutes
- Cook Time: 30 minutes
- Total Time: 24 hours 50 minutes (includes overnight refrigeration)
- Servings: 4-10
- Yields: 30 dosas
- Dietary Type: Vegetarian
Ingredients
- 1 cup urad dal flour
- 3 cups rice flour
- 6 cups buttermilk
- 1 tablespoon salt, more salt if needed
- 1 teaspoon fenugreek seeds
- Vegetable oil, for cooking
Equipment Needed
- Large mixing bowl
- Blender (optional, but recommended)
- Air-tight container
- Non-stick pan or griddle
- Ladle
- Spatula
Instructions
-
Begin by combining the urad dal flour and rice flour in a large mixing bowl. Ensure both are well-mixed for even distribution.
-
Gradually incorporate the buttermilk into the flour mixture. It’s crucial to add the buttermilk slowly to prevent lumps from forming. The consistency you’re aiming for is a smooth batter that drizzles easily off a spoon. Using a blender will simplify this process and create an even smoother batter.
-
Season the batter with salt and fenugreek seeds to taste. Don’t be afraid to adjust the amount of salt to your preference. The fenugreek seeds add a subtle, earthy flavor that enhances the dosa.
-
Transfer the batter to an air-tight container and refrigerate overnight. This fermentation period is critical for developing the characteristic tangy flavor and light texture of the dosa.
-
The next day, heat a non-stick pan or griddle over medium heat. Add a drizzle of vegetable oil to lightly coat the surface.
-
Once the pan is hot, pour a ladleful of the dosa batter into the center of the pan. Immediately use the bottom of the ladle to spread the batter thinly and gently in a circular motion. Be careful not to press too hard, as this can tear the delicate dosa.
-
Cook the dosa for 2-3 minutes, or until the bottom is golden brown and crispy. Drizzle a little more vegetable oil around the edges to help with browning.
-
Flip the dosa carefully using a spatula and cook for another minute until the other side is lightly browned.
-
Remove the dosa from the pan and serve immediately. Repeat the process with the remaining batter.
Expert Tips & Tricks
-
Batter Consistency: The batter should be thin enough to spread easily but not so thin that it tears. If the batter is too thick, add a little more buttermilk. If it’s too thin, add a small amount of rice flour.
-
Pan Temperature: Maintaining the right pan temperature is crucial. If the pan is too hot, the dosa will burn before it cooks through. If it’s not hot enough, the dosa will stick.
-
Crispy Dosa: For extra crispy dosas, use a cast-iron skillet.
-
Fermentation: The longer the batter ferments, the tangier the dosa will be. In warmer climates, you may need to reduce the fermentation time.
-
Lumps: If the batter has lumps, use a blender or immersion blender to smooth it out.
Serving & Storage Suggestions
Serve dosas immediately for the best taste and texture. They are traditionally served with sambar, coconut chutney, and tomato chutney. You can also fill them with spiced potatoes (aloo masala) for a delicious and satisfying meal.
Leftover dosas can be stored in the refrigerator for up to 2 days. Reheat them on a dry pan or in a microwave. They may not be as crispy as freshly made dosas, but they will still be delicious. Dosas can also be frozen for up to 1 month. Wrap them individually in plastic wrap before freezing. Thaw them completely before reheating.
Nutritional Information
| Nutrient | Amount per Serving | % Daily Value |
|---|---|---|
| Calories | 583.7 kcal | N/A |
| Calories from Fat | 44 g | 8% |
| Total Fat | 5 g | 7% |
| Saturated Fat | 2.5 g | 12% |
| Cholesterol | 14.7 mg | 4% |
| Sodium | 2130.6 mg | 88% |
| Total Carbohydrate | 113.1 g | 37% |
| Dietary Fiber | 3.1 g | 12% |
| Sugars | 17.8 g | N/A |
| Protein | 19.4 g | 38% |
Note: Nutritional information is an estimate and may vary based on specific ingredients and portion sizes.
Variations & Substitutions
-
Gluten-Free Dosa: Ensure that the rice flour and urad dal flour are certified gluten-free to make this recipe suitable for those with gluten sensitivities.
-
Vegan Dosa: This recipe is already naturally vegan!
-
Different Flours: You can experiment with different types of rice flour, such as brown rice flour or idli rice flour, to create variations in texture and flavor.
-
Spice Variations: Add finely chopped green chilies, ginger, or curry leaves to the batter for a spicy twist.
FAQs (Frequently Asked Questions)
Q: Why is it important to refrigerate the batter overnight?
A: Refrigerating the batter allows it to ferment, which develops the characteristic tangy flavor and light, airy texture of the dosa. This fermentation process is crucial for achieving the perfect dosa.
Q: Can I use regular milk instead of buttermilk?
A: While you can use regular milk, the buttermilk’s acidity helps with the fermentation process, resulting in a more flavorful and textured dosa. If using regular milk, consider adding a tablespoon of lemon juice or vinegar to mimic the acidity of buttermilk.
Q: How do I prevent the dosa from sticking to the pan?
A: Ensure your pan is properly heated and lightly oiled before pouring the batter. Using a non-stick pan is also highly recommended.
Q: My dosa is tearing when I try to spread the batter. What am I doing wrong?
A: The batter may be too thick, or you might be pressing too hard when spreading it. Try adding a little more buttermilk to thin the batter and use a gentle, circular motion when spreading.
Q: Can I make the batter in advance and store it for longer than overnight?
A: Yes, you can store the batter in the refrigerator for up to 2-3 days. However, keep in mind that the flavor will become more tangy over time as the fermentation process continues.
Final Thoughts
Making dosas at home might seem intimidating at first, but with a little practice, you’ll be whipping up these delicious South Indian crepes in no time. This recipe is a wonderful starting point, and I encourage you to experiment with different variations and fillings to create your own signature dosa. Don’t be afraid to get creative and, most importantly, have fun in the kitchen! I’d love to hear how your dosas turn out, so please share your feedback and any creative twists you add to the recipe. Pair your perfect dosas with a cup of hot chai for the ultimate comforting meal.