
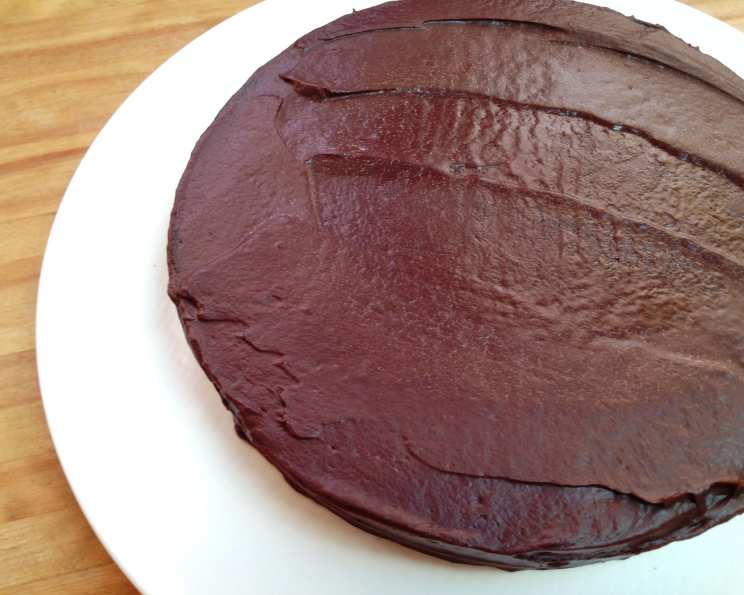
Decadent Flourless Chocolate Cake: A Taste of Pure Indulgence
The memory is as vivid as the taste: my grandmother, Nana Rose, bustling around her tiny kitchen, the air thick with the intoxicating aroma of melting chocolate. This wasn’t just baking; it was an act of love. Her flourless chocolate cake, a masterpiece of simplicity and richness, was reserved for the most special occasions. Each bite was an experience – a symphony of bittersweet chocolate that danced on my tongue, leaving me utterly and completely content. Now, I’m sharing my version, a tribute to Nana Rose’s legacy and my own quest for chocolate perfection.
Recipe Overview
- Prep Time: 20 minutes
- Cook Time: 60-70 minutes
- Total Time: 1 hour 30 minutes (plus chilling time)
- Servings: 12
- Yield: 1 cake
- Dietary Type: Gluten-Free
Ingredients
- 12 tablespoons (1 1/2 sticks) unsalted butter
- 12 ounces bittersweet chocolate, finely chopped
- 3 teaspoons vanilla extract
- 8 large eggs, separated
- 2/3 cup brown sugar, packed
- 1/4 teaspoon salt
- 1/4 teaspoon cream of tartar
- 1 tablespoon cooking oil or cooking spray, for greasing the pan
- 2 tablespoons flour or rice flour, for dusting the pan (use rice flour for gluten-free)
Optional Additions: For an exotic twist, consider adding 2 teaspoons of key-lime zest or key-lime extract along with the vanilla extract.
Equipment Needed
- 9-inch springform cake pan
- Double boiler or heatproof bowl and saucepan
- Electric mixer (stand mixer or hand mixer)
- Mixing bowls
- Whisk
- Rubber spatula
- Wax paper or parchment paper
- Deep cooking sheet
- Aluminum foil
- Toothpick
Instructions
-
Preheat and Prepare: Preheat your oven to 325°F (160°C). Grease a 9-inch springform cake pan with cooking oil or cooking spray. Dust the greased pan with flour (or rice flour for a gluten-free option), tapping out any excess. Cut a circle of wax paper or parchment paper to fit the bottom of the pan and place it inside. This ensures easy removal later.
-
Melt the Chocolate and Butter: In a double boiler over gently simmering water (or in a heatproof bowl set over a saucepan with simmering water, ensuring the bowl doesn’t touch the water), melt the butter and bittersweet chocolate together, stirring occasionally, until smooth. Remove from the heat and set aside to cool slightly. Cooling is crucial; if the chocolate is too hot, it will cook the egg yolks.
-
Whip the Egg Whites: In a clean mixing bowl (ensure there is no oil residue, as this will prevent the egg whites from whipping properly), beat the egg whites with an electric mixer until they become cloudy and frothy, about 30 seconds.
-
Make a Meringue: Continue beating while gradually adding the brown sugar and cream of tartar. The cream of tartar helps stabilize the egg whites and create a more voluminous meringue. Beat until stiff peaks form. Be careful not to overbeat, as this will cause the meringue to become dry and curdled. This is a critical step for achieving the right texture. If the eggs curdle, unfortunately, you’ll need to discard them and start over with fresh egg whites.
-
Combine Yolks and Chocolate: In a large mixing bowl, whisk the egg yolks and vanilla extract into the slightly cooled melted chocolate mixture until well combined.
-
Fold in the Egg Whites: Gently fold the egg whites into the chocolate mixture. Start by folding in about one-third of the egg whites to lighten the batter. This makes it easier to incorporate the remaining whites without deflating them. Then, gently fold in the remaining egg whites until just combined. Be careful not to overmix; you want to maintain as much air as possible for a light and airy cake.
-
Prepare for Baking: Pour the batter into the prepared springform pan, spreading it evenly. Wrap the bottom of the pan tightly with aluminum foil to prevent water from seeping in during the water bath. Place the wrapped pan in a deep cooking sheet.
-
Bake in a Water Bath: Carefully pour hot water into the cooking sheet, reaching about 1/2 to 1 inch up the sides of the springform pan. This water bath creates a gentle, even heat that helps prevent the cake from cracking and keeps it moist.
-
Bake the Cake: Bake in the preheated oven for about 60-70 minutes, or until a toothpick inserted into the center of the cake comes out with moist crumbs attached. The cake should be set around the edges but still slightly soft in the center.
-
Cooling Process: Remove the cake from the oven and allow it to cool in the water bath for about an hour. This gradual cooling helps prevent the cake from collapsing.
-
Release and Invert: Gently run a knife around the edge of the pan to loosen the cake. Carefully release the sides of the springform pan. Invert the cake onto a flat plate or other surface. Remove the wax paper or parchment paper from the bottom (now the top) of the cake.
-
Final Inversion: Invert the cake again onto the final plate for displaying.
-
Chill for Best Results: While the cake can be eaten right away, it may fall slightly when cut. For the best results, refrigerate it for at least 6 hours, or preferably overnight, before serving. This allows the cake to fully set and develop its rich, decadent flavor.
Expert Tips & Tricks
- Chocolate Quality Matters: The quality of the bittersweet chocolate you use will directly impact the taste of the cake. Opt for a high-quality chocolate with a cocoa percentage of around 60-70% for the best balance of sweetness and bitterness.
- Meringue Mastery: Achieving stiff peaks with your egg whites is essential for a light and airy cake. Ensure your bowl and beaters are completely clean and free of grease.
- Water Bath Wisdom: Don’t skip the water bath! It’s crucial for achieving a moist and evenly baked cake. Make sure the foil wrapping is secure to prevent water from seeping into the pan.
- Cooling is Key: Resist the temptation to cut into the cake while it’s still warm. Allowing it to cool completely, and then chilling it, will result in a firmer, more enjoyable texture.
- Troubleshooting Cracks: If your cake cracks slightly on top, don’t worry! It won’t affect the taste. You can also cover the cracks with a dusting of cocoa powder or a chocolate ganache.
Serving & Storage Suggestions
This flourless chocolate cake is incredibly versatile and can be served in a variety of ways. Dust it with cocoa powder or powdered sugar for a simple yet elegant presentation. Alternatively, top it with fresh berries, a dollop of whipped cream, or a scoop of vanilla ice cream. A drizzle of chocolate sauce or a sprinkle of chopped nuts also adds a touch of indulgence.
Leftovers can be stored in an airtight container in the refrigerator for up to 5 days. For longer storage, wrap the cake tightly in plastic wrap and then foil, and freeze it for up to 2 months. Thaw overnight in the refrigerator before serving.
Nutritional Information
(Estimated, per serving)
| Nutrient | Amount per Serving | % Daily Value |
|---|---|---|
| Calories | 350 kcal | 18% |
| Total Fat | 25g | 38% |
| Saturated Fat | 15g | 75% |
| Cholesterol | 100mg | 33% |
| Sodium | 50mg | 2% |
| Total Carbohydrate | 30g | 10% |
| Dietary Fiber | 2g | 8% |
| Sugars | 20g | – |
| Protein | 5g | 10% |
Variations & Substitutions
- Dairy-Free: Substitute the butter with a high-quality vegan butter alternative.
- Espresso Boost: Add 1-2 teaspoons of instant espresso powder to the melted chocolate for a richer, more intense flavor.
- Spice it Up: Incorporate a pinch of cayenne pepper or chili powder for a subtle kick.
- Nutty Delight: Fold in 1/2 cup of chopped nuts (such as walnuts, pecans, or almonds) into the batter before baking.
- Citrus Infusion: Add the zest of an orange or lemon for a bright, refreshing twist.
FAQs (Frequently Asked Questions)
Q: Why is my flourless chocolate cake sinking in the middle?
A: This can happen if the egg whites are not whipped to stiff peaks, or if the cake is overbaked. Ensure you whip the egg whites properly and check for doneness with a toothpick. A slight sink is normal, but a large one indicates an issue.
Q: Can I use a different type of chocolate?
A: Yes, you can experiment with different types of chocolate, such as dark chocolate or milk chocolate. However, keep in mind that this will affect the sweetness and overall flavor of the cake.
Q: What if I don’t have a springform pan?
A: While a springform pan is ideal for easy removal, you can use a regular cake pan. Line the bottom of the pan with parchment paper, allowing the paper to extend over the sides to create handles for lifting the cake out.
Q: How do I know when the cake is done?
A: Insert a toothpick into the center of the cake. It should come out with moist crumbs attached. If it comes out clean, the cake is likely overbaked.
Q: Can I make this cake ahead of time?
A: Absolutely! In fact, this cake tastes even better after it has been refrigerated for a few hours or overnight.
Final Thoughts
This flourless chocolate cake isn’t just a dessert; it’s an experience. It’s a testament to the power of simple ingredients, expertly combined, to create something truly extraordinary. I encourage you to try this recipe, to savor each decadent bite, and to share it with those you love. Whether you’re celebrating a special occasion or simply craving a little chocolate indulgence, this cake is sure to delight. And who knows, maybe it will become a cherished family tradition for you, just as it is for me. Don’t hesitate to experiment with the variations and substitutions to make it your own, and feel free to share your creations and feedback! Pair it with a glass of red wine or a scoop of vanilla bean ice cream for the ultimate indulgence.