
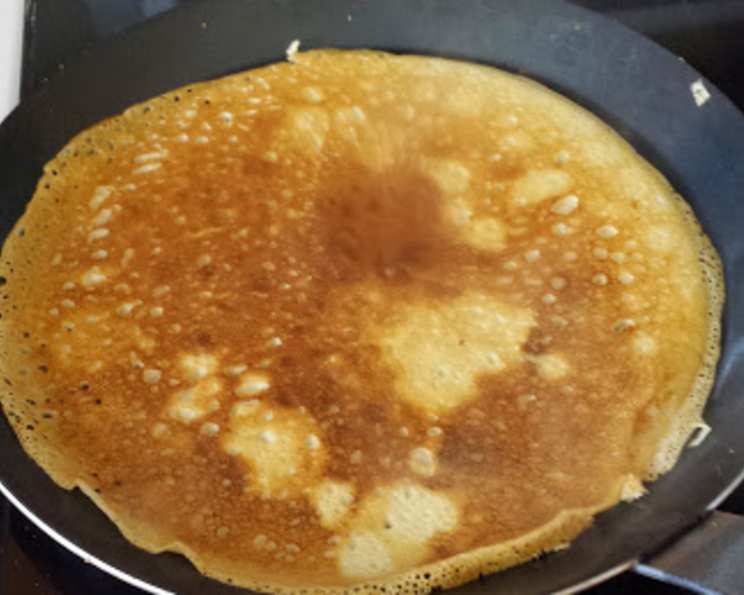
Perfect French Crepes: A Culinary Love Affair
I still remember the first time I tasted a truly perfect French crepe. It was a drizzly morning in Paris, tucked away in a tiny café. The aroma of warm butter and gently cooked batter filled the air. As I took my first bite, the delicate, almost ethereal texture melted in my mouth, followed by the sweet simplicity of Nutella and a dusting of powdered sugar. It was pure magic – a culinary experience that sparked a lifelong love for these versatile and elegant pancakes. Ever since, I’ve been on a quest to recreate that perfect crepe, and this recipe is the culmination of years of experimentation and delicious memories.
Recipe Overview
- Prep Time: 15 minutes
- Cook Time: 30 minutes
- Total Time: 45 minutes
- Servings: 12
- Yield: 12 crepes
- Dietary Type: Vegetarian
Ingredients
- 1 cup flour
- 1 pinch salt
- 2 eggs
- 2 cups milk
- 2 tablespoons butter, melted
- 2 teaspoons oil
Equipment Needed
- Large bowl
- Blender
- 24cm / 9 1/2 inch steel pan (or similar crepe pan)
- Paper towels
- Plate
- Spatula
- Cooling rack
- Wax paper
Instructions
- Before you begin, ensure all your ingredients are at room temperature. This helps the batter come together smoothly and ensures even cooking.
- In a large bowl, mix together the flour and salt. This simple step ensures that the salt is evenly distributed throughout the batter.
- In a blender, combine the eggs, milk, 2 tablespoons melted butter, and the flour mixture. Blend until completely smooth. Be sure to scrape down the sides of the blender a few times to incorporate any stray flour. The blender is key for achieving a luxuriously smooth and light crepe.
- Pour the blended mixture back into the bowl you used for the flour.
- Allow the batter to rest for at least 30 minutes before cooking. This crucial resting period allows the gluten in the flour to relax, resulting in more tender crepes. You can even let it rest in the refrigerator for a few hours or overnight for optimal results.
- Heat your pan to medium-high heat. A well-heated pan is essential for achieving those beautifully golden-brown spots on your crepes.
- Add oil to the hot pan, then immediately wipe it off with a paper towel. Reserve this paper towel on a plate; you’ll use it to lightly grease the pan after making each crepe. This ensures a thin, even coating of oil without making the crepes greasy.
- Pour some batter into the hot pan. For a 9 1/2 inch pan, approximately 3 tablespoons or a 1/4 measuring cup of batter is ideal. Immediately tilt the pan in all directions so that the batter spreads out evenly and thinly across the surface.
- Cook for about 1 minute, tilting the pan in all directions to ensure the bottom is fully covered and cooking evenly.
- When the edges of the crepe start to curl up slightly and the bottom is lightly golden, use a spatula to flip the crepe.
- Cook the other side for another minute, or until lightly golden.
- Slide the crepe onto a cooling rack to cool slightly. This prevents them from becoming soggy.
- Stack the cooked crepes on a plate, separating each crepe with a piece of wax paper to prevent them from sticking together.
- You can refrigerate the crepes for up to 3 days before serving. They can also be frozen at this stage. Wrap them tightly in plastic wrap and then in a freezer bag for up to 3 months.
Expert Tips & Tricks
- Batter Consistency is Key: If your batter seems too thick, add a tablespoon or two of milk until it reaches a thin, pourable consistency, similar to heavy cream.
- Pan Temperature: Finding the right pan temperature is crucial. If the pan is too hot, the crepes will burn. If it’s too cold, they’ll be pale and sticky. Adjust the heat as needed.
- Even Cooking: Tilting the pan quickly and evenly is important for creating thin, uniform crepes. Practice makes perfect!
- Lacy Edges: Don’t be afraid if your crepes have slightly lacy or uneven edges. These add character and a rustic touch.
- Flavor Infusion: For added flavor, infuse the batter with vanilla extract, citrus zest, or even a tablespoon of your favorite liqueur.
Serving & Storage Suggestions
Crepes are incredibly versatile and can be served in countless ways! For a sweet treat, fill them with Nutella, fresh fruit, whipped cream, custard, or jam. For a savory option, try fillings like ham and cheese, sautéed mushrooms, spinach and ricotta, or even chicken and vegetables.
Leftover crepes can be stored in the refrigerator for up to 3 days. To reheat, simply warm them gently in a skillet or microwave for a few seconds. Frozen crepes can be thawed overnight in the refrigerator or reheated directly from frozen. For best results when reheating, cover the crepes to prevent them from drying out.
Nutritional Information
| Nutrient | Amount per Serving | % Daily Value |
|---|---|---|
| Calories | 100 kcal | 5% |
| Total Fat | 5g | 7% |
| Saturated Fat | 2.5g | 12% |
| Cholesterol | 42mg | 14% |
| Sodium | 62mg | 3% |
| Total Carbohydrate | 10g | 4% |
| Dietary Fiber | 0.3g | 1% |
| Sugars | 0.1g | 0% |
| Protein | 4g | 8% |
Note: Nutritional information is an estimate and may vary based on specific ingredients and portion sizes.
Variations & Substitutions
- Gluten-Free Crepes: Substitute the all-purpose flour with a gluten-free blend. You may need to add a little more liquid to achieve the correct batter consistency.
- Dairy-Free Crepes: Use your favorite non-dairy milk, such as almond, soy, or oat milk, in place of cow’s milk. Also, substitute the melted butter with a dairy-free butter alternative or a neutral-flavored oil.
- Buckwheat Crepes (Galettes): Replace half of the all-purpose flour with buckwheat flour for a nutty, earthy flavor that pairs perfectly with savory fillings.
- Sweet Crepes: Add 1-2 tablespoons of sugar to the batter for sweeter crepes. Vanilla extract, almond extract, or lemon zest can also be added for enhanced flavor.
- Savory Crepes: Omit the sugar and add a pinch of dried herbs, such as thyme or rosemary, to the batter for savory crepes.
FAQs (Frequently Asked Questions)
Q: Why is it important to let the crepe batter rest?
A: Resting allows the gluten in the flour to relax, resulting in more tender crepes. It also allows any air bubbles to dissipate, creating a smoother batter and a more delicate final product.
Q: Can I make crepe batter ahead of time?
A: Yes, crepe batter can be made up to 24 hours in advance. Store it in the refrigerator and give it a good whisk before using.
Q: How do I prevent crepes from sticking to the pan?
A: Make sure your pan is properly heated before adding the batter, and lightly grease it with oil or butter between each crepe.
Q: How do I store leftover crepes?
A: Stack the crepes between sheets of wax paper to prevent sticking, then store them in an airtight container in the refrigerator for up to 3 days or in the freezer for up to 3 months.
Q: What are some good filling ideas for crepes?
A: The possibilities are endless! Try Nutella and bananas for a classic sweet crepe, or ham and cheese for a savory option. Get creative and experiment with your favorite flavors!
Final Thoughts
Perfect French crepes are more than just a breakfast or dessert; they’re a blank canvas for your culinary creativity. Don’t be intimidated – with a little practice, you’ll be whipping up these delicate delights in no time. So gather your ingredients, embrace the process, and prepare to create a dish that will impress your friends and family. Feel free to experiment with different fillings and flavors, and don’t hesitate to share your creations and feedback. Bon appétit!