
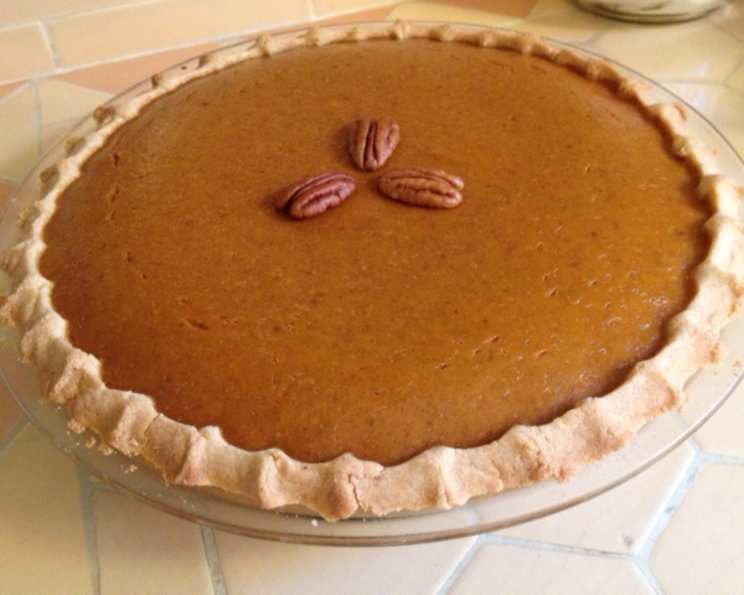
The Enduring Perfection of Gluten-Free Pie Crust
The aroma of baking pie dough transports me back to my grandmother’s kitchen every single time. I can almost feel the warmth of the oven on my face and see her flour-dusted hands deftly crimping the edges of a perfectly formed crust. While her recipes weren’t gluten-free, adapting that comforting classic to meet dietary needs has been a delicious journey, preserving the heart of those memories while creating something new. This gluten-free pie crust delivers that familiar taste and texture without compromise, opening a world of possibilities for those avoiding gluten.
Recipe Overview
- Prep Time: 20 minutes
- Cook Time: 25 minutes
- Total Time: 45 minutes
- Servings: 8
- Yield: 1 pie crust
- Dietary Type: Gluten-Free
Ingredients
- 2/3 cup brown rice flour (extra fine ground)
- 1/3 cup potato starch (not potato flour)
- 2 tablespoons tapioca flour
- 2 tablespoons sweet rice flour
- 2 tablespoons granulated sugar (omit if making savory pie)
- 1/2 teaspoon ground flax seeds or 1/2 teaspoon psyllium husk
- 1/4 teaspoon salt
- 6 tablespoons cold unsalted butter (if using salted butter, omit salt in recipe)
- 1 large egg
- 2 teaspoons orange juice or 2 teaspoons lemon juice
Equipment Needed
- 9-inch pie pan
- Electric mixer
- Large mixing bowl
- Wax paper
- Rolling pin
- Fork
- Wire rack
Instructions
-
Begin by preparing your 9-inch pie pan. Spray it generously with cooking spray, ensuring all surfaces are coated. Then, dust the pan thoroughly with flour, tapping out any excess. This will prevent the crust from sticking.
-
In a large mixing bowl, preferably using an electric mixer, combine the dry ingredients. This includes the brown rice flour, potato starch, tapioca flour, sweet rice flour, sugar (if using), ground flax seeds (or psyllium husk), and salt.
-
Cut the cold unsalted butter into 6 equal pieces. Add the butter pieces to the flour mixture in the bowl. Using the electric mixer on low speed, mix the ingredients until the mixture resembles coarse meal. The butter should be evenly distributed throughout the flour, creating small crumbs. It’s important that the butter is cold for this step, as it helps create a flaky crust.
-
In a separate small bowl, whisk together the egg and orange juice (or lemon juice).
-
Add the egg mixture to the flour and butter mixture. Mix on low speed until the dough just comes together. It should not be sticky. If the dough seems too dry, add a tiny splash of ice water, a teaspoon at a time, until it reaches the right consistency. Be careful not to overmix, as this can result in a tough crust.
-
Form the dough into a ball using your hands. Place the ball of dough on a sheet of wax paper. Top with a second sheet of wax paper. Using your hands or a rolling pin, flatten the dough to about 1 inch thickness.
-
At this point, you can freeze the dough for later use. Wrap it tightly in plastic wrap and then in foil. It can be stored in the freezer for up to one month. Thaw completely in the refrigerator before rolling out.
-
Roll out the dough between the two sheets of wax paper. If the dough seems too tacky or difficult to handle, refrigerate it for 15 minutes before proceeding. This will help firm up the butter and make it easier to roll.
-
Once the dough is rolled out to a size slightly larger than your pie pan, carefully remove the top sheet of wax paper. Invert the dough into the prepared pie pan. Gently remove the remaining sheet of wax paper.
-
Crimp the edges of the crust to create a decorative border. You can use your fingers, a fork, or a specialized crimping tool to achieve your desired look.
-
At this point, you can also freeze the unbaked pie shell for up to one month. Line the pie shell with wax paper, wrap it tightly in plastic wrap, and then in foil.
-
To Pre-bake a bottom crust (blind bake):
- Preheat your oven to 375°F (190°C).
- Gently prick the pastry in 3 or 4 places with a fork. This will prevent it from puffing up during baking.
- Bake for approximately 25 minutes, or until the crust is golden brown.
- Cool completely on a wire rack before filling.
-
To Partially Bake a bottom crust:
- Preheat your oven to 375°F (190°C).
- Bake the pastry for 10 minutes.
- Remove from the oven.
- Fill and bake as per your specific pie recipe.
Expert Tips & Tricks
- Keep your ingredients cold. Cold butter is crucial for creating a flaky crust. If your butter gets too soft, pop it back into the refrigerator for a few minutes.
- Don’t overmix the dough. Overmixing develops the gluten (even in gluten-free flours!), resulting in a tougher crust. Mix just until the dough comes together.
- Use a kitchen scale for accurate measurements. While cup measurements are convenient, using a kitchen scale provides more accurate results, especially when working with gluten-free flours.
- Blind baking is essential for pies with wet fillings. This prevents the crust from becoming soggy.
Serving & Storage Suggestions
Serve your pie warm or at room temperature, depending on the filling.
- Unfilled baked crust: Store at room temperature for up to 2 days, wrapped tightly in plastic wrap.
- Filled pie: Store in the refrigerator for up to 3 days.
- To freeze a baked pie: Wrap tightly in plastic wrap and then in foil. Freeze for up to 2 months. Thaw overnight in the refrigerator before serving. Reheat slices in a warm oven (300°F/150°C) for 10-15 minutes, or until heated through.
Nutritional Information
| Nutrient | Amount per Serving | % Daily Value |
|---|---|---|
| Calories | 178.5 kcal | N/A |
| Calories from Fat | N/A | 49% |
| Total Fat | 9.7 g | 14% |
| Saturated Fat | 5.8 g | 28% |
| Cholesterol | 46.1 mg | 15% |
| Sodium | 87.5 mg | 3% |
| Total Carbohydrate | 20.9 g | 6% |
| Dietary Fiber | 1.1 g | 4% |
| Sugars | 3.6 g | N/A |
| Protein | 2.4 g | 4% |
Note: Nutritional information is an estimate and may vary based on specific ingredients and portion sizes.
Variations & Substitutions
- Savory Crust: Omit the sugar for a savory pie crust. Add a pinch of dried herbs like thyme or rosemary for extra flavor.
- Dairy-Free Crust: Substitute the butter with a vegan butter alternative. Make sure the vegan butter is cold before using.
- Flavor Variations: Add lemon or orange zest to the dough for a citrusy twist.
- Nut Flour Addition: Replace up to 1/4 cup of the brown rice flour with almond flour for a slightly nutty flavor.
FAQs (Frequently Asked Questions)
Q: Why do I need sweet rice flour?
A: Sweet rice flour (also known as glutinous rice flour) adds elasticity and helps bind the gluten-free flours together, preventing the crust from being too crumbly.
Q: Can I use a different type of starch?
A: While potato starch is recommended, you can substitute it with cornstarch or arrowroot starch if needed, though the texture might be slightly different.
Q: My dough is too sticky. What should I do?
A: Add a little more brown rice flour, a tablespoon at a time, until the dough reaches the right consistency. Refrigerating the dough for 15-20 minutes can also help.
Q: Can I make this crust ahead of time?
A: Absolutely! The dough can be frozen for up to one month, or the unbaked pie shell can be frozen as well.
Q: How do I prevent the crust from shrinking during baking?
A: Pricking the crust with a fork before baking and using pie weights or dried beans can help prevent shrinkage.
Final Thoughts
Creating a perfect gluten-free pie crust might seem daunting, but with these tips and tricks, you’ll be turning out beautiful, delicious pies in no time. Don’t be afraid to experiment with different fillings and flavors to make it your own. So, preheat your oven, gather your ingredients, and let the aroma of warm pie fill your kitchen! Share your creations and feedback – I’d love to see what delicious pies you bake.