
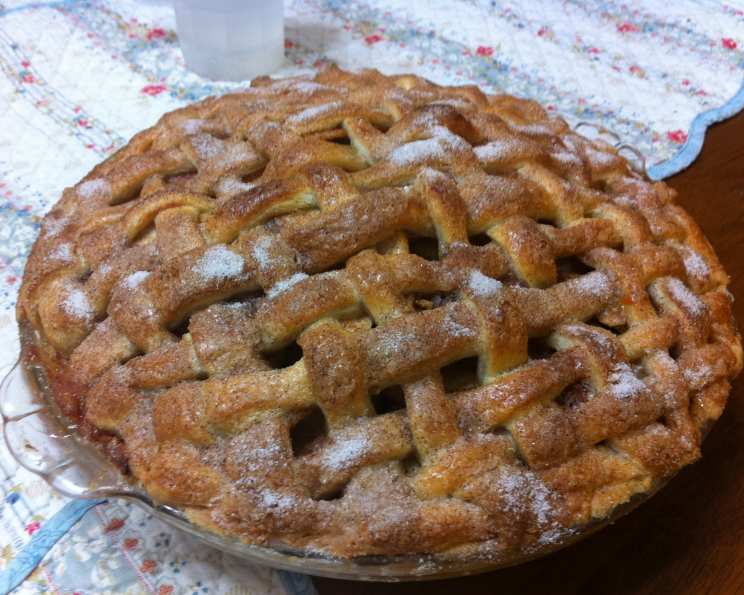
Perfect Granny Smith Apple Pie
There’s something undeniably comforting about the aroma of apple pie wafting through the house. I remember countless autumn afternoons spent in my grandmother’s kitchen, watching her expertly crimp the edges of the crust, the scent of cinnamon and baked apples filling every corner of the room. The warmth of the oven, the chatter of family, and the promise of that first delicious bite – it’s a memory etched in my heart, and one I try to recreate every time I bake this classic dessert. This Granny Smith apple pie, with its tart filling and flaky crust, brings me right back to those cherished moments.
Recipe Overview
- Prep Time: 60 minutes (including chilling)
- Cook Time: 60 minutes
- Total Time: 2 hours
- Servings: 8-10
- Yield: 1 pie
- Dietary Type: Can be made Gluten-Free
Ingredients
For the Filling:
- 7 xl Granny Smith apples (non organic)
- 1 cup sugar
- 4 1⁄4 tablespoons cornstarch
- 1 1⁄2 tablespoons organic cinnamon
- 1⁄4 tablespoon freshly grated nutmeg
- 1 tablespoon lemon zest
- 2 tablespoons softened butter
For the Pie Crust (Double Crust):
- 3 cups flour (use gluten-free blend for gluten-free pie)
- 2 tablespoons sour cream (gluten-free only)
- 1 cup of cold butter or 2 sticks butter flavor shortening
- 3⁄4 teaspoon salt
- Ice cold water
- 1 egg
- 1⁄2 cup cinnamon sugar mixture
Equipment Needed
- Large bowl
- Small bowl
- Pie dish
- Rolling pin
- Pastry blender or fork
- Ziplock bag
- Cookie sheet
- Cooling rack
Instructions
-
Prepare the Crust: In a large bowl, combine the flour and salt. Cut in the cold butter or shortening with a pastry blender or fork until the mixture starts to form clumps, resembling the size of small peas or smaller. It’s crucial to keep the butter cold for a flaky crust, so work quickly!
-
Add the Liquid: Gradually knead in the ice-cold water, one spoonful at a time, until the dough starts to come together and the bowl begins to clean itself. Be careful not to over-knead the dough, as this will develop the gluten and result in a tough crust. You want the dough to feel slightly wet but not sticky.
-
Chill the Dough: Carefully pack the dough into a ball, place it in a zip-lock bag, and refrigerate for at least 30 minutes. This chilling period allows the gluten to relax and the butter to solidify, resulting in a more tender and flaky crust.
-
Prepare the Filling: (Preheat the oven to 450°F / 232°C). While the dough is chilling, prepare the apple filling.
-
Roll Out the Bottom Crust: Split the chilled dough into two halves. Flour a flat surface and roll out one half into a circle approximately 1/4 inch thick. Gently transfer the rolled-out dough into the pie pan, ensuring it fits snugly against the bottom and sides. Trim any excess dough and crimp the edges as desired. Place the pie pan with the bottom crust back into the refrigerator while you prepare the filling.
-
Combine Dry Ingredients: In a small bowl, combine the sugar, cinnamon, nutmeg, and cornstarch. Whisk together until well blended.
-
Prepare the Apples: Peel, core, and slice the Granny Smith apples to your desired thickness (approximately 1/4 inch is recommended) and place them in a large bowl. Add the lemon zest and the sugar mixture to the apples, tossing until the apples are evenly coated.
-
Assemble the Pie: Remove the pie crust from the refrigerator. Place the apples into the pie crust, one layer at a time. In between layers, add small drops of softened butter, about 5 small drops on each layer. Once all the apples are in the crust, pour any extra juice from the bottom of the bowl over the apples. This adds moisture and flavor to the filling.
-
Roll Out the Top Crust: Roll out the second half of the dough on a floured surface. Place the top crust on the pie. If you are not using a lattice crust, make sure to cut about 3 finger-length slits in the top crust to allow steam to escape during baking.
-
Egg Wash and Sugar: Beat the egg in a small bowl and brush it evenly over the entire top crust. Sprinkle the cinnamon sugar mixture generously over the crust until it is completely covered. This will create a beautiful, golden-brown, and slightly crunchy top.
-
Bake the Pie: Bake for 10 minutes at 450°F (232°C). Place a cookie sheet on the rack beneath the pie in case any filling bubbles over. After 10 minutes, reduce the oven temperature to 350°F (175°C) and bake for an additional 50 minutes, or until the crust is golden brown and the filling is bubbling.
-
Cool and Serve: Remove the pie from the oven and place it on a cooling rack. Let it cool completely before slicing and serving. This is crucial, as the filling will continue to thicken as it cools.
Expert Tips & Tricks
- Keep it Cold: The key to a flaky pie crust is keeping the ingredients cold. Use ice-cold water and chilled butter, and chill the dough before rolling it out.
- Don’t Overwork the Dough: Over-kneading the dough will develop the gluten and result in a tough crust. Mix the dough just until it comes together.
- Prevent a Soggy Bottom Crust: Blind baking the bottom crust for 15 minutes before adding the filling can help prevent a soggy bottom.
- Apple Variety is Key: Granny Smith apples provide a tartness that balances the sweetness of the sugar. Feel free to mix in other varieties like Honeycrisp or Braeburn for a more complex flavor.
- Adjust Sugar to Taste: The amount of sugar can be adjusted depending on the tartness of the apples and your personal preference.
- Add a Touch of Acid: The lemon zest adds a bright, acidic note that enhances the flavor of the apples.
Serving & Storage Suggestions
Serve the pie warm or at room temperature. A scoop of vanilla ice cream or a dollop of whipped cream is the perfect accompaniment. Leftover pie can be stored at room temperature for up to 2 days, or in the refrigerator for up to 5 days. To reheat, cover the pie loosely with foil and bake at 350°F (175°C) until warmed through. You can also freeze the baked pie for up to 3 months. Thaw overnight in the refrigerator before reheating.
Nutritional Information
| Nutrient | Amount per Serving | % Daily Value |
|---|---|---|
| Calories | 663.5 kcal | N/A |
| Calories from Fat | 251 g | 38% |
| Total Fat | 27.9 g | 42% |
| Saturated Fat | 17.1 g | 85% |
| Cholesterol | 93.5 mg | 31% |
| Sodium | 460.8 mg | 19% |
| Total Carbohydrate | 100.7 g | 33% |
| Dietary Fiber | 6 g | 24% |
| Sugars | 54.4 g | 217% |
| Protein | 6.5 g | 12% |
Note: Nutritional information is an estimate and may vary based on specific ingredients and portion sizes.
Variations & Substitutions
- Gluten-Free Crust: Use a gluten-free flour blend and gluten-free sour cream for a gluten-free pie.
- Lattice Crust: Create a beautiful lattice crust for the top of the pie for a more decorative presentation.
- Caramel Apple Pie: Add a layer of caramel sauce over the apples before topping with the crust for a decadent treat.
- Apple Crumble Topping: Instead of a top crust, use a crumble topping made with flour, butter, sugar, and oats.
- Different Apple Varieties: Experiment with different apple varieties, such as Honeycrisp, Gala, or Braeburn, for a unique flavor.
FAQs (Frequently Asked Questions)
Q: How do I prevent the pie crust from burning?
A: If the crust starts to brown too quickly, cover the edges with aluminum foil or a pie shield during the last 20-30 minutes of baking.
Q: Why is my apple pie filling too runny?
A: Make sure to use enough cornstarch to thicken the filling. Also, allowing the pie to cool completely before slicing will give the filling more time to set.
Q: Can I make this pie ahead of time?
A: Yes, you can bake the pie a day or two in advance. Store it covered at room temperature or in the refrigerator.
Q: How do I know when the apple pie is done?
A: The crust should be golden brown, and the filling should be bubbling. You can also insert a knife into the center of the pie; it should slide in easily with little resistance.
Q: Can I freeze apple pie?
A: Yes, you can freeze a baked apple pie. Wrap it tightly in plastic wrap and then in aluminum foil. Freeze for up to 3 months. Thaw overnight in the refrigerator before reheating.
Final Thoughts
This Granny Smith apple pie is a timeless classic for a reason. Its simple ingredients, comforting flavors, and delightful aroma make it the perfect dessert for any occasion. Don’t be intimidated by the process – with a few simple techniques, you can create a homemade pie that will impress your family and friends. So, preheat your oven, gather your ingredients, and get ready to experience the joy of baking this delicious apple pie. I encourage you to make it your own by experimenting with different apple varieties or adding your own personal touches. Share your creations and feedback – I’d love to hear about your apple pie adventures! Pair it with a warm cup of tea or a scoop of vanilla ice cream for the ultimate indulgence. Happy baking!