
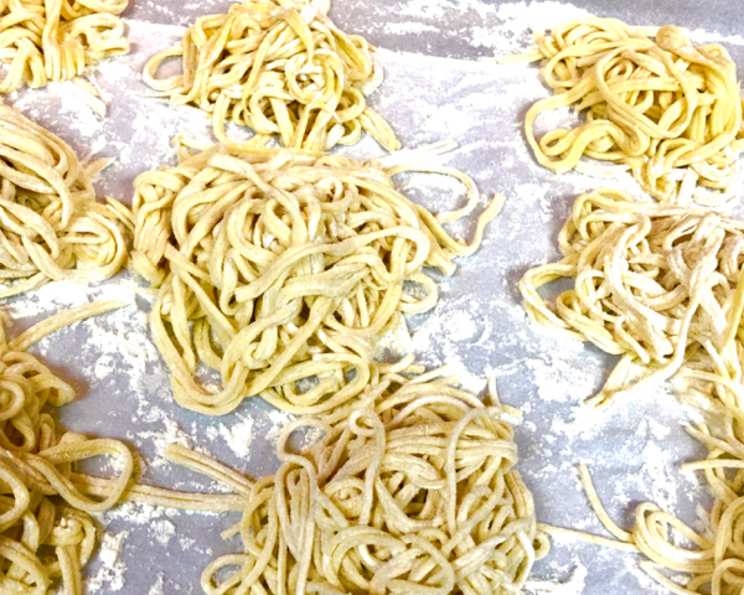
The Joy of Homemade: Perfect Spaghetti with Your KitchenAid
There’s something truly special about homemade pasta. It takes me back to my grandmother’s kitchen, the scent of flour dusting the air as she expertly kneaded and rolled dough for what seemed like hours. We’d laugh and talk as she shared her wisdom, each strand of pasta imbued with love and tradition. Now, with my trusty KitchenAid and its pasta attachments, I can recreate that magic in my own kitchen, and I’m excited to share my go-to recipe with you.
Recipe Overview
- Prep Time: 2 hours 15 minutes (includes rest & drying)
- Cook Time: 15 minutes
- Total Time: 2 hours 30 minutes
- Servings: 8
- Yield: 1 1/2 pounds fresh pasta
- Dietary Type: Vegetarian
Ingredients
- 2 cups semolina flour
- 2 cups all-purpose flour (bread flour recommended for higher gluten)
- 2 large eggs, well beaten
- 1 tablespoon extra virgin olive oil
- 1/2 teaspoon salt
- 1 cup cold water
Equipment Needed
- Large bowl
- Fork
- Sifter
- KitchenAid stand mixer
- Flat beater attachment
- Dough hook attachment
- Plastic wrap
- Pasta roller attachment (KitchenAid)
- Spaghetti cutter attachment (KitchenAid)
- Pasta drying rack (or plastic hangers)
Instructions
- In a large bowl, combine the semolina flour, all-purpose flour, and salt. Using a fork, mix these ingredients together, then using a sifter, sift into another bowl. Set aside. Sifting ensures a lighter, more delicate pasta.
- In a separate bowl, combine the eggs and beat well with a fork.
- Add the extra virgin olive oil to the eggs and mix with a fork.
- Add the cold water to the egg and olive oil mixture, and mix with a fork. Using cold water helps to develop the gluten properly.
- Pour the liquid ingredients into your mixer bowl and attach the flat beater.
- Add half of the sifted flour mixture, turn to speed 2 and mix for 20 seconds. Add the rest of the sifted flour mixture and mix an additional 20 seconds.
- Exchange the flat beater for the dough hook. Turn to speed 2 and knead for 2 to 3 minutes, until a dough ball is formed. Watch carefully; the dough should start pulling away from the sides of the bowl.
- Remove dough from bowl and hand-knead for 2 to 3 minutes. This step is crucial for developing the right texture. Good pasta dough should be elastic and pliable, but firm (not soft like bread dough). It should not stick to your fingers or fall apart. To test for the correct consistency, pinch a small amount of dough together after kneading for 2 to 3 minutes — if the dough stays together without sticking to your fingers or falling apart, it should work well. If too soft, add more flour by dusting the top of the dough and knead some more, continuing to dust the dough with flour until achieving the right consistency. If too dry, wet your hands and knead some more, continuing to wet your hands a little at a time & knead until the right consistency.
- Wrap dough in plastic wrap and put in the refrigerator for a minimum of 1 hour. This resting period allows the gluten to relax, resulting in a more tender pasta.
- Remove dough from refrigerator and let it rest for 15 minutes at room temperature. This allows the dough to warm up slightly, making it easier to work with.
- Using your hands, roll dough into a log, about 12 inches long.
- Cut log into 8 slices, then flatten each piece slightly. Spread slices out so they aren’t touching and cover with plastic wrap. This prevents the dough from drying out while you work.
- Using the widest setting (1 on the KitchenAid), turn mixer to speed 2 and taking one piece of the flattened dough, feed through rollers. Fold dough in half & roll again. Repeat 3 more times, lightly dusting the sheet of pasta in between each rolling if it feels the slightest bit sticky. This initial process helps to develop the gluten and create a smooth, even sheet of pasta.
- Move adjustment knob to setting 2 and feed the dough sheet through the rollers once.
- Move adjustment knob to setting 3 and feed the dough sheet through the rollers once.
- Continue to increase roller setting until desired dough thickness is reached: 3 for Thick “kluski” type egg noodles; 4 for standard egg noodles; 4 or 5 for lasagna noodles, fettuccine, spaghetti, and ravioli; 6 or 7 for tortellini, thin fettuccine, and linguine fini; 7 or 8 for VERY thin “angel-hair” type pasta/capellini or VERY fine linguine.
- Separate sheets once desired thickness is achieved with a thin towel or piece of plastic wrap dusted with flour, so the dough doesn’t dry out too much.
- To cut the noodles, exchange the Pasta Roller Sheet attachment for the cutter attachment of choice, either the fettuccine cutter for wider noodles or the spaghetti cutter for spaghetti or linguine. Run each sheet through the cutter. Each sheet can be cut in half or thirds before putting through the cutter to prevent “too long” of strips.
- After cutting each sheet, hang to dry on a pasta rack. Dry for a minimum of 10 minutes. If you don’t have a pasta rack, plastic hangers work great! Flour the pasta rack or the plastic hangers before placing pasta on them. Separate the strips of pasta as best you can, so they aren’t touching. This way they won’t dry sticking together. If you want to dry the pasta for later use, dry for several hours and then store in airtight plastic bags (i.e. Ziploc Freezer or Storage Bags).
- When ready to cook, boil your water and add salt. For the 1.5 pounds of pasta, use 2 teaspoons of salt. Oil in the water is not necessary.
- Fresh pasta will cook faster than commercially bought pasta — about 4 to 5 minutes in vigorously boiling water for al dente. Start tasting after 3 minutes to prevent overcooking.
Expert Tips & Tricks
- Don’t be afraid to experiment with different flours. A combination of semolina and bread flour provides a wonderful texture, but you can also try using all-purpose flour on its own.
- If your dough is too sticky, add a little more flour, one tablespoon at a time, until it reaches the right consistency.
- If your dough is too dry, add a teaspoon of water at a time until it becomes pliable.
- Dust your work surface and the pasta sheets with flour to prevent sticking.
- For a richer flavor, try using duck eggs instead of chicken eggs.
- Don’t overcrowd the pot when cooking the pasta, or it will stick together. Cook in batches if necessary.
Serving & Storage Suggestions
Serve your freshly made spaghetti with your favorite sauce. It’s delicious with a simple tomato sauce, a creamy pesto, or a hearty meat ragu. For a truly authentic experience, try making your own sauce from scratch.
Store any leftover cooked pasta in an airtight container in the refrigerator for up to 3 days. To reheat, simply add it to boiling water for a minute or two, until heated through.
You can also dry the uncooked pasta for longer storage. Spread it out on a baking sheet lined with parchment paper and let it air dry for several hours, or until completely dry. Store in an airtight container at room temperature for up to 2 months.
Nutritional Information
| Nutrient | Amount per Serving | % Daily Value |
|---|---|---|
| Calories | 296.8 kcal | N/A |
| Calories from Fat | 32 g | 11% |
| Total Fat | 3.6 g | 5% |
| Saturated Fat | 0.7 g | 3% |
| Cholesterol | 46.5 mg | 15% |
| Sodium | 165.1 mg | 6% |
| Total Carbohydrate | 54.3 g | 18% |
| Dietary Fiber | 2.5 g | 9% |
| Sugars | 0.1 g | 0% |
| Protein | 10.1 g | 20% |
Note: Nutritional information is an estimate and may vary based on specific ingredients and preparation methods.
Variations & Substitutions
- Gluten-Free Pasta: Use a gluten-free flour blend designed for pasta making. You may need to adjust the amount of water to achieve the correct dough consistency.
- Whole Wheat Pasta: Substitute up to half of the all-purpose flour with whole wheat flour for a nuttier flavor and increased fiber.
- Herb-Infused Pasta: Add finely chopped fresh herbs, such as basil, oregano, or rosemary, to the dough for a burst of flavor.
- Spinach Pasta: Puree cooked spinach and add it to the egg mixture for a vibrant green pasta.
FAQs (Frequently Asked Questions)
Q: Why is it important to rest the dough in the refrigerator?
A: Resting the dough allows the gluten to relax, which results in a more tender pasta. It also makes the dough easier to roll out.
Q: Can I use a different type of flour?
A: Yes, you can experiment with different flours, such as whole wheat flour or gluten-free flour. Just be sure to adjust the amount of water as needed.
Q: How do I prevent the pasta from sticking together while cooking?
A: Use a large pot with plenty of boiling water. Don’t overcrowd the pot, and stir the pasta frequently during the first few minutes of cooking.
Q: Can I freeze the fresh pasta?
A: Yes, you can freeze the fresh pasta. Spread it out on a baking sheet lined with parchment paper and freeze until solid. Then, transfer it to a freezer bag and store for up to 2 months. Cook directly from frozen, adding a minute or two to the cooking time.
Q: How do I know when the pasta is cooked al dente?
A: Al dente means “to the tooth” in Italian. The pasta should be firm to the bite, with a slight resistance in the center. Start tasting the pasta after 3 minutes of cooking to prevent overcooking.
Final Thoughts
Making homemade pasta might seem daunting at first, but with a KitchenAid mixer and this recipe, it’s surprisingly easy and incredibly rewarding. The taste and texture of fresh pasta are simply unmatched. So, gather your ingredients, put on some music, and get ready to embark on a culinary adventure. Don’t be afraid to experiment and make it your own. Share your creations with loved ones and savor the joy of homemade goodness. Buon appetito!