
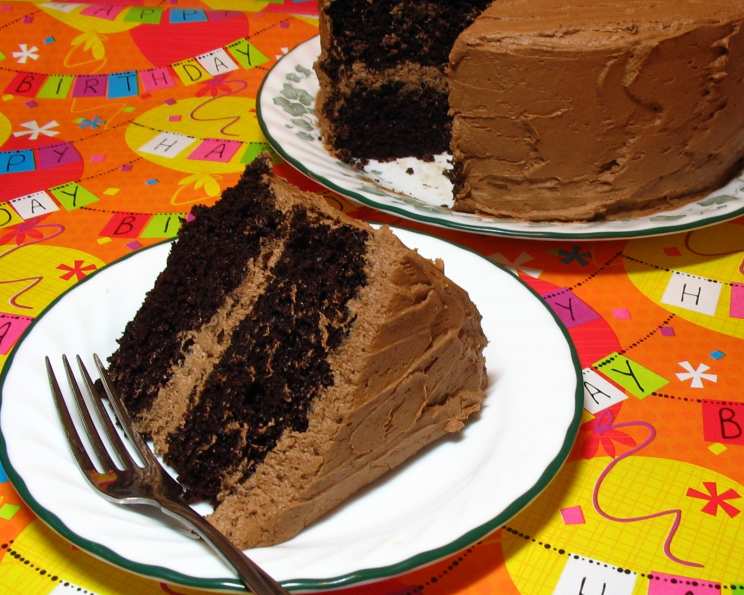
Perfect One-Bowl Chocolate Layer Cake
The aroma of chocolate cake baking fills my kitchen with memories of childhood birthdays. I remember watching my grandmother, a true magician in the kitchen, effortlessly whip up a chocolate cake that was the centerpiece of every celebration. The rich, moist texture and intense chocolate flavor made it a family favorite, and this recipe is my attempt to capture that same delightful experience, simplified for the modern baker. It proves that you don’t need fancy equipment or complicated techniques to create a truly spectacular cake.
Recipe Overview
- Prep Time: 15 minutes
- Cook Time: 30-35 minutes
- Total Time: 45-50 minutes
- Servings: 8-10
- Yield: 1 cake
- Dietary Type: Vegetarian
Ingredients
- 2 cups sugar
- 1 3⁄4 cups all-purpose flour
- 3⁄4 cup sifted unsweetened cocoa powder (good quality is highly recommended!)
- 1 1⁄2 teaspoons baking powder
- 1 1⁄2 teaspoons baking soda
- 1 teaspoon salt
- 2 eggs
- 1 cup buttermilk (or 1 cup milk)
- 2 teaspoons vanilla extract
- 1 cup strong coffee, cooled
- 1⁄2 cup vegetable oil
Equipment Needed
- Two 9-inch round cake pans (or two 8-inch round cake pans)
- Large mixing bowl
- Electric mixer
- Measuring cups and spoons
- Sifter
- Rubber spatula
- Oven
Instructions
- Begin by preheating your oven to 350 degrees F (175 degrees C). It is important to make sure your oven rack is set to the second-lowest position. This helps ensure even baking.
- Prepare your cake pans. Grease the inside of two 9-inch round cake pans (or 8-inch cake pans) thoroughly with shortening or butter. Then, flour the pans, tapping out any excess. This prevents the cake from sticking and allows for easy release after baking. If using 8-inch cake pans, be aware that the baking time may need to be increased slightly.
- In a large mixing bowl, combine the sugar, flour, sifted cocoa powder, baking powder, baking soda, and salt. Use a whisk to mix the dry ingredients together until they are thoroughly combined. This ensures that the leavening agents (baking powder and baking soda) are evenly distributed, which is critical for a light and fluffy cake. Make sure to sift your cocoa powder to avoid any lumps.
- Add the eggs, cooled coffee, buttermilk (or milk), vanilla, and oil to the bowl with the dry ingredients. Using an electric mixer, begin mixing on medium speed. Beat the ingredients together until the batter is smooth. This step is crucial for developing the gluten in the flour, which gives the cake its structure.
- Continue to beat the batter for another 2 minutes. The batter will be quite thin. Don’t be alarmed; this is normal for this recipe and contributes to the cake’s moist texture.
- Divide the batter evenly between the two prepared cake pans. Use a kitchen scale if you want to be precise, or simply eyeball it as best you can.
- Bake for approximately 30-35 minutes. The baking time may vary depending on your oven and the size of the cake pans you’re using.
- To test for doneness, insert a toothpick into the center of one of the cakes. If the toothpick comes out clean or with only a few moist crumbs attached, the cake is done. If the toothpick comes out with wet batter, continue baking for a few more minutes and test again.
- Once the cakes are done, remove them from the oven and let them cool in the pans for about 10 minutes. This allows the cakes to firm up slightly, making them easier to remove from the pans without breaking.
- After 10 minutes, invert the cakes onto a wire rack to cool completely. Be sure the cakes are completely cool before frosting.
Expert Tips & Tricks
- Cocoa Powder Quality: Using a good-quality cocoa powder will make a noticeable difference in the flavor of the cake. Look for Dutch-processed cocoa powder for a richer, smoother chocolate flavor.
- Coffee Enhancement: The coffee intensifies the chocolate flavor without making the cake taste like coffee. If you don’t have coffee on hand, you can substitute hot water, but the flavor will be slightly less intense.
- Buttermilk Substitute: If you don’t have buttermilk, you can make a quick substitute by adding 1 tablespoon of lemon juice or white vinegar to a measuring cup and then filling the cup with milk to the 1-cup line. Let it sit for 5 minutes to curdle slightly before using.
- Even Baking: To ensure even baking, rotate the cake pans halfway through the baking time.
- Preventing a Dome: If your cakes tend to dome in the center while baking, try using baking strips wrapped around the cake pans. These strips help to insulate the edges of the pan, allowing the cake to bake more evenly.
- Freezing Cakes: These cake layers freeze beautifully! Wrap them tightly in plastic wrap and then place them in a freezer bag. They can be stored in the freezer for up to 2 months. Thaw them completely before frosting.
Serving & Storage Suggestions
Serve the cooled cake with your favorite frosting – chocolate buttercream, vanilla buttercream, or even a simple dusting of powdered sugar. For an extra touch, add fresh berries or chocolate shavings.
To store leftover cake, keep it in an airtight container at room temperature for up to 3 days or in the refrigerator for up to a week. For longer storage, wrap individual slices tightly and freeze them for up to 2 months.
Nutritional Information
(Note: Values are approximate and will vary based on specific ingredients and frosting used.)
| Nutrient | Amount per Serving | % Daily Value |
|---|---|---|
| Calories | 465.7 kcal | N/A |
| Calories from Fat | 148 g | 32% |
| Total Fat | 16.5 g | 25% |
| Saturated Fat | 3 g | 15% |
| Cholesterol | 47.7 mg | 15% |
| Sodium | 648.1 mg | 27% |
| Total Carbohydrate | 77.4 g | 25% |
| Dietary Fiber | 3.4 g | 13% |
| Sugars | 51.8 g | 207% |
| Protein | 7 g | 14% |
Variations & Substitutions
- Gluten-Free: Substitute a gluten-free all-purpose flour blend for the regular all-purpose flour. You may need to add a binder, such as xanthan gum, to improve the cake’s texture.
- Dairy-Free: Replace the buttermilk with a plant-based milk alternative, such as almond milk or soy milk.
- Spice It Up: Add a teaspoon of cinnamon or a pinch of cayenne pepper to the dry ingredients for a warm, spicy twist.
- Chocolate Chips: Fold in 1 cup of chocolate chips into the batter before baking for an extra chocolatey treat.
- Mocha Cake: Use mocha-flavored coffee, or add 2 tablespoons of instant espresso powder to the dry ingredients for a deeper coffee flavor.
FAQs (Frequently Asked Questions)
Q: Can I use this batter for cupcakes?
A: While possible, this batter is designed for cake pans. Its thinner consistency may not work as well for cupcakes, and they may require adjusted baking times to prevent them from drying out.
Q: Why is the batter so thin?
A: The thin batter is intentional and contributes to the cake’s moist and tender texture. Don’t worry, it will bake up beautifully.
Q: Can I use oil other than vegetable oil?
A: Yes, you can substitute another neutral-flavored oil, such as canola oil or sunflower oil.
Q: My cake sank in the middle. What went wrong?
A: Several factors can cause a cake to sink, including over-mixing the batter, opening the oven door too frequently, or under-baking the cake. Make sure to follow the recipe instructions carefully and avoid opening the oven door during baking.
Q: Can I make this cake ahead of time?
A: Yes, you can bake the cake layers ahead of time and store them tightly wrapped in the refrigerator for up to 2 days. Allow them to come to room temperature before frosting.
Final Thoughts
This one-bowl chocolate layer cake is a testament to the fact that simple can be extraordinary. Its rich, moist texture and deep chocolate flavor make it a crowd-pleaser for any occasion. Don’t be intimidated by baking; this recipe is incredibly forgiving and easy to follow. So, gather your ingredients, preheat your oven, and prepare to create a chocolate masterpiece that will impress your family and friends. And do not hesitate to top with chocolate ganache for extra indulgence! Share your baking adventures with us and let us know how this cake becomes a part of your own cherished memories.