
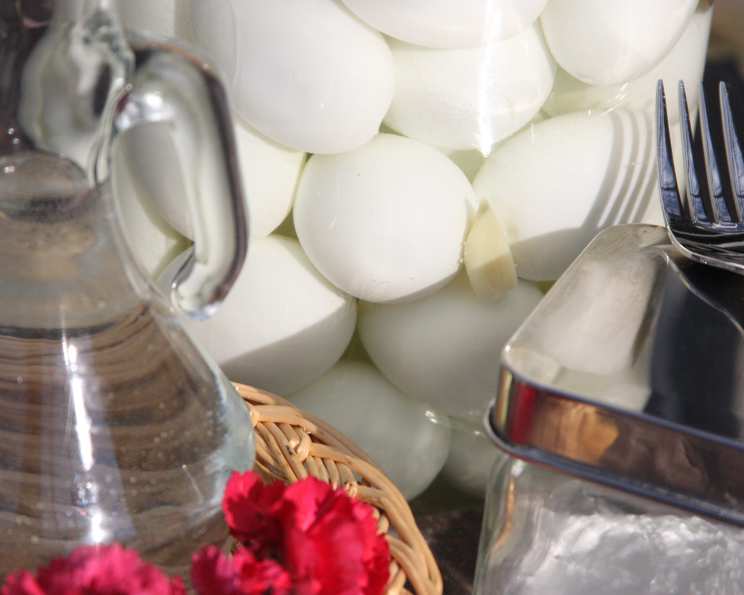
Perfectly Pickled Eggs: A Chef’s Guide to a Classic
My grandmother, bless her heart, always had a jar of pickled eggs tucked away in the back of her refrigerator. As a kid, I wasn’t quite sure what to make of them – the tangy, vinegary aroma wafting out each time the fridge door swung open was intriguing but also a little intimidating. Now, years later and after countless culinary adventures, I understand the simple genius of a perfectly pickled egg. It’s a flavor bomb, a protein powerhouse, and a testament to the art of preservation. And I’m delighted to share the secrets I’ve learned over the years to achieve that perfect pickled egg, just like Grandma used to make.
Recipe Overview
- Prep Time: 15 minutes
- Cook Time: 20 minutes
- Total Time: 2 weeks (includes pickling time)
- Servings: 12
- Yield: 1 jar
- Dietary Type: Gluten-Free, Dairy-Free
Ingredients
- 12 large eggs
- 1 ½ cups white vinegar
- 1 ½ cups water
- 1 ½ teaspoons salt
- 2 garlic cloves, peeled, whole
- 2 bay leaves
- 1 tablespoon salt
- ¾ cup white vinegar
- Water for boiling the eggs
Equipment Needed
- Large pot
- Medium pot
- Large bowl
- Sterile jars or containers with lids
- Egg piercing tool or needle (optional)
Instructions
-
Using an egg piercing tool or a needle, carefully poke a small hole in each egg shell at the wider end (the bottom) of the egg. This is where the air sac is located. Piercing the shell allows the air to escape as the egg heats, preventing those unsightly cracks that often plague hard-boiled eggs.
-
Add water and 1 tablespoon of salt to a large pot. Use enough water to completely submerge the eggs. Bring the water to a rapid boil.
-
Once the water is boiling vigorously, slowly pour in ¾ cup of white vinegar. The salt and vinegar added to the boiling water are not intended to flavor the eggs themselves, but rather to assist in the peeling process. Don’t worry; your eggs won’t taste like vinegar at this stage!
-
Immediately and gently lower the eggs into the boiling water, one at a time, taking care not to crack the shells. Use a spoon if needed to gently guide them.
-
Bring the water back to a boil, then reduce the heat slightly to maintain a gentle, rolling boil. Boil the eggs for precisely 15 minutes. Setting a timer is crucial for achieving that perfectly cooked yolk.
-
After 15 minutes, carefully drain the hot water from the pot. Immediately dump the eggs into a large bowl filled with ice water. This abrupt temperature change stops the cooking process and further aids in easy peeling. I prefer a large salad bowl for this step.
-
Allow the eggs to cool completely in the ice bath, which usually takes about 10-15 minutes. Once they’re cool enough to handle, crack the shells gently all over. You should now be able to peel the eggs easily, revealing a smooth, unblemished surface.
-
While the eggs are cooling, prepare the pickling brine. In a medium pot, combine 1 ½ cups of white vinegar, 1 ½ cups of water, 1 ½ teaspoons of salt, the 2 peeled garlic cloves, and the 2 bay leaves.
-
Bring the vinegar mixture to a boil over medium heat. Once boiling, reduce the heat to low, cover the pot, and simmer for 5 minutes. This allows the flavors to meld together beautifully.
-
Carefully transfer the peeled eggs to sterile jars or containers. Pack them in snugly, leaving some space at the top.
-
Pour the hot vinegar mixture over the eggs, ensuring that they are completely submerged.
-
Seal the jars tightly with their lids.
-
Allow the jars to cool completely at room temperature. Once cooled, refrigerate the pickled eggs for at least 2 weeks before serving. This allows the flavors to fully penetrate the eggs. The longer they sit, the more flavorful they become!
Expert Tips & Tricks
-
Freshness Matters: While this recipe is fantastic for using up extra eggs, remember that fresh eggs can sometimes be harder to peel. Letting your eggs sit in the fridge for a few days before pickling can improve the peeling process.
-
Sterilization is Key: Always use sterilized jars to prevent bacterial growth and ensure your pickled eggs are safe to eat. You can sterilize jars by boiling them in water for 10 minutes.
-
Don’t Overcook: Overcooked eggs will have a green ring around the yolk and a rubbery texture. Sticking to the 15-minute boiling time is crucial.
-
Flavor Boost: For a spicier kick, add a few dried red pepper flakes to the pickling brine. You can also experiment with other spices like mustard seeds, peppercorns, or even a small piece of ginger.
Serving & Storage Suggestions
Pickled eggs are a fantastic snack, appetizer, or addition to a charcuterie board. They can be sliced and added to salads, deviled, or simply enjoyed straight from the jar.
Store your pickled eggs in the refrigerator, fully submerged in the brine. They will keep for up to 3 months. It is not recommended to freeze pickled eggs, as freezing can alter the texture and flavor.
Nutritional Information
| Nutrient | Amount per Serving | % Daily Value |
|---|---|---|
| Calories | 83.7 kcal | N/A |
| Calories from Fat | 44 g | 53% |
| Total Fat | 5 g | 7% |
| Saturated Fat | 1.6 g | 7% |
| Cholesterol | 211.5 mg | 70% |
| Sodium | 945 mg | 39% |
| Total Carbohydrate | 1 g | 0% |
| Dietary Fiber | 0 g | 0% |
| Sugars | 0.6 g | 2% |
| Protein | 6.3 g | 12% |
Note: Nutritional information is an estimate and can vary based on specific ingredients used.
Variations & Substitutions
-
Spicy Pickled Eggs: Add sliced jalapeños or a pinch of cayenne pepper to the brine for a fiery kick.
-
Beet Pickled Eggs: Add cooked beets or beet juice to the brine for a vibrant pink color and a slightly earthy flavor.
-
Sweet Pickled Eggs: Add a tablespoon or two of sugar to the brine for a sweeter taste.
-
Herb-Infused Pickled Eggs: Add fresh herbs like dill, thyme, or rosemary to the brine for a fragrant twist.
FAQs (Frequently Asked Questions)
Q: Why do I need to poke a hole in the egg before boiling?
A: Poking a small hole allows air to escape during boiling, preventing the shell from cracking and making the eggs easier to peel.
Q: Can I use different types of vinegar?
A: While white vinegar is the most common choice, you can experiment with apple cider vinegar or other vinegars for a slightly different flavor profile.
Q: How long do pickled eggs last in the refrigerator?
A: Properly stored pickled eggs can last for up to 3 months in the refrigerator.
Q: Can I use brown eggs instead of white eggs?
A: Absolutely! Brown eggs and white eggs are nutritionally the same and can be used interchangeably in this recipe.
Q: Why do I need to wait two weeks before eating the pickled eggs?
A: The two-week waiting period allows the flavors of the brine to fully penetrate the eggs, resulting in a more flavorful and well-balanced final product.
Final Thoughts
Pickled eggs are more than just a snack; they’re a culinary adventure, a taste of nostalgia, and a testament to the simple pleasures of homemade food. This recipe is your guide to creating perfectly pickled eggs every time, whether you’re looking to impress guests, add a unique touch to your next meal, or simply relive a cherished childhood memory. Don’t be afraid to experiment with different flavors and spices to create your own signature pickled egg recipe. So grab some fresh eggs, gather your ingredients, and get ready to embark on a pickling adventure that will tantalize your taste buds and leave you craving more. I encourage you to try it and welcome any feedback or variations you come up with! Perhaps pair it with a crisp, cold beer for the ultimate satisfying treat.