
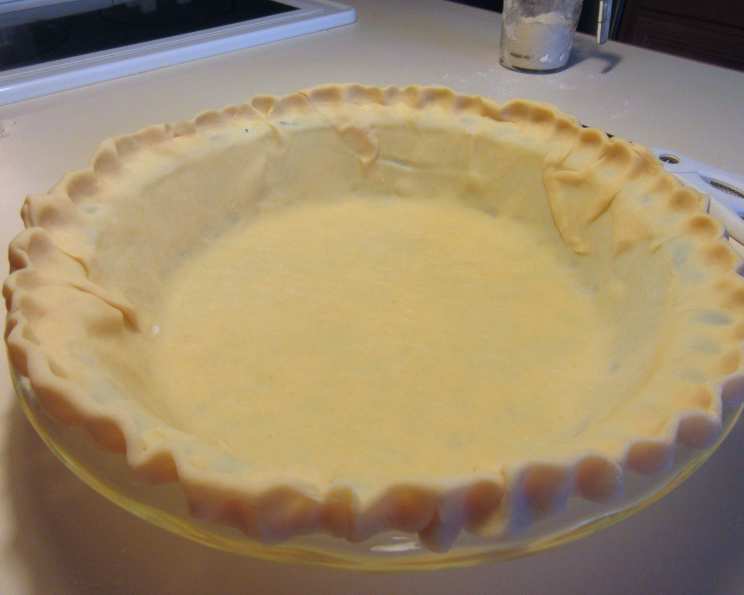
Perfect Pie Crust: The King Arthur Flour Method
The first time I bit into a truly exceptional homemade pie, it wasn’t the filling that blew me away – it was the crust. It shattered delicately, releasing a buttery aroma that mingled with the sweet scent of the fruit inside. It was at my grandmother’s table, of course, and she chuckled, saying, “The secret’s in the butter, dear, and a little bit of patience.” While I’ve since learned many tips and tricks, I’ve never forgotten that first pie, and the pursuit of the perfect crust has been a lifelong culinary adventure. This recipe, adapted from the brilliant minds at King Arthur Baking Company, brings back those memories with every flaky, buttery bite.
Recipe Overview
- Prep Time: 25 minutes
- Cook Time: Variable, dependent on pie filling
- Total Time: Variable, dependent on pie filling + chilling time
- Yields: 1 pie crust
- Serves: 8
- Dietary Type: Vegetarian (easily adaptable to vegan – see variations)
Ingredients
- 2 ½ cups all-purpose flour
- 1 ¼ teaspoons salt
- 1 cup (2 sticks) unsalted butter, very cold
- ¼ – ½ cup ice water
Equipment Needed
- Large mixing bowl
- Dough scraper or pastry blender
- Plastic wrap
- Rolling pin
- Pie dish (9-inch recommended)
Instructions
-
In a large bowl, thoroughly sift together the all-purpose flour and salt. This ensures even distribution of the salt and creates a lighter, more tender crust. Set the bowl aside.
-
Prepare the butter. Cut one stick (½ cup) of unsalted butter into small, even pieces – about ½-inch cubes. Cut the remaining stick (½ cup) into larger pieces, approximately 1-inch to 1 ½-inch chunks. The differing sizes of butter contribute to both tenderness and flakiness.
-
Incorporate the smaller butter pieces. Add the smaller cubes of butter to the flour mixture. Using a dough scraper or pastry blender, cut the butter into the flour until the mixture resembles coarse crumbs with some pea-sized pieces of butter remaining. Don’t overwork it at this stage; you want visible bits of butter.
-
Add the larger butter chunks. Now, add the larger hunks of butter to the bowl. Gently coat each chunk with flour, ensuring they are lightly covered to prevent sticking during the next step.
-
Flatten the butter. This is where the magic happens! Take each larger piece of butter individually and squeeze it firmly between your thumb and forefinger, flattening it into a thin, pancake-like shape. Don’t aim for perfection; the goal is to create flat layers of butter within the flour. Grab, squeeze, and move on to the next piece, working efficiently.
-
Mix and hydrate. After flattening all the butter pieces, use your dough scraper to gently stir the mixture, distributing the flattened butter evenly throughout the flour.
-
Add the ice water gradually. Begin adding the ice water, a tablespoon at a time, while using your dough scraper to gently combine. Continue adding water, bit by bit, until the dough begins to come together into a shaggy mass. Be careful not to add too much water at once, as this can lead to a tough crust. The dough should still appear slightly floury but able to clump together when pressed.
-
Form the dough. Gently gather the shaggy dough into a ball. Avoid overworking it.
-
Wrap and chill. Place a sheet of plastic wrap on your work surface. Place the dough ball on the plastic wrap. Bring the edges of the plastic wrap up and over the dough, encasing it loosely. Gently flatten the dough into a disc about 1-inch thick. This helps the dough chill evenly and makes it easier to roll out later.
-
Chill the dough in the refrigerator for at least 2 hours, or preferably overnight. This allows the gluten to relax and the butter to firm up, resulting in a more tender and flaky crust.
-
After chilling, remove the dough from the refrigerator and allow it to sit at room temperature for about 5-10 minutes to soften slightly before rolling. On a lightly floured surface, roll the dough into a circle that is about 12 inches in diameter (large enough to fit your pie dish with some overhang).
-
Gently transfer the rolled-out dough to your pie dish. Trim the edges of the dough, leaving about a 1-inch overhang. Fold the overhang under and crimp the edges to create a decorative border.
-
At this point, you can either pre-bake the crust (blind bake) for a filled pie that requires no baking, or you can fill the crust and bake according to your pie filling recipe’s instructions. If blind baking, prick the bottom of the crust several times with a fork to prevent it from puffing up. Line the crust with parchment paper and fill with pie weights or dried beans to prevent shrinking. Bake in a preheated oven at 375°F (190°C) for 15-20 minutes, or until the edges are lightly golden brown. Remove the parchment paper and pie weights and bake for another 5-10 minutes, or until the bottom crust is also golden brown.
Expert Tips & Tricks
- Keep everything cold. Cold ingredients are crucial for a flaky crust. Use ice water and ensure your butter is very cold before you begin. You can even chill your flour and mixing bowl for 30 minutes before starting.
- Don’t overwork the dough. Overworking develops the gluten, resulting in a tough crust. Handle the dough as little as possible.
- Blind Baking Perfection: For a truly crisp bottom crust in filled pies, pre-bake (blind bake) your pie crust. Dock the crust well with a fork, use pie weights, and even brush the baked crust with a lightly beaten egg white to seal it before adding your filling.
- Make ahead: This pie dough can be made ahead of time and stored in the refrigerator for up to 3 days or frozen for up to 3 months. Thaw frozen dough in the refrigerator overnight before using.
- Visible Butter: The key to this recipe’s success is those flattened butter pieces. They create flaky layers as the butter melts during baking, resulting in that desirable “VB” (Visible Butter) effect.
Serving & Storage Suggestions
Serve your pie warm or at room temperature, depending on the filling. Store leftover pie in the refrigerator, covered, for up to 3 days. For longer storage, freeze individual slices wrapped tightly in plastic wrap and then in a freezer bag. Reheat refrigerated slices in a 350°F (175°C) oven for 10-15 minutes, or until warmed through. Frozen slices can be reheated directly from frozen, but may require a longer baking time.
Nutritional Information
(Note: Nutritional information is an estimate and will vary depending on specific ingredients and serving size.)
| Nutrient | Amount per Serving | % Daily Value |
|---|---|---|
| Calories | 345 kcal | 17% |
| Total Fat | 23g | 35% |
| Saturated Fat | 15g | 75% |
| Cholesterol | 60mg | 20% |
| Sodium | 368mg | 15% |
| Total Carbohydrate | 30g | 10% |
| Dietary Fiber | 1g | 4% |
| Sugars | 0g | 0% |
| Protein | 4g | 8% |
Variations & Substitutions
- Vegan Pie Crust: Substitute the butter with a vegan butter alternative, such as Miyoko’s Kitchen Cultured Vegan Butter. Ensure the vegan butter is very cold.
- Gluten-Free Pie Crust: Use a gluten-free all-purpose flour blend designed for baking. You may need to add a binder like xanthan gum to help hold the crust together.
- Whole Wheat Pie Crust: Substitute up to half of the all-purpose flour with whole wheat flour for a nuttier flavor and added fiber.
- Sweet Pie Crust: Add 1-2 tablespoons of granulated sugar to the flour mixture for a slightly sweeter crust, ideal for fruit pies.
- Savory Pie Crust: Add herbs and spices to the flour mixture for a savory crust perfect for quiches or meat pies. Try adding dried thyme, rosemary, or black pepper.
FAQs (Frequently Asked Questions)
Q: Why is it important to use ice water?
A: Ice water helps keep the butter cold, which is crucial for creating a flaky crust. Cold butter creates steam during baking, resulting in layers of flaky dough.
Q: Can I use a food processor instead of a dough scraper?
A: While a food processor can be used, it’s easy to over-process the dough, resulting in a tougher crust. Using a dough scraper or pastry blender gives you more control.
Q: What if my dough is too dry?
A: If your dough is too dry and crumbly, add ice water, a teaspoon at a time, until it comes together.
Q: What if my dough is too sticky?
A: If your dough is too sticky, add a tablespoon of flour at a time until it reaches the desired consistency. Make sure to chill the dough for at least 2 hours before rolling.
Q: How do I prevent the crust from shrinking during baking?
A: Ensure the dough is properly chilled, dock the crust with a fork, and use pie weights or dried beans during blind baking.
Final Thoughts
Mastering the art of pie crust is a journey, not a destination. This King Arthur Flour-inspired method offers a reliable and delicious path to flaky, buttery perfection. Don’t be discouraged if your first attempt isn’t flawless – every pie is a learning experience. So, gather your ingredients, channel your inner pastry chef, and bake a pie that will bring joy to your table. And don’t forget to share your creations and feedback; happy baking!