
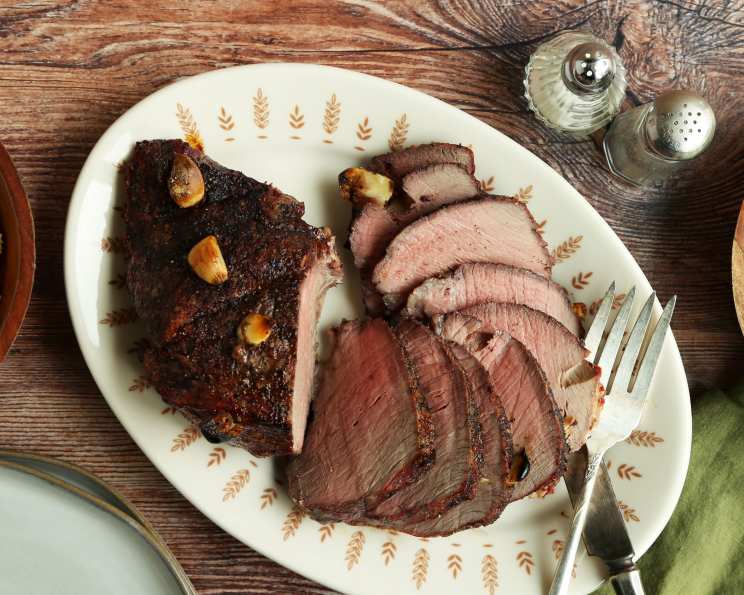
Perfect Rump Roast: A Family Tradition
The aroma of a perfectly cooked rump roast, mingled with garlic and onions, always takes me back to Sunday afternoons at my grandmother’s house. We’d gather around her large, wooden dining table, anticipation filling the air as she carefully carved the tender, juicy meat. The rich gravy, ladled generously over fluffy rice, was the final touch of perfection. It wasn’t just a meal; it was a symbol of family, love, and comfort, and a tradition I cherish to this day.
Recipe Overview
- Prep Time: 15 minutes
- Cook Time: 1 hour 40 minutes
- Total Time: 1 hour 55 minutes
- Servings: 4-6
- Yield: 1 roast
- Dietary Type: Varies (see Variations)
Ingredients
- 1 (4 lb) rump roast (room temperature)
- 3 garlic cloves
- 1 tablespoon salt
- 1 tablespoon pepper
- 1 onion
- 1 cup water
Equipment Needed
- Roasting pan (do NOT use glass)
Instructions
-
Preheat your oven to a blazing 500 degrees Fahrenheit. It’s crucial to avoid using a glass pan for this recipe, as the high initial temperature can cause it to shatter. Opt for a metal roasting pan instead.
-
Prepare the rump roast by making 4-5 small slits across the top surface of the meat. These incisions will act as flavor pockets.
-
Mince half of a garlic clove for each slit (approximately 2.5 cloves in total). Stuff the garlic, along with a generous pinch of salt and pepper, into each of the slits you’ve created. This ensures that the flavor penetrates deep into the roast.
-
Now, generously season the entire rump roast with the remaining salt and pepper. Ensure an even coating for optimal flavor in every bite.
-
Place the prepared roast in the preheated oven and sear it for 20 minutes. This high-heat searing creates a beautiful crust that seals in the juices and adds a layer of rich flavor.
-
After searing, carefully remove the roasting pan from the oven. Add the water to the pan. Then, roughly chop the onion and scatter the pieces around the roast in the pan. The onion will add flavor to the gravy as the roast cooks.
-
Reduce the oven temperature to 275 degrees Fahrenheit.
-
Continue cooking the rump roast for 20 minutes per pound. For a 4-pound roast, this translates to a cooking time of 1 hour and 20 minutes. Keep in mind that this will result in a rare roast. Adjust the cooking time accordingly if you prefer a more well-done roast.
-
To check for doneness, use a meat thermometer. For a rare roast, aim for an internal temperature of 130-135°F. For medium-rare, it should be 135-145°F; for medium, 145-155°F; medium-well, 155-165°F; and well-done, 165°F and above.
-
Once the roast reaches your desired temperature, remove it from the oven and let it rest for at least 10-15 minutes before carving. This allows the juices to redistribute throughout the meat, resulting in a more tender and flavorful roast.
Expert Tips & Tricks
- Room Temperature is Key: Taking the rump roast out of the refrigerator well in advance (at least an hour, but preferably two) allows it to come to room temperature. This ensures more even cooking and prevents a tough, chewy texture.
- Don’t Overcrowd the Pan: Ensure there’s enough space around the roast in the pan. Overcrowding can steam the meat instead of roasting it properly.
- Basting for Extra Moisture: While not essential, basting the roast with the pan juices every 30 minutes during the low-temperature cooking can help keep it extra moist.
- Make-Ahead Gravy: The pan drippings make a delicious gravy. While the roast is resting, strain the drippings into a saucepan, skim off any excess fat, and thicken with a cornstarch slurry (equal parts cornstarch and cold water). Season to taste with salt and pepper.
- Saving Time: If you are short on time and have an Instant Pot, you could sear the roast in it, and then pressure cook it for about 60-70 minutes. The roast won’t have quite the same crust, but it will be very tender.
Serving & Storage Suggestions
Serve the perfectly cooked rump roast sliced thinly against the grain. Ladle generously with the pan gravy. Excellent accompaniments include mashed potatoes, roasted vegetables, steamed rice, or a simple green salad.
Leftover roast can be stored in an airtight container in the refrigerator for up to 3-4 days. For longer storage, freeze the sliced roast in freezer-safe bags or containers for up to 2-3 months.
To reheat, thaw frozen roast in the refrigerator overnight. Gently reheat sliced roast in a skillet with a little beef broth or gravy, or in a low oven (250°F) until warmed through. Avoid overheating, as this can dry out the meat. You can also add slices to soups, sandwiches, or salads.
Nutritional Information
| Nutrient | Amount per Serving | % Daily Value |
|---|---|---|
| Calories | 750 kcal | 38% |
| Total Fat | 45g | 69% |
| Saturated Fat | 20g | 100% |
| Cholesterol | 300mg | 100% |
| Sodium | 1800mg | 75% |
| Total Carbohydrate | 5g | 2% |
| Dietary Fiber | 1g | 4% |
| Sugars | 2g | 4% |
| Protein | 80g | 160% |
Note: Nutritional information is an estimate and may vary based on specific ingredients and portion sizes.
Variations & Substitutions
- Herb-Crusted Roast: Before searing, rub the roast with a mixture of dried herbs such as rosemary, thyme, and oregano.
- Red Wine Braised Roast: Instead of water, use a cup of red wine in the roasting pan. This will add depth and richness to the gravy.
- Spicy Roast: Add a pinch of red pepper flakes to the salt and pepper mixture for a touch of heat.
- Garlic Herb Butter: Mix softened butter with minced garlic, fresh herbs (parsley, thyme, rosemary), salt, and pepper. Spread this mixture under the skin of the roast before cooking for an incredibly flavorful result.
- Dietary Adaptations: The recipe, as written, is naturally gluten-free and dairy-free (if serving without a dairy-based gravy). For a lower-sodium version, reduce the amount of salt used.
FAQs (Frequently Asked Questions)
Q: Why is it important to bring the rump roast to room temperature before cooking?
A: Bringing the roast to room temperature allows for more even cooking, preventing a tough outer layer while the inside remains undercooked.
Q: Can I use a different cut of meat for this recipe?
A: While this recipe is specifically designed for a rump roast, you could potentially use other cuts like a sirloin tip roast or a chuck roast, but cooking times may need adjustments.
Q: What if I don’t have a meat thermometer? How can I tell if the roast is done?
A: While a meat thermometer is highly recommended for accuracy, you can use the touch test. A rare roast will feel soft and spongy, medium-rare will have a bit more resistance, and well-done will feel firm.
Q: Can I prepare the roast ahead of time?
A: You can prepare the roast up to the point of searing the day before. Cover and refrigerate overnight, then bring it back to room temperature before searing and continuing with the recipe.
Q: What’s the best way to carve a rump roast?
A: Use a sharp carving knife and slice the roast thinly against the grain. Identifying the direction of the muscle fibers and cutting perpendicular to them will result in more tender slices.
Final Thoughts
This recipe for Perfect Rump Roast isn’t just about following instructions; it’s about creating memories and sharing a meal that brings people together. Don’t be intimidated by the high searing temperature or the long cooking time – the result is a flavorful, tender roast that will impress your family and friends. So, gather your ingredients, preheat your oven, and embark on this culinary journey. I encourage you to try it, make it your own, and share your feedback. Serve with a robust Cabernet Sauvignon for a truly unforgettable dining experience.