
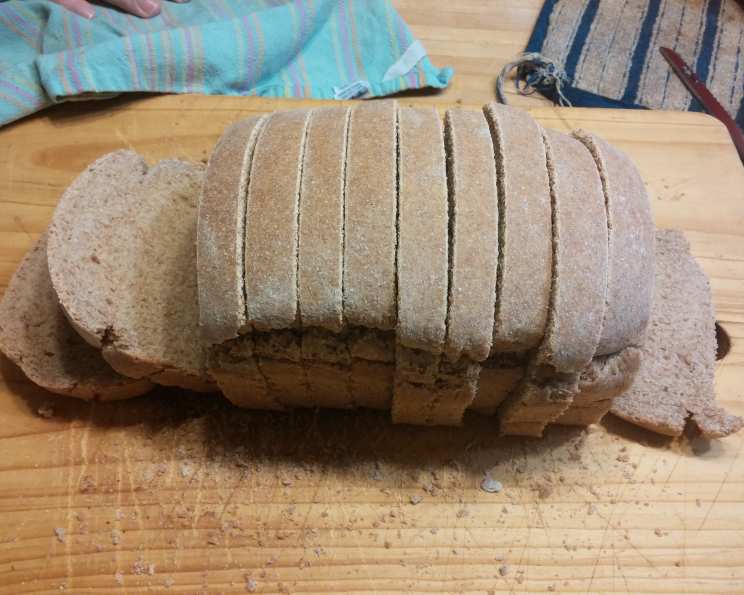
The Humble Joy of Spelt Bread
There’s a particular scent that instantly transports me back to my grandmother’s kitchen: the warm, nutty aroma of freshly baked bread. She always seemed to have a loaf cooling on the counter, ready to be sliced and slathered with butter. While her recipe was a closely guarded secret, this spelt bread evokes that same feeling of simple comfort and homemade goodness. It’s a reminder that the most satisfying foods are often the ones made with love and patience, from wholesome ingredients.
Recipe Overview
- Prep Time: 3 hours
- Cook Time: 45 minutes
- Total Time: 3 hours 45 minutes
- Servings: 2
- Yield: 2 loaves
- Dietary Type: Vegetarian
Ingredients
- 1 tablespoon active dry yeast
- 2 cups warm water (105°F – 110°F)
- 3 tablespoons honey
- 3 tablespoons butter, melted
- 2 teaspoons sea salt
- 6 cups spelt flour (use any combination of whole or white spelt)
Equipment Needed
- Large bowl
- Wooden spoon
- Lightly floured surface
- Lightly greased bowl
- Two 8 1/2″ x 4 1/2″ loaf pans
- Heavy baking sheet
- Wire rack
Instructions
-
In a large, warm bowl, combine the yeast, warm water, and honey. Let this mixture stand for about 10 minutes, or until the yeast has softened and become foamy. This step is crucial to ensure your yeast is active and will leaven the bread properly.
-
Stir in the melted butter and sea salt into the yeast mixture. Then, add 3 cups of the spelt flour. Using a wooden spoon, stir the ingredients vigorously until well combined.
-
Gradually add the remaining flour in increments. Once the dough becomes too stiff to stir easily, transfer it to a lightly floured surface.
-
Knead the dough for approximately 6 minutes. Add the remaining flour as needed, until the dough becomes smooth and elastic. Remember, it is incredibly important to avoid over-kneading the spelt dough. Spelt flour behaves differently than traditional wheat flour; over-kneading will result in a dense, crumbly loaf. Pay close attention to the texture and stop kneading when it feels smooth and elastic, but not tough. The dough will likely still be slightly sticky, and that is perfectly fine!
-
Place the kneaded dough in a lightly greased bowl. Cover the bowl and let it rise in a warm, draft-free spot for approximately 2 hours, or until the dough has doubled in bulk. Rising times can vary depending on the temperature of your environment; check the dough after about an hour and a half to see how it’s progressing.
-
Grease two 8 1/2″ x 4 1/2″ loaf pans thoroughly. Once the dough has doubled, gently punch it down to deflate it.
-
Divide the dough in half and form each half into a smooth loaf shape. Place each loaf into a prepared pan.
-
Cover the loaf pans and let them rise in a warm, draft-free spot for about 1 hour, or until the dough has risen to the top of the pans. Again, keep an eye on the rising time, as it may be shorter than an hour depending on your environment.
-
Preheat the oven to 350°F (175°C).
-
Uncover the risen loaves. Place the pans on a heavy baking sheet. Baking the loaves on a baking sheet helps to ensure even heat distribution and prevents the bottoms from burning.
-
Bake for 45 minutes, or until the tops are light brown and crusty. To check for doneness, insert a wooden skewer into the center of a loaf; it should come out clean. You can also tap the bottom of the loaf; if it sounds hollow, it’s done.
-
Remove the loaves from the oven and immediately tap them out of the pans onto the baking sheet. Turn the oven off and return the breads to the oven to crisp for an additional 5 minutes. This step helps to create a beautifully crisp crust.
-
Remove the loaves from the oven and let them cool completely on a wire rack before slicing and serving. This is crucial, as slicing the bread while it’s still warm will result in a gummy texture.
Expert Tips & Tricks
- For a lighter flavour and texture, you can substitute up to 50% of the whole spelt flour with white spelt flour.
- If your kitchen is particularly cold, you can create a warm environment for the dough to rise by placing the bowl in a slightly warmed (but turned off!) oven or near a radiator.
- To prevent the crust from becoming too dark during baking, you can tent the loaves with foil after about 30 minutes.
- If the dough seems too sticky to knead, resist the urge to add too much flour at once. Add small amounts gradually until the dough becomes manageable but not dry.
- You can enhance the flavour of your spelt bread by adding a tablespoon of molasses or a sprinkle of your favourite seeds (such as flax, sesame, or poppy seeds) to the dough before the final rise.
Serving & Storage Suggestions
This spelt bread is delicious served warm with butter, jam, or your favourite spread. It also makes excellent toast and sandwiches.
To store the bread, wrap it tightly in plastic wrap or place it in an airtight container at room temperature. It will stay fresh for up to 3 days. For longer storage, you can freeze the bread for up to 2 months. To freeze, wrap the loaf tightly in plastic wrap and then in foil. Thaw the bread at room temperature before slicing and serving. You can also refresh day-old bread by lightly toasting it or warming it in the oven.
Nutritional Information
Please note that these values are estimates and may vary based on specific ingredients and portion sizes.
| Nutrient | Amount per Serving | % Daily Value |
|---|---|---|
| Calories | 268 kcal | N/A |
| Total Fat | 17.7 g | 27% |
| Saturated Fat | 11 g | 55% |
| Cholesterol | 45.8 mg | 15% |
| Sodium | 2489 mg | 103% |
| Total Carbohydrate | 28.4 g | 9% |
| Dietary Fiber | 1.7 g | 6% |
| Sugars | 25.9 g | N/A |
| Protein | 2.7 g | 5% |
Variations & Substitutions
- Seeded Spelt Bread: Add 1/4 cup of mixed seeds (sunflower, pumpkin, flax) to the dough during the kneading process for added texture and flavour.
- Herb & Garlic Spelt Bread: Incorporate 2 tablespoons of chopped fresh herbs (rosemary, thyme, or oregano) and 2 cloves of minced garlic into the dough for a savoury twist.
- Sweet Spelt Bread: Add 1/4 cup of raisins or dried cranberries and 1 teaspoon of cinnamon to the dough for a sweeter loaf.
- Dairy-Free: Replace the butter with an equal amount of olive oil or your favourite dairy-free butter alternative.
FAQs (Frequently Asked Questions)
Q: Can I use all white spelt flour for this recipe?
A: Yes, you can use all white spelt flour for a lighter flavour and texture. However, using a combination of whole and white spelt flour provides a more balanced flavour and nutritional profile.
Q: Why is it important not to over-knead spelt dough?
A: Spelt flour contains gluten that is more delicate than wheat flour. Over-kneading can cause the gluten to become tough, resulting in a dense and crumbly loaf.
Q: Can I use a bread machine for this recipe?
A: Yes, you can adapt this recipe for a bread machine. Follow your bread machine’s instructions for adding ingredients and selecting the appropriate settings. Be sure to monitor the dough closely and adjust the kneading and rising times as needed.
Q: How do I know if my yeast is active?
A: To test the yeast, combine it with warm water and honey and let it stand for 10 minutes. If the yeast is active, it will become foamy and bubbly.
Q: My bread is browning too quickly. What should I do?
A: If the bread is browning too quickly, tent it with foil during the last 15-20 minutes of baking. This will help to prevent the crust from burning.
Final Thoughts
I hope this recipe inspires you to bake your own delicious and wholesome spelt bread. Don’t be intimidated by the process; bread making is a rewarding experience, and even if your first loaf isn’t perfect, it will still be delicious. Experiment with different variations, share your creations with loved ones, and enjoy the simple pleasure of homemade bread. I’d love to hear about your baking adventures and any variations you try, so please feel free to share your feedback! Perhaps a warm slice of this spelt bread would pair perfectly with a hearty bowl of soup on a chilly evening, or maybe alongside a vibrant salad for a light lunch. Happy baking!