
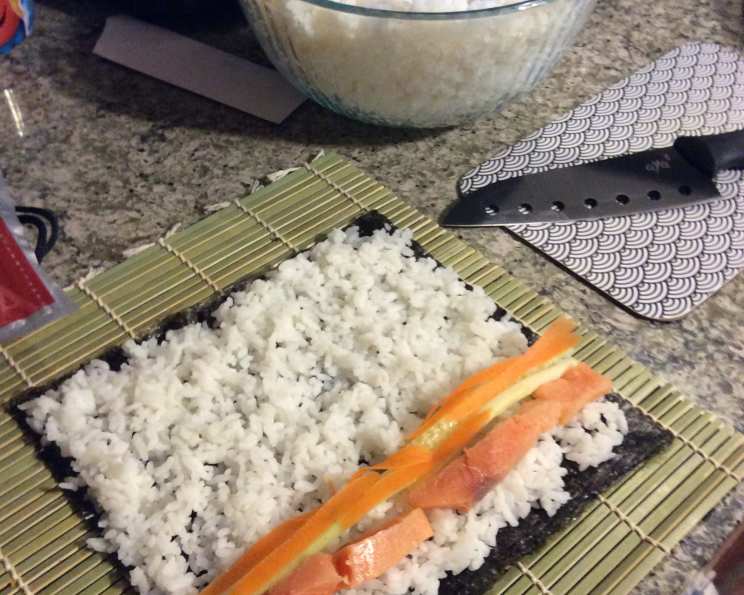
The Secret to Perfect Sushi Rice: A Culinary Journey
My earliest memory of sushi wasn’t in a fancy restaurant, but rather crammed around my grandmother’s tiny kitchen table. The air, thick with the aroma of simmering rice and salty seaweed, buzzed with anticipation. She’d carefully guide my small hands as we layered vinegared rice onto nori sheets, giggling as rogue grains stubbornly stuck to our fingers. Those imperfect, wobbly rolls were more than just food; they were edible love letters, penned with the simple ingredients of rice, vinegar, and shared laughter. To this day, the comforting fragrance of perfectly cooked sushi rice transports me back to that cozy kitchen, reminding me of the magic that can be created with patience and a little culinary know-how.
Recipe Overview
- Prep Time: 5 minutes
- Cook Time: 40 minutes
- Total Time: 45 minutes
- Yields: Approximately 18 maki rolls
- Serves: 2
- Dietary Type: Gluten-Free, Vegan
Ingredients
- 250 ml sushi rice, must be short-grained
- 325 ml water, for cooking
- 8 teaspoons rice vinegar
- 4 teaspoons sugar
- 2 teaspoons salt
Equipment Needed
- Good quality pot with a lid (at least 1 liter capacity)
- Strainer or sieve
- Microwave-safe bowl
- Large bowl (glass, ceramic, wood, or plastic)
- Flat-ended wooden spoon
Instructions
- Begin by preparing the sushi rice. Place the sushi rice in a good quality pot that can hold about four times its volume.
- Rinse and swirl the rice in the pot with cold water. Drain the water using a strainer or sieve. Repeat this rinsing process three times until the water runs relatively clear. This step is crucial for removing excess starch, which can lead to sticky rice.
- Return the rinsed rice to the pot. Add the cooking water (325 ml).
- Place the pot on the stove over high heat. Bring the rice and water to a boil.
- As soon as the water boils, immediately reduce the heat to the lowest setting. Place the lid tightly on the pot.
- Set a timer for 20 minutes and, most importantly, DO NOT REMOVE THE LID FOR EVEN A MOMENT. This is crucial for achieving the correct texture. Peeking releases steam and disrupts the cooking process.
- While the rice is cooking, prepare the sushi-su (rice vinegar mix). In a microwave-safe bowl, combine the rice vinegar, sugar, and salt.
- Microwave the mixture for about one minute or until it is just heated through. This helps dissolve the sugar and salt more easily.
- Stir the mixture until the sugar and salt have completely dissolved. Set aside.
- Use this time to also prepare any other ingredients for your sushi, such as slicing vegetables or preparing your protein.
- After the timer goes off at 20 minutes, turn the heat off completely, but DO NOT REMOVE THE LID. Set the timer for another 20 minutes. This allows the rice to steam in its own heat, further improving the texture.
- Once the second timer goes off after 20 minutes, YOU MAY REMOVE THE LID! The rice should be fluffy and have absorbed all the water.
- Immediately transfer the cooked rice into a large bowl made of glass, ceramic, wood, or plastic. Avoid metal bowls, as they can react with the vinegar.
- Let the rice cool for a few minutes. While the rice is still warm, use a large blunt implement such as a flat-ended wooden spoon to make some gentle but deep incisions into the rice. This creates channels for the sushi-su to penetrate evenly.
- Pour half of the sushi-su all over and into the cooling rice.
- Gently turn the rice with your implement, taking care not to mash or break the grains. You want to coat each grain of rice without making it sticky.
- Make a few more incisions, and pour the remaining sushi-su over the rice.
- Gently turn the rice again, allowing it to cool to body temperature (about 37°C or 98.6°F) before starting to make your sushi.
Expert Tips & Tricks
- Rice Quality Matters: Opt for high-quality, short-grain sushi rice. Cheaper varieties might not yield the desired sticky, yet separate, texture.
- Vinegar Adjustment: Adjust the sushi-su to your taste. Some prefer a sweeter or more acidic flavor. Start with the given ratios and adjust slightly each time until you find your perfect balance.
- Fan It Out: For faster cooling, use a fan to gently cool the rice while mixing in the sushi-su. This helps prevent the rice from becoming too sticky.
- Keep it Covered: If you’re not using the sushi rice immediately, keep it covered with a damp cloth to prevent it from drying out.
- Wooden Utensils: Ideally, use wooden bowls and spoons. Wood doesn’t react with the vinegar and helps absorb excess moisture.
Serving & Storage Suggestions
Serve your perfectly cooked sushi rice immediately in your favorite sushi rolls or bowls. To prevent the rice from sticking to your hands while making sushi, keep a bowl of clean, slightly warm water nearby and frequently wet your hands.
Leftover sushi rice can be stored in an airtight container in the refrigerator for up to 24 hours. Keep in mind that the texture will change and it might become drier. To reheat, gently steam the rice with a small amount of water or microwave it with a damp paper towel on top to prevent drying. It is best consumed fresh. It is not recommended to freeze sushi rice as this will significantly impact the texture.
Nutritional Information
| Nutrient | Amount per Serving | % Daily Value |
|---|---|---|
| Calories | 374.8 kcal | N/A |
| Calories from Fat | N/A | 1% |
| Total Fat | 0.5 g | 0% |
| Saturated Fat | 0.1 g | 0% |
| Cholesterol | 0 mg | 0% |
| Sodium | 2336.9 mg | 97% |
| Total Carbohydrate | 84 g | 27% |
| Dietary Fiber | 2.6 g | 10% |
| Sugars | 8.4 g | 33% |
| Protein | 6.3 g | 12% |
Note: Nutritional information is an estimate and may vary based on specific ingredients and portion sizes.
Variations & Substitutions
- Brown Rice Sushi: While traditional sushi uses white rice, you can experiment with short-grain brown rice for a healthier, nuttier flavor. Adjust the cooking time and water ratio as needed.
- Sweetener Alternatives: If you’re avoiding refined sugar, try using honey or maple syrup in the sushi-su. Start with a smaller amount and adjust to taste.
- Vinegar Variety: Experiment with different types of rice vinegar, such as seasoned rice vinegar, for a slightly different flavor profile.
- Flavor Infusions: Add a piece of kombu (dried kelp) to the rice while cooking for added umami flavor. Remove the kombu before adding the sushi-su.
FAQs (Frequently Asked Questions):
Q: Why is it important not to remove the lid while the rice is cooking?
A: Removing the lid releases steam, which is essential for properly cooking the rice. Disturbing the steam can result in unevenly cooked rice.
Q: Can I use a rice cooker instead of a pot on the stove?
A: Yes, you can. Follow your rice cooker’s instructions for sushi rice, but make sure to still rinse the rice thoroughly beforehand.
Q: How do I know if my sushi-su is mixed properly?
A: The sugar and salt should be completely dissolved. If you can still see granules, continue stirring or microwave for a few more seconds.
Q: What do I do if my sushi rice is too sticky?
A: This usually means there was too much starch. Be more diligent about rinsing the rice next time. You can also try adding a bit more rice vinegar to help separate the grains.
Q: Can I make sushi rice ahead of time?
A: Yes, but it’s best used the same day. If you make it ahead, store it in an airtight container in the refrigerator and let it come to room temperature before using.
Final Thoughts
Creating perfect sushi rice is a journey, not just a recipe. Embrace the process, experiment with flavors, and don’t be afraid to make mistakes. With a little practice, you’ll be crafting restaurant-quality sushi in your own kitchen in no time. I hope this comprehensive guide empowers you to explore the art of sushi making and create delicious, memorable meals for yourself and your loved ones. Now, go forth and make some magic with those little grains of rice! Please feel free to share your creations and experiences in the comments below – I’d love to hear how your sushi rice adventure unfolds!