
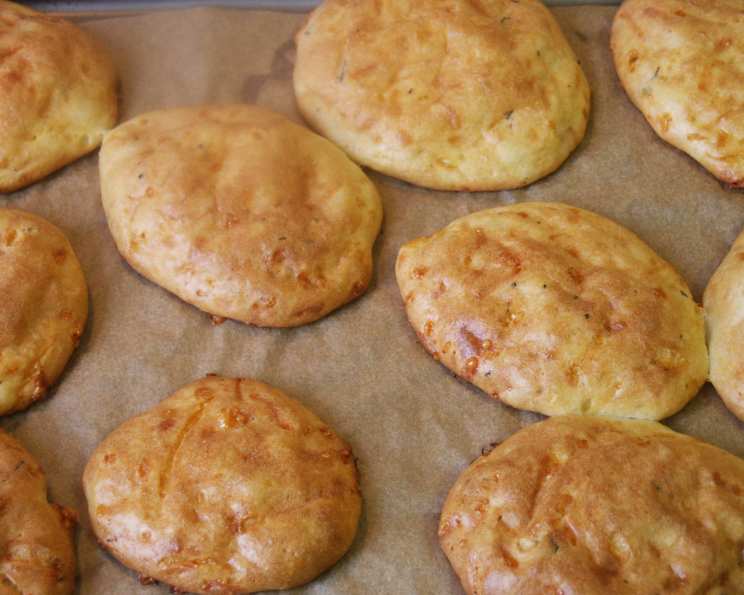
Petits Choux Au Fromage Ou Gougeres (Cheese Puffs)
The first time I tasted a gougère, I was a wide-eyed culinary student interning at a small French bistro. I remember biting into the warm, airy puff, the savory Gruyère melting on my tongue. It was an explosion of cheesy goodness, a simple yet elegant treat that instantly transported me to a cozy Parisian café. I’ve been chasing that perfect bite ever since, and after many attempts, I’m thrilled to share my version of these classic cheese puffs with you.
Recipe Overview
- Prep Time: 20 minutes
- Cook Time: 25-30 minutes
- Total Time: 45-50 minutes
- Yields: Approximately 50 cheese puffs
- Dietary Type: Not Gluten-Free
Ingredients
- 1 cup water
- 6 tablespoons olive oil
- 1/2 teaspoon salt
- 1 cup flour, sifted
- 4 large eggs
- 3/4 cup Gruyère cheese, grated (high-quality Gruyère is recommended)
- 1/4 teaspoon ground black pepper
Equipment Needed
- 2 aluminum baking sheets
- Parchment paper
- Saucepan
- Mixing bowl
- Stand mixer with paddle attachment (or standard mixing bowl with electric beaters)
- Teaspoon (or pastry bag with a plain round tip)
Instructions
-
Preheat your oven to 400 degrees Fahrenheit (200 degrees Celsius). Line 2 aluminum baking sheets with parchment paper. This will prevent the cheese puffs from sticking and make cleanup a breeze.
-
In a medium saucepan, combine the water, olive oil, and salt. Place the saucepan over high heat and bring the mixture to a rolling boil. Make sure the salt is fully dissolved before it boils.
-
Once boiling, immediately remove the saucepan from the heat and add all the sifted flour at once. Stir vigorously and continuously with a wooden spoon or spatula. The mixture will initially form a lumpy mass, but keep stirring!
-
Return the saucepan to medium heat. Continue to cook the mixture, stirring constantly to break up any lumps. This is crucial for developing the dough’s structure. Cook until the dough forms a smooth ball that comes away from the sides of the pan, about 5 minutes. A thin film may form on the bottom of the pan – this is normal.
-
Immediately transfer the hot dough to the mixing bowl of a stand mixer fitted with the paddle attachment. If you don’t have a stand mixer, you can use a standard mixing bowl and electric beaters. Beat the dough on medium speed to cool it down to room temperature. This step is essential to prevent the eggs from scrambling when added later. It should take around 5-7 minutes.
-
Once the dough has cooled slightly, begin adding the eggs one at a time. Beat well after each egg is added, ensuring that each egg is fully incorporated into the dough before adding the next. The dough will initially look curdled or separated after each egg is added, but keep beating, and it will come back together. You’re aiming for a stiff, yet pliable texture. The final dough should be smooth, glossy, and able to hold its shape.
-
Finally, add the grated Gruyère cheese and black pepper to the dough. Continue mixing for 1 minute to evenly distribute the cheese and pepper throughout the dough. The cheese will add a wonderful savory flavor and help the puffs achieve their signature golden-brown color.
-
Using a greased teaspoon, drop spoonfuls of dough 2 inches apart onto the prepared baking sheets. Alternatively, for a more uniform look, you can use a pastry bag fitted with a plain round tip to pipe the dough into 1-inch diameter balls, also spaced 2 inches apart.
-
Bake the cheese puffs in the preheated oven at 400 degrees Fahrenheit (200 degrees Celsius) for approximately 5 minutes, or until they begin to puff up and turn a light golden color. Then, reduce the oven temperature to 325 degrees Fahrenheit (160 degrees Celsius) and continue baking for another 20-25 minutes, or until the puffs are golden brown and cooked through.
-
To check for doneness, gently tap one of the puffs. It should sound hollow. If the puffs are browning too quickly, you can loosely tent them with foil during the final baking time.
-
Once baked, remove the cheese puffs from the oven and let them cool slightly on the baking sheets before serving.
Expert Tips & Tricks
- Sifting the flour is essential for creating light and airy puffs. Sifting helps to remove any lumps and ensures that the flour is evenly distributed in the dough.
- Don’t open the oven door during the initial baking period when the puffs are rising. Opening the door can cause the puffs to deflate.
- If you want to make the dough ahead of time, you can store it in the refrigerator for up to 24 hours. Bring the dough to room temperature before baking.
- For a richer flavor, try using a combination of Gruyère and Parmesan cheese.
- To add a touch of freshness, incorporate finely chopped herbs like thyme, rosemary, or chives into the dough.
Serving & Storage Suggestions
Serve the cheese puffs warm or at room temperature. They make a delightful appetizer, snack, or accompaniment to soups and salads. They’re best enjoyed on the day they’re baked.
Store leftover cheese puffs in an airtight container at room temperature for up to 2 days. For longer storage, freeze them in a single layer on a baking sheet, then transfer them to a freezer-safe bag or container. Frozen cheese puffs can be reheated in a 350-degree Fahrenheit (175 degrees Celsius) oven for about 5-10 minutes, or until warmed through. Reheating will help restore some of their crispness.
Nutritional Information
| Nutrient | Amount per Serving | % Daily Value |
|---|---|---|
| Calories | 36 kcal | – |
| Total Fat | 2.6 g | 3% |
| Saturated Fat | 0.7 g | 3% |
| Cholesterol | 18.7 mg | 6% |
| Sodium | 34.5 mg | 1% |
| Total Carbohydrate | 1.9 g | 0% |
| Dietary Fiber | 0.1 g | 0% |
| Sugars | 0 g | 0% |
| Protein | 1.2 g | 2% |
Note: Nutritional information is an estimate and may vary based on specific ingredients and portion sizes.
Variations & Substitutions
- Gluten-Free: Experiment with gluten-free flour blends. Keep in mind the texture may slightly differ.
- Cheese Variations: Substitute Gruyère with other hard cheeses like Comté, Emmental, or aged cheddar for different flavor profiles.
- Spice it Up: Add a pinch of cayenne pepper or a dash of hot sauce to the dough for a little kick.
- Herbed Gougères: Incorporate fresh herbs such as thyme, rosemary, or chives for a fragrant twist.
- Garlic Gougères: Add 1-2 cloves of minced garlic to the water when bringing it to a boil for a savory garlic flavor.
FAQs (Frequently Asked Questions)
Q: Why did my cheese puffs deflate after baking?
A: This is often caused by not baking the puffs long enough. Make sure they are golden brown and sound hollow when tapped. Also, avoid opening the oven door frequently during baking.
Q: Can I make the dough ahead of time?
A: Yes, the dough can be made ahead of time and stored in the refrigerator for up to 24 hours. Allow it to come to room temperature before baking.
Q: What if I don’t have a stand mixer?
A: No problem! You can use a standard mixing bowl and electric beaters. Just make sure to beat the dough thoroughly after each egg is added.
Q: Can I freeze the baked cheese puffs?
A: Yes, baked cheese puffs freeze well. Freeze them in a single layer on a baking sheet before transferring them to a freezer-safe bag or container. Reheat in a 350-degree Fahrenheit oven until warmed through.
Q: My dough seems too wet or too dry. What should I do?
A: The consistency of the dough can vary depending on the size of the eggs and the humidity. If the dough is too wet, add a tablespoon of flour at a time until it reaches the desired consistency. If it’s too dry, add a teaspoon of water at a time.
Final Thoughts
Now that you’re armed with this detailed guide, it’s time to roll up your sleeves and create your own batch of delightful cheese puffs. Don’t be intimidated, even if your first attempt isn’t perfect – practice makes perfect, and the reward is well worth the effort. Imagine serving these golden treasures to your loved ones, watching their faces light up with each cheesy bite. Pair them with a crisp white wine or a steaming bowl of French onion soup for an unforgettable culinary experience. Bon appétit!