
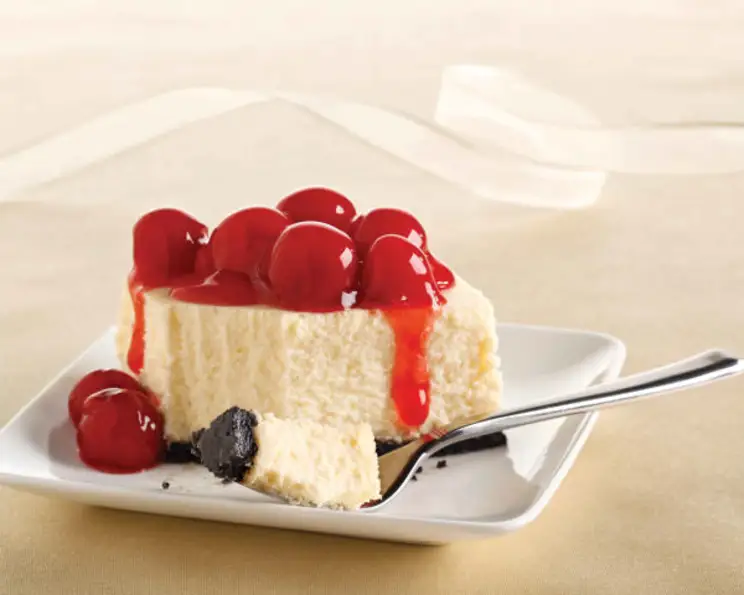
Philadelphia New York Cheesecake
The first time I tasted a truly exceptional cheesecake, I was visiting my aunt in Manhattan. We walked into a tiny, unassuming bakery in Greenwich Village, and the aroma of warm cream cheese and vanilla enveloped me. I remember the sheer, unadulterated bliss of that first bite – the creamy, tangy filling melting on my tongue, contrasted by the subtle crunch of the graham cracker crust. It was a revelation, and I’ve been chasing that perfect cheesecake experience ever since. This Philadelphia New York Cheesecake is my attempt to recreate that memory, and I think I’ve gotten pretty darn close.
Recipe Overview
- Prep Time: 20 minutes
- Cook Time: 50 minutes
- Total Time: 4 hours 50 minutes (includes chilling)
- Servings: 16
- Yield: 1 cheesecake
- Dietary Type: Not specified
Ingredients
-
For the Crust:
- 6 Honey Maid Honey Grahams, crushed (about 1 cup)
- 3 tablespoons sugar
- 3 tablespoons butter or 3 tablespoons margarine, melted
-
For the Filling:
- 5 (8 ounce) packages Philadelphia Cream Cheese, softened
- 1 cup sugar
- 3 tablespoons flour
- 1 tablespoon vanilla
- 1 cup BREAKSTONE’S Sour Cream or 1 cup KNUDSEN Sour Cream
- 4 eggs
-
Topping:
- 1 (21 ounce) can cherry pie filling
Equipment Needed
- 13×9-inch pan
- Foil
- Mixer (hand or stand)
- Measuring cups and spoons
- Rubber spatula
- Optional: 9-inch springform pan
Instructions
- Preheat your oven to 325°F (160°C).
- Line a 13×9-inch pan with foil, ensuring the ends of the foil extend over the sides to create handles for easy removal later. This is crucial for lifting the cheesecake out cleanly.
- In a medium bowl, thoroughly mix the crushed graham crackers, 3 tablespoons of sugar, and melted butter or margarine. Ensure the crumbs are evenly moistened for a cohesive crust.
- Press the graham cracker mixture firmly onto the bottom of the prepared pan to create an even layer. A flat-bottomed measuring cup or the back of a spoon can help achieve this.
- Bake the crust in the preheated oven for 10 minutes. This pre-baking step helps to set the crust and prevent it from becoming soggy.
- While the crust is baking, prepare the filling. In a large bowl, beat the softened cream cheese, 1 cup of sugar, flour, and vanilla with a mixer until the mixture is smooth and well blended. Ensure the cream cheese is truly softened to avoid lumps in the final product.
- Add the sour cream to the cream cheese mixture and mix well until fully incorporated. The sour cream adds a lovely tang and richness to the cheesecake.
- Add the eggs, one at a time, mixing on low speed after each addition just until blended. Avoid overmixing at this stage, as it can incorporate too much air and cause the cheesecake to crack during baking.
- Pour the cream cheese filling evenly over the pre-baked crust.
- Bake in the 325°F (160°C) oven for 40 minutes, or until the center is almost set. The cheesecake should still have a slight wobble in the center. It will continue to set as it cools.
- Turn off the oven and let the cheesecake cool completely inside. This slow cooling process helps prevent cracks from forming.
- Once completely cooled, refrigerate the cheesecake for at least 4 hours to allow it to fully set and chill. Overnight is even better.
- Use the foil handles to carefully lift the chilled cheesecake from the pan before cutting it into squares or rectangles.
- Top each serving with cherry pie filling before serving.
Expert Tips & Tricks
- Softening the Cream Cheese: The key to a smooth, lump-free cheesecake is properly softened cream cheese. Let it sit at room temperature for at least an hour, or even longer depending on the temperature of your kitchen. You can also microwave it in short bursts (15-20 seconds), but be careful not to melt it.
- Preventing Cracks: Avoid overbaking and overmixing. The slow cooling process in the oven helps prevent cracks. You can also try baking the cheesecake in a water bath (bain-marie) for even more consistent results. To do this, wrap the bottom of your springform pan tightly in foil to prevent leaks, then place it in a larger roasting pan. Pour hot water into the roasting pan until it reaches about halfway up the sides of the springform pan.
- Getting a Clean Cut: To get neat, clean slices, run a long, thin knife under hot water and wipe it dry before each cut.
Serving & Storage Suggestions
Serve the Philadelphia New York Cheesecake chilled, topped with a generous spoonful of cherry pie filling. The tartness of the cherries complements the richness of the cheesecake beautifully.
Leftovers can be stored in an airtight container in the refrigerator for up to 3-4 days. For longer storage, you can freeze individual slices wrapped tightly in plastic wrap and then placed in a freezer bag. Frozen cheesecake can be thawed in the refrigerator overnight. It’s best enjoyed within 1-2 months of freezing for optimal flavor and texture.
Nutritional Information
| Nutrient | Amount per Serving | % Daily Value |
|---|---|---|
| Calories | 440 kcal | N/A |
| Total Fat | 31g | N/A |
| Saturated Fat | 18g | N/A |
| Trans Fat | 1.5g | N/A |
| Cholesterol | 165mg | N/A |
| Sodium | 340mg | N/A |
| Total Carbohydrate | 34g | N/A |
| Dietary Fiber | less than 1g | N/A |
| Sugars | 27g | N/A |
| Protein | 7g | N/A |
| Vitamin A | N/A | 25% |
| Vitamin C | N/A | 4% |
| Calcium | N/A | 8% |
| Iron | N/A | 4% |
Variations & Substitutions
- Oreo Crust: For a chocolatey twist, substitute 20 crushed Oreo cookies (about 2 1/4 cups) for the graham crackers and sugar in the crust.
- Lemon Zest: Add 1-2 teaspoons of lemon zest to the filling for a brighter, more citrusy flavor.
- Different Toppings: Get creative with your toppings! Try fresh berries, chocolate ganache, caramel sauce, or a sprinkle of chopped nuts.
- Springform Pan: Bake the cheesecake in a 9-inch springform pan (preheated to 325ºF) for a more traditional, circular presentation. If using a dark nonstick springform pan, reduce the oven temperature to 300ºF. Bake for 1 hour 10 minutes or until the center is almost set. Run a knife or metal spatula around the rim of the pan to loosen the cake; cool before removing the rim.
FAQs (Frequently Asked Questions)
Q: Can I use low-fat cream cheese?
A: While you can use low-fat cream cheese, the texture and flavor of the cheesecake will be affected. Full-fat cream cheese is recommended for the best results.
Q: Why did my cheesecake crack?
A: Cheesecakes crack due to rapid temperature changes, overbaking, or overmixing. Follow the instructions carefully, and allow the cheesecake to cool slowly in the oven to minimize cracking.
Q: Can I make this cheesecake ahead of time?
A: Absolutely! In fact, it’s recommended to make this cheesecake at least a day in advance to allow it to fully chill and set.
Q: How do I prevent the crust from burning?
A: Pre-baking the crust helps to prevent it from becoming soggy, but keep an eye on it while it’s baking. If it starts to brown too quickly, you can tent it with foil.
Q: Can I freeze the entire cheesecake?
A: Yes, you can freeze the entire cheesecake. Wrap it tightly in plastic wrap and then in foil before freezing. Thaw it in the refrigerator overnight before serving. It’s best to freeze it without the cherry pie filling on top.
Final Thoughts
This Philadelphia New York Cheesecake is more than just a dessert; it’s a celebration of simple pleasures and timeless flavors. I hope this recipe inspires you to create your own unforgettable cheesecake experience. Don’t be afraid to experiment with variations and toppings to make it your own. And most importantly, enjoy every creamy, tangy, and utterly delicious bite! Please share your baking successes (or learning experiences!) and any creative twists you try – I’d love to hear about them. Pair a slice with a strong cup of coffee or a chilled glass of dessert wine for the perfect ending to any meal. Happy baking!