
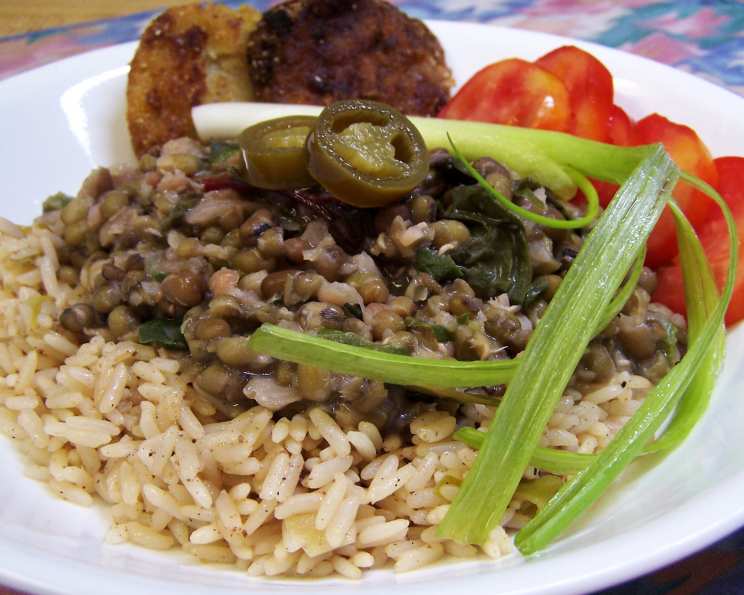
Philippine Mung Beans in Coconut Milk: A Comforting Bowl of Ginisang Munggo
The scent of coconut milk simmering on the stove always takes me back to my Lola’s (grandmother’s) kitchen in Manila. She’d stand over the stove, stirring a pot of ginisang munggo with such care, the aroma filling the house with warmth and the promise of a comforting meal. It wasn’t just the delicious flavors of the tender mung beans, the savory onions, and the slight kick of chili that made it special; it was the feeling of being surrounded by family, laughter, and love. This recipe is a tribute to her and all the delicious memories we shared around the dinner table.
Recipe Overview
- Prep Time: 20 minutes
- Cook Time: 1 hour 15 minutes
- Total Time: 1 hour 35 minutes
- Servings: 6
- Yield: About 8 cups
- Dietary Type: Vegan
Ingredients
- 1 1⁄2 cups dried mung beans
- 1 – 1 1⁄2 cups onion, finely chopped
- 2 tablespoons vegetable oil
- 1⁄2 teaspoon salt
- 2 tablespoons fresh gingerroot, peeled and finely minced
- 1 -2 small fresh chili pepper, minced (adjust to your spice preference)
- 5 -6 garlic cloves, minced
- 14 ounces coconut milk
- 1 tablespoon soy sauce
- 2 cups finely chopped chard leaves (kale or spinach can be substituted)
Equipment Needed
- Large pot or Dutch oven
- Large skillet or frying pan
- Colander or strainer
- Knife and cutting board
Instructions
- Begin by preparing the mung beans. Rinse the dried mung beans thoroughly in a colander under cold running water to remove any debris.
- Place the rinsed mung beans in a large pot and cover with plenty of fresh water. It’s best to soak them for several hours or, ideally, overnight. Soaking helps to reduce the cooking time and improves digestibility.
- After soaking, drain the mung beans completely and rinse them again.
- Return the mung beans to the pot and add fresh water, ensuring the water level is about 2 inches above the beans. Bring the water to a boil over high heat. Once boiling, reduce the heat to a simmer, cover the pot, and cook until the mung beans are tender. This usually takes about 1 hour, but it can vary depending on the age and quality of the beans. Check for doneness by pressing a bean against the side of the pot with a spoon; it should easily mash.
- While the mung beans are cooking, prepare the aromatics. In a large skillet or frying pan, heat the vegetable oil over medium heat.
- Add the finely chopped onion and salt to the heated oil. Sauté the onions, stirring frequently, until they become translucent and softened, about 5-7 minutes.
- Add the minced ginger, minced chili pepper, and minced garlic to the skillet. Continue to simmer on low heat for a few minutes, stirring occasionally, until the garlic is fragrant and the ginger and chili have released their aromas. Be careful not to burn the garlic, as it can turn bitter.
- Pour in the coconut milk into the skillet with the aromatics. Bring the coconut milk mixture to a gentle simmer and cook for another 5 minutes, allowing the flavors to meld together beautifully. Stir occasionally to prevent sticking or scorching.
- Once the mung beans are cooked and tender, drain them thoroughly.
- Transfer the drained mung beans to a large pot.
- Pour the coconut milk mixture from the skillet over the mung beans in the pot.
- Add the soy sauce to the pot. Stir everything together gently to combine all the ingredients.
- Add the finely chopped chard leaves (or kale or spinach) to the pot. Cook until the chard wilts and becomes tender, about 3-5 minutes. Stir occasionally to ensure the chard cooks evenly and doesn’t stick to the bottom of the pot.
- Remove the pot from the heat. The Philippine Mung Beans in Coconut Milk are now ready to be served.
Expert Tips & Tricks
- Toast Your Spices: For a deeper, richer flavor, lightly toast the ginger, chili, and garlic in a dry pan before adding the oil. This releases their essential oils and intensifies their aroma.
- Adjust the Consistency: If you prefer a thicker consistency, you can mash some of the mung beans against the side of the pot with a spoon. Alternatively, for a thinner consistency, add a little vegetable broth or water.
- Spice it Up: If you like your ginisang munggo extra spicy, add a pinch of cayenne pepper or a few more minced chili peppers.
- Make Ahead: This dish can be made a day or two in advance. The flavors actually deepen and improve as it sits.
- Dealing with Salty Soy Sauce: Different brands of soy sauce vary in saltiness. Start with a smaller amount and add more to taste.
Serving & Storage Suggestions
Serve the Philippine Mung Beans in Coconut Milk hot, preferably with steamed rice. It’s also delicious on its own or as a side dish to grilled meats or fish. Garnish with a sprinkle of toasted garlic or some fresh cilantro for added flavor and visual appeal.
Leftovers can be stored in an airtight container in the refrigerator for up to 3-4 days. To reheat, simply warm it up in a saucepan over medium heat, stirring occasionally, until heated through. You can also reheat it in the microwave. For longer storage, you can freeze the ginisang munggo in freezer-safe containers for up to 2-3 months. Thaw it overnight in the refrigerator before reheating.
Nutritional Information
| Nutrient | Amount per Serving | % Daily Value |
|---|---|---|
| Calories | 315 kcal | 16% |
| Total Fat | 18g | 28% |
| Saturated Fat | 14g | 70% |
| Cholesterol | 0mg | 0% |
| Sodium | 350mg | 15% |
| Total Carbohydrate | 32g | 11% |
| Dietary Fiber | 8g | 32% |
| Sugars | 12g | |
| Protein | 10g | 20% |
Note: Nutritional information is an estimate and can vary based on specific ingredients and portion sizes.
Variations & Substitutions
- Protein Boost: Add some smoked tofu, tempeh, or even leftover cooked chicken for an extra boost of protein.
- Vegetable Medley: Feel free to add other vegetables, such as diced carrots, bell peppers, or green beans, along with the chard.
- Smoked Flavor: Incorporate a piece of smoked fish (like tinapa) during the simmering process to infuse a smoky flavor. Remove the fish before serving.
- Sweetness: For a touch of sweetness, add a pinch of brown sugar or a drizzle of maple syrup to the coconut milk mixture.
- Greens: You can substitute chard with spinach, kale, or even mustard greens.
- Add Shrimp Paste: For a more authentic Filipino taste, a small dollop of shrimp paste (bagoong) can be added during the sauteeing of the onions and aromatics. Be mindful of the salt content.
FAQs (Frequently Asked Questions)
Q: Can I cook the mung beans in a pressure cooker or Instant Pot?
A: Yes, you can! Reduce the cooking time significantly by using a pressure cooker or Instant Pot. Cook on high pressure for about 15-20 minutes, followed by a natural pressure release.
Q: Do I have to soak the mung beans?
A: Soaking is highly recommended as it shortens the cooking time and makes the beans easier to digest. However, if you’re short on time, you can skip the soaking, but increase the cooking time accordingly.
Q: Can I use canned coconut milk instead of fresh?
A: Absolutely! Canned coconut milk works perfectly fine. Just make sure to shake the can well before using.
Q: How can I make this dish vegetarian instead of vegan?
A: While the base recipe is vegan, you can easily adapt it by adding a dollop of fish sauce for added umami.
Q: My ginisang munggo turned out too watery. How can I fix it?
A: Simmer the dish uncovered for a longer time to allow excess liquid to evaporate. You can also mash some of the mung beans to thicken the sauce.
Final Thoughts
Now that you have this treasured recipe in hand, I encourage you to recreate the flavors and aromas of my Lola’s kitchen. Don’t be afraid to experiment with the variations and substitutions to make it your own. Gather your loved ones, share a bowl of this comforting Philippine Mung Beans in Coconut Milk, and create your own special memories around the dinner table. And most importantly, don’t forget to share your culinary creations and feedback! This dish pairs wonderfully with grilled fish and rice, and a glass of cool Sago’t Gulaman would be a perfect way to end the meal. Happy cooking!