
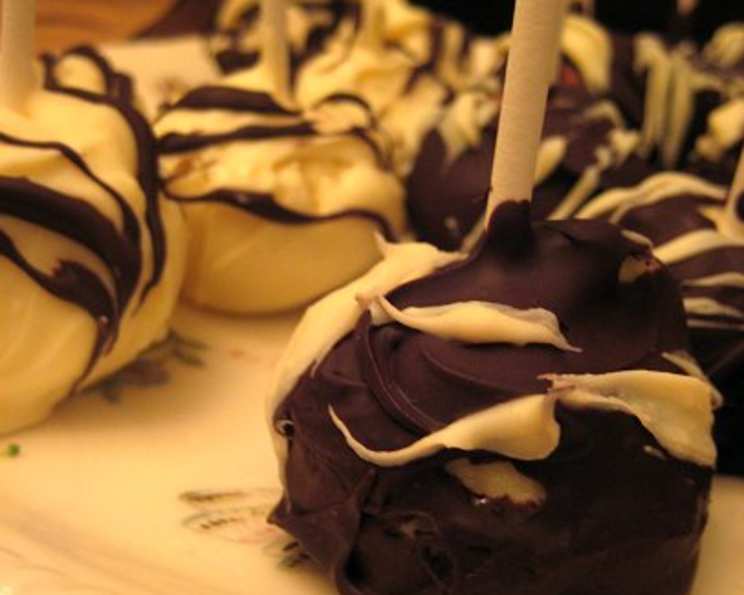
Philly Cheesecake Party Pops: A Bite-Sized Celebration
My earliest memory of cheesecake involves standing on a stool, barely tall enough to see over the kitchen counter, mesmerized by the way my grandmother’s electric mixer transformed cream cheese into a velvety cloud. It was always a special occasion dessert, reserved for birthdays and holidays. These Philly Cheesecake Party Pops take that classic flavor and transform it into a fun, portable treat perfect for any gathering. They’re a little bit of work, yes, but the smiles they bring make every second worth it!
Recipe Overview
- Prep Time: 45 minutes
- Cook Time: 35 minutes
- Total Time: 4 hours 45 minutes (includes chilling and freezing time)
- Servings: 42
- Yield: 42 lollipops
- Dietary Type: Not Gluten-Free
Ingredients
- 2 eggs
- 750g (approximately 3 10-oz packages) Philadelphia Cream Cheese, softened
- ¾ cup sugar
- 1 teaspoon vanilla extract
- 550g (approximately 1.5 packages) dark chocolate chips
- 550g (approximately 1.5 packages) white chocolate chips
- 42 lollipop sticks
Equipment Needed
- 13×9 inch baking pan
- Aluminum foil
- Food processor
- Parchment paper
- Baking sheet
- Two microwave-safe bowls (or double boiler)
Instructions
-
Preheat your oven to 325°F (160°C). Position a rack in the center of the oven.
-
Line a 13×9 inch baking pan with foil, ensuring the ends of the foil extend over the sides of the pan. This will create “handles” for easy removal later.
-
In a food processor, combine the cream cheese, sugar, vanilla extract, and eggs. Process until the mixture is completely smooth and well blended. Be sure to scrape down the sides of the bowl occasionally to ensure everything is incorporated evenly.
-
Pour the cheesecake mixture into the prepared baking pan, spreading it evenly.
-
Bake for 35 minutes, or until the center is set. The cheesecake should be slightly firm to the touch, but with a little give. Don’t overbake, or it will become dry.
-
Allow the cheesecake to cool completely at room temperature. This is crucial for achieving the right texture.
-
Once cooled, refrigerate the cheesecake for at least 4 hours. This chilling time is important for firming up the cheesecake and making it easier to handle.
-
Use the foil handles to carefully lift the cheesecake from the pan. Place it on a cutting board.
-
Cut the cheesecake into 42 equal squares. A pizza cutter can be helpful for this step.
-
Roll each square into a ball. The chilled cheesecake should be firm enough to hold its shape. Place the balls on a baking sheet lined with parchment paper.
-
Insert one lollipop stick into the center of each cheesecake ball, pushing it about halfway through.
-
Freeze the cheesecake pops for at least 4 hours. This will help them firm up even more and prevent them from melting when you dip them in chocolate.
-
Place the dark chocolate chips and the white chocolate chips into separate microwave-safe bowls.
-
Melt each chocolate separately. Microwave in 30-second intervals, stirring in between, until completely melted and smooth. Be careful not to overheat the chocolate, or it will seize. Alternatively, you can melt the chocolate in a double boiler over simmering water.
-
Dip 21 of the frozen cheesecake lollipops into the melted dark chocolate, ensuring they are fully coated. Return them to the parchment-lined baking sheet.
-
Repeat with the remaining 21 lollipops, dipping them into the melted white chocolate.
-
While the chocolate is still wet, drizzle the remaining melted white chocolate over the dark chocolate lollipops, and the remaining melted dark chocolate over the white chocolate lollipops. Get creative with your designs!
-
Refrigerate the cheesecake lollipops for at least 1 hour, or until the chocolate is firm and set.
Expert Tips & Tricks
- Softening the Cream Cheese: Make sure your cream cheese is thoroughly softened before blending. This will ensure a smooth, lump-free cheesecake. Leave it at room temperature for at least an hour, or microwave it in 15-second intervals until softened.
- Preventing Cracks: To prevent cracks in your cheesecake, avoid opening the oven door during baking. The sudden temperature change can cause the cheesecake to sink and crack. You can also place a pan of water on the bottom rack of the oven to create a humid environment.
- Clean Chocolate Drizzle: For a neater chocolate drizzle, use a piping bag or a small spoon. Hold the bag or spoon above the lollipops and drizzle the chocolate back and forth in a thin stream.
- Adding Extracts: Experiment with adding other extracts to the cheesecake batter, such as almond extract, lemon extract, or even a touch of peppermint extract for a festive flavor.
- Topping Variations: Add sprinkles, crushed nuts, or mini chocolate chips to the lollipops while the chocolate is still wet for extra flair.
Serving & Storage Suggestions
Serve these delightful Philly Cheesecake Party Pops chilled. They are best enjoyed straight from the refrigerator. Arrange them on a platter or stand for an eye-catching presentation.
To store, keep the lollipops refrigerated in an airtight container. They will last for up to 3-4 days. You can also freeze them for longer storage. Wrap each lollipop individually in plastic wrap before placing them in a freezer-safe container. Frozen cheesecake pops will last for up to 2 months. Thaw them in the refrigerator before serving.
Nutritional Information
| Nutrient | Amount per Serving | % Daily Value* |
|---|---|---|
| Calories | 213 kcal | N/A |
| Total Fat | 14.6g | 22% |
| Saturated Fat | 8.9g | 44% |
| Cholesterol | 31.6mg | 10% |
| Sodium | 69.4mg | 2% |
| Total Carbohydrate | 20.1g | 6% |
| Dietary Fiber | 0.8g | 3% |
| Sugars | 18.5g | N/A |
| Protein | 3g | 5% |
*Percent Daily Values are based on a 2,000 calorie diet.
Variations & Substitutions
- Gluten-Free: While this recipe isn’t naturally gluten-free due to the lack of a crust (normally made with graham crackers), you can adapt it. Grind gluten-free cookies in a food processor and press them into the bottom of the pan before pouring in the cheesecake mixture.
- Chocolate Variations: Use milk chocolate, semi-sweet chocolate, or even flavored melting wafers instead of dark or white chocolate.
- Flavor Infusions: Infuse the cream cheese with citrus zest (lemon, orange, lime) for a brighter flavor. You can also add a swirl of raspberry jam or Nutella to the cheesecake batter before baking.
- Seasonal Adaptations: Add pumpkin puree and pumpkin pie spice to the cheesecake batter for a fall-inspired treat. In the summer, incorporate fresh berries into the cheesecake filling.
FAQs (Frequently Asked Questions)
Q: Can I make these ahead of time?
A: Absolutely! These cheesecake pops are perfect for making ahead. The chilling and freezing steps actually improve their texture and make them easier to handle.
Q: My chocolate seized when I was melting it. What can I do?
A: Seized chocolate is usually caused by overheating or adding water. Try stirring in a teaspoon of vegetable oil or shortening to smooth it out. If that doesn’t work, unfortunately, you’ll need to start with fresh chocolate.
Q: Can I use low-fat cream cheese?
A: While you can use low-fat cream cheese, the texture of the cheesecake may be slightly different. Full-fat cream cheese will give you the richest and creamiest results.
Q: My cheesecake cracked during baking. Is it ruined?
A: Not at all! Cracks in the cheesecake are purely cosmetic and won’t affect the taste. The chocolate coating will cover them up anyway.
Q: Can I skip the freezing step?
A: Freezing the cheesecake pops is highly recommended. It firms them up, making them easier to dip in chocolate and preventing them from melting. If you skip it, the pops will be much softer and more difficult to work with.
Final Thoughts
These Philly Cheesecake Party Pops are more than just a dessert; they’re a delightful experience. The creamy cheesecake, the rich chocolate coating, and the fun lollipop format create a treat that’s sure to impress. Don’t be intimidated by the multiple steps – each one is simple, and the final result is well worth the effort. So, gather your ingredients, put on some music, and get ready to create a batch of these irresistible pops. And be sure to let me know what you think and share your creative variations. Enjoy!