
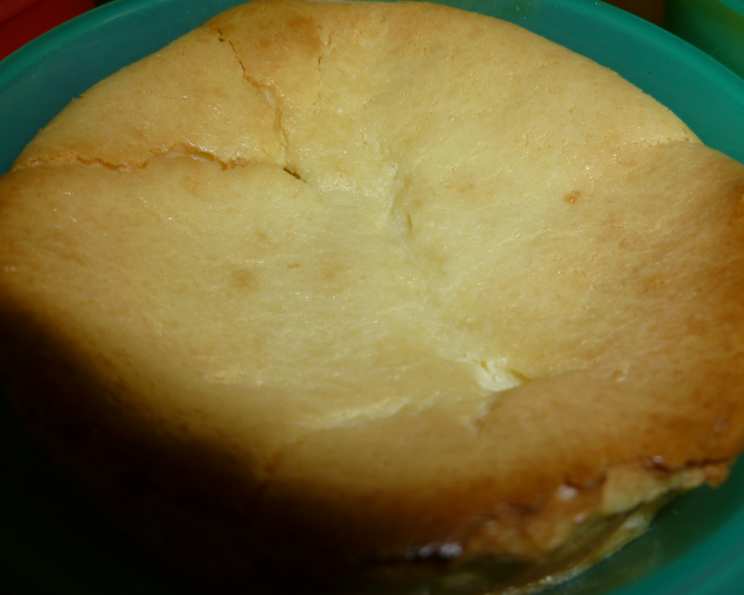
The Quintessential Philly Classic New York Cheesecake
The first time I tasted a true New York cheesecake, I was a wide-eyed culinary student on a field trip. We ventured into a bustling Manhattan bakery, the air thick with the scent of vanilla and warm butter. That first bite was transformative – a velvety smooth texture, a tangy richness that danced on my palate, and a subtly sweet graham cracker crust that provided the perfect counterpoint. It was a revelation, and from that moment on, I was determined to master the art of baking the perfect cheesecake. This recipe, a take on the classic using Philly cream cheese, is my tribute to that unforgettable experience.
Recipe Overview
- Prep Time: 20 minutes
- Cook Time: 65 minutes
- Total Time: 5 hours, 25 minutes (includes chilling)
- Servings: 12
- Yield: 1 9-inch cake
- Dietary Type: Not Gluten-Free
Ingredients
For the Crust:
- 1 cup graham cracker crumbs
- 3 tablespoons granulated sugar
- 3 tablespoons unsalted butter, melted
For the Filling:
- 40 ounces (five 8-ounce packages) cream cheese, softened (Philadelphia brand recommended)
- 1 cup granulated sugar
- 3 tablespoons all-purpose flour
- 1 tablespoon vanilla extract
- 1 cup sour cream
- 4 large eggs
Equipment Needed
- 9-inch springform pan
- Mixing bowl
- Electric mixer (stand or hand-held)
- Measuring cups and spoons
- Rubber spatula
- Oven
Instructions
-
Preheat your oven to 325°F (160°C). This lower temperature is crucial for even baking and preventing cracks.
-
Prepare the crust: In a medium bowl, combine the graham cracker crumbs, 3 tablespoons of sugar, and melted butter. Mix thoroughly until the crumbs are evenly moistened.
-
Press the crust firmly into the bottom of a 9-inch springform pan. Ensure an even layer for a stable base. You can use the bottom of a measuring cup to help press the crumbs down firmly.
-
Bake the crust: Place the springform pan in the preheated oven and bake for 10 minutes. This helps set the crust and prevent it from becoming soggy. Remove from the oven and let it cool slightly while you prepare the filling.
-
Prepare the filling: In a large mixing bowl, beat the softened cream cheese, 1 cup of sugar, flour, and vanilla extract with an electric mixer until the mixture is smooth and well blended. Be careful not to overmix at this stage; excessive mixing can incorporate too much air, leading to cracks during baking.
-
Add the sour cream: Stir in the sour cream and mix until just combined. Sour cream adds a lovely tang and richness to the cheesecake.
-
Incorporate the eggs: Add the eggs one at a time, mixing on low speed until each egg is just blended. Again, avoid overmixing.
-
Pour the filling over the pre-baked crust in the springform pan. Gently tap the pan on the counter a few times to release any trapped air bubbles.
-
Bake the cheesecake: Place the springform pan in the oven and bake for 65 minutes, or until the center of the cheesecake is almost set but still has a slight jiggle. It should look firm around the edges but slightly wobbly in the very center.
-
Cool and release: Once baked, turn off the oven and slightly open the oven door. Allow the cheesecake to cool in the oven for about an hour. This gradual cooling helps prevent cracking.
-
Loosen and chill: After an hour in the oven, carefully loosen the cake from the rim of the springform pan using a thin knife or spatula. This will prevent the cheesecake from sticking as it cools further. Cool completely at room temperature before removing the rim of the springform pan.
-
Refrigerate: Cover the cheesecake and refrigerate for at least 4 hours, or preferably overnight, to allow the flavors to meld and the texture to fully set. This step is crucial for achieving that signature creamy texture.
Expert Tips & Tricks
- Softened Cream Cheese is Key: Ensure your cream cheese is completely softened before mixing. This will prevent lumps and ensure a smooth, creamy filling. Leave the cream cheese out at room temperature for at least an hour, or even longer depending on the temperature of your kitchen.
- Water Bath (Optional): For an even more luxurious texture and to further minimize the risk of cracks, consider baking the cheesecake in a water bath. Wrap the bottom of the springform pan tightly in heavy-duty aluminum foil to prevent water from seeping in. Place the wrapped pan in a larger roasting pan and fill the roasting pan with hot water to reach about halfway up the sides of the springform pan. Bake as directed.
- Don’t Overbake: Overbaking is the enemy of cheesecake. A slight jiggle in the center is perfectly fine; the cheesecake will continue to set as it cools.
- Gentle Mixing: Avoid overmixing the batter, especially after adding the eggs. Overmixing incorporates too much air, which can cause the cheesecake to puff up during baking and then crack as it cools.
- Crumb Crust Variations: For a richer crust, use digestive biscuits instead of graham crackers. You can also add a touch of cinnamon or nutmeg to the crumb mixture for extra flavor.
Serving & Storage Suggestions
To serve, carefully slice the cheesecake with a warm, wet knife for clean, even slices. A simple dusting of powdered sugar is a classic garnish, or you can add a dollop of whipped cream and fresh berries for a more festive presentation.
Leftover cheesecake should be stored in an airtight container in the refrigerator. It will keep well for up to 5 days. You can also freeze cheesecake for longer storage. Wrap individual slices tightly in plastic wrap and then place them in a freezer-safe container. Frozen cheesecake can be stored for up to 2 months. Thaw in the refrigerator overnight before serving.
Nutritional Information
| Nutrient | Amount per Serving | % Daily Value |
|---|---|---|
| Calories | 526 kcal | 26% |
| Total Fat | 37g | 57% |
| Saturated Fat | 24g | 120% |
| Cholesterol | 184mg | 61% |
| Sodium | 402mg | 17% |
| Total Carbohydrate | 31g | 10% |
| Dietary Fiber | 0.3g | 1% |
| Sugars | 26g | — |
| Protein | 9g | 18% |
Nutritional information is an estimate and may vary based on specific ingredients and serving sizes.
Variations & Substitutions
- Lemon Zest: Add the zest of one lemon to the filling for a bright, citrusy flavor.
- Chocolate Swirl: Melt some semi-sweet chocolate and swirl it into the batter before baking for a chocolate cheesecake.
- Berry Topping: Top the baked and cooled cheesecake with fresh berries and a simple berry glaze.
- Gluten-Free Crust: Use gluten-free graham crackers or a mixture of almond flour and oats for a gluten-free crust. Adjust the butter amount as needed to bind the crust.
- Reduced-Fat: While it will affect the richness, you can use reduced-fat cream cheese and sour cream to lower the fat content.
- Extracts: Consider almond or lemon extract as variations to the standard vanilla.
FAQs (Frequently Asked Questions)
Q: Why did my cheesecake crack?
A: Cracking can be caused by several factors, including overbaking, rapid temperature changes, and overmixing the batter. Avoid overbaking, cool the cheesecake gradually, and mix the batter gently.
Q: Can I use a different size pan?
A: While a 9-inch springform is recommended, you can use an 8-inch pan. Note that the baking time may need to be adjusted as the cake will be thicker.
Q: How do I know when the cheesecake is done?
A: The cheesecake is done when the edges are set and the center still has a slight jiggle. It will continue to set as it cools.
Q: Can I freeze the cheesecake?
A: Yes, cheesecake freezes well. Wrap it tightly in plastic wrap and then in foil before freezing. Thaw overnight in the refrigerator.
Q: Why is my cheesecake gummy?
A: This could be caused by overmixing the batter. Be careful not to overmix, especially after adding the eggs.
Final Thoughts
There’s something undeniably comforting and satisfying about a slice of perfectly baked New York cheesecake. This recipe, with its tangy filling and buttery graham cracker crust, is a classic for a reason. I encourage you to try your hand at making this delectable dessert. Whether you’re celebrating a special occasion or simply craving a sweet treat, this Philly Classic New York Cheesecake is sure to impress. Share your baking successes (and any questions!) – happy baking!