
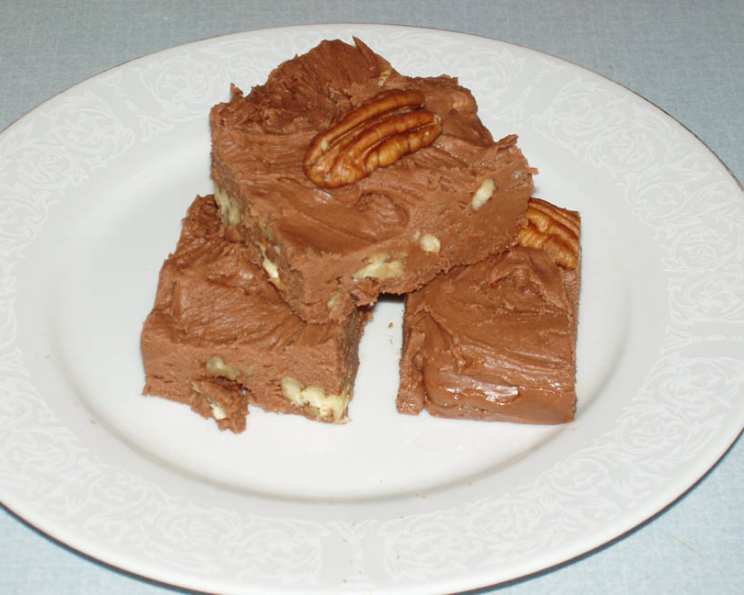
Philly Fudge: A Creamy, Dreamy Delight
Fudge. The word itself conjures up images of holiday gatherings, cozy nights by the fire, and the pure, unadulterated joy of childhood. I remember standing on a stool next to my grandmother, her hands guiding mine as we stirred a bubbling pot of chocolate, the sweet aroma filling her warm kitchen. The anticipation of that first bite, the creamy melt-in-your-mouth texture, the rich chocolate flavor…it’s a memory etched in my heart and taste buds. This Philly Fudge recipe, with its unbelievably smooth texture, brings me right back to those precious moments.
Recipe Overview
- Prep Time: 15 minutes
- Cook Time: 5 minutes
- Chill Time: Overnight
- Total Time: Overnight + 20 minutes
- Servings: Approximately 36 squares
- Yield: 1 9x9x2 inch pan
- Dietary Type: Vegetarian
Ingredients
- 1 (6 ounce) package semi-sweet chocolate chips
- 2 (3 ounce) packages cream cheese, at room temperature
- 2 tablespoons milk or 2 tablespoons cream
- 4 cups sifted confectioners’ sugar (10X)
- 1 teaspoon vanilla extract
- 1/4 teaspoon salt
- 1 cup coarsely chopped pecans or 1 cup walnuts
Equipment Needed
- 9x9x2 inch baking pan
- Double boiler (or heatproof bowl and saucepan)
- Electric mixer
- Plastic wrap
Instructions
- Prepare your pan: Generously butter a 9x9x2 inch baking pan. Set it aside. This prevents the fudge from sticking and ensures easy removal.
- Melt the chocolate: In a double boiler over hot, but not boiling, water, gently melt the chocolate chips. Stir occasionally until completely smooth and glossy. Be patient and avoid overheating the chocolate, which can cause it to seize. If you don’t have a double boiler, you can use a heatproof bowl set over a saucepan of simmering water, ensuring the bottom of the bowl doesn’t touch the water.
- Cream the cheese: In a large electric mixer bowl, combine the softened cream cheese and milk (or cream). Beat at high speed until the mixture is completely smooth and free of lumps. Room temperature cream cheese is crucial for achieving a smooth and creamy fudge.
- Incorporate the sugar: Gradually add the sifted confectioners’ sugar, about 1/2 cup at a time, to the cream cheese mixture. Beat at low speed until a creamy consistency is achieved. Sifting the sugar is important to prevent lumps in the final product.
- Blend in the chocolate: Carefully pour the melted chocolate chips into the cream cheese and sugar mixture. Add the vanilla extract and salt. Beat until everything is thoroughly combined and the mixture is smooth and homogenous.
- Add the nuts: Stir in the coarsely chopped pecans or walnuts. Ensure the nuts are evenly distributed throughout the fudge mixture.
- Press and chill: Pour the fudge mixture into the prepared baking pan. Use a spatula to spread it evenly. Cover the pan tightly with plastic wrap, pressing the plastic directly onto the surface of the fudge to prevent a skin from forming. Chill in the refrigerator overnight, or until the fudge is firm enough to cut. This chilling period is essential for the fudge to set properly.
- Cut and serve: Once the fudge is firm, cut it into 1 1/4 inch squares. A warm, sharp knife can make cutting easier.
Expert Tips & Tricks
- Cream Cheese Consistency is Key: Ensure your cream cheese is truly at room temperature. This means taking it out of the refrigerator at least an hour before you begin. Cold cream cheese will not blend smoothly and will result in a lumpy fudge.
- Chocolate Choices: While semi-sweet chocolate is traditional, you can experiment with different types of chocolate chips. Dark chocolate will create a richer, more intense flavor, while milk chocolate will result in a sweeter fudge.
- Nut Variations: Feel free to substitute other nuts, such as almonds, hazelnuts, or macadamia nuts. You can also toast the nuts lightly before adding them to enhance their flavor.
- Flavor Infusions: Add a touch of flavor with extracts like peppermint, almond, or coffee. A pinch of espresso powder can also enhance the chocolate flavor.
- For a Swirl Effect: Melt white chocolate separately and drizzle it over the fudge mixture before chilling. Swirl it gently with a toothpick for a marbled effect.
- If your fudge seems too soft: It might be due to humidity or variations in ingredient measurements. Return the fudge to the refrigerator for a longer chilling period.
- For easy cutting: Use a warm knife. Dip the knife in hot water, dry it thoroughly, and then cut the fudge. Repeat this process as needed.
Serving & Storage Suggestions
This Philly Fudge is perfect for serving as a dessert, a sweet treat alongside coffee or tea, or as a gift during the holidays. Arrange the squares on a platter for an elegant presentation.
Storage: Store the fudge in an airtight container in the refrigerator. It will keep for up to two weeks. You can also freeze the fudge for up to two months. Thaw it in the refrigerator before serving. While it can be left at room temperature, the fudge will soften, so refrigeration is recommended for maintaining its shape and texture.
Nutritional Information
Note: Nutritional information is an estimate and can vary based on specific ingredients and portion sizes.
| Nutrient | Amount per Serving | % Daily Value |
|---|---|---|
| Calories | 226 kcal | 11% |
| Total Fat | 12g | 18% |
| Saturated Fat | 5g | 25% |
| Cholesterol | 5mg | 2% |
| Sodium | 30mg | 1% |
| Total Carbohydrate | 29g | 10% |
| Dietary Fiber | 0.5g | 2% |
| Sugars | 27g | – |
| Protein | 1.5g | 3% |
Variations & Substitutions
- Peanut Butter Fudge: Swirl in 1/2 cup of peanut butter into the fudge mixture before chilling.
- Chocolate Walnut Fudge: Use walnuts instead of pecans and add 1/4 teaspoon of cinnamon for a warm, comforting flavor.
- Mint Chocolate Fudge: Add 1/2 teaspoon of peppermint extract to the fudge mixture and top with crushed candy canes before chilling.
- Espresso Fudge: Add 1 tablespoon of instant espresso powder to the chocolate mixture for a coffee-infused flavor.
- Dairy-Free Fudge: While the original recipe calls for cream cheese, you can experiment with using a dairy-free cream cheese alternative. The results might vary slightly in texture, but it’s worth a try for those with dietary restrictions. Ensure your chocolate chips are also dairy-free.
- Nut-Free Fudge: Omit the nuts entirely or substitute with toasted sunflower seeds or chopped dried fruit like cranberries or cherries.
FAQs (Frequently Asked Questions)
Q: Why is my fudge grainy?
A: Graininess is often caused by under-mixing the sugar or using cream cheese that isn’t at room temperature. Ensure you beat the cream cheese until completely smooth and gradually add the sifted powdered sugar.
Q: Can I use a different size pan?
A: Yes, but the thickness of the fudge will vary. A smaller pan will result in thicker fudge, while a larger pan will result in thinner fudge. Adjust the chilling time accordingly.
Q: How do I prevent the fudge from sticking to the pan?
A: Buttering the pan generously is crucial. You can also line the pan with parchment paper, leaving an overhang on the sides for easy removal.
Q: Can I freeze the fudge?
A: Yes, the fudge freezes well. Wrap it tightly in plastic wrap and then place it in an airtight container. Thaw it in the refrigerator before serving.
Q: My fudge is too soft. What did I do wrong?
A: It’s possible the proportions of the ingredients were slightly off, or the fudge wasn’t chilled long enough. Place it back in the refrigerator for a longer period. In humid conditions, fudge might require longer chilling.
Final Thoughts
This Philly Fudge recipe is more than just a sweet treat; it’s a connection to simpler times, shared moments, and the enduring power of comfort food. Don’t be intimidated by the chilling time; the overnight wait is well worth the reward of creamy, melt-in-your-mouth perfection. I encourage you to give it a try, experiment with different flavors and add-ins, and create your own cherished fudge memories. Share your creations and feedback, and perhaps pair it with a warm cup of coffee or a scoop of vanilla ice cream for an extra special indulgence. Happy fudging!