
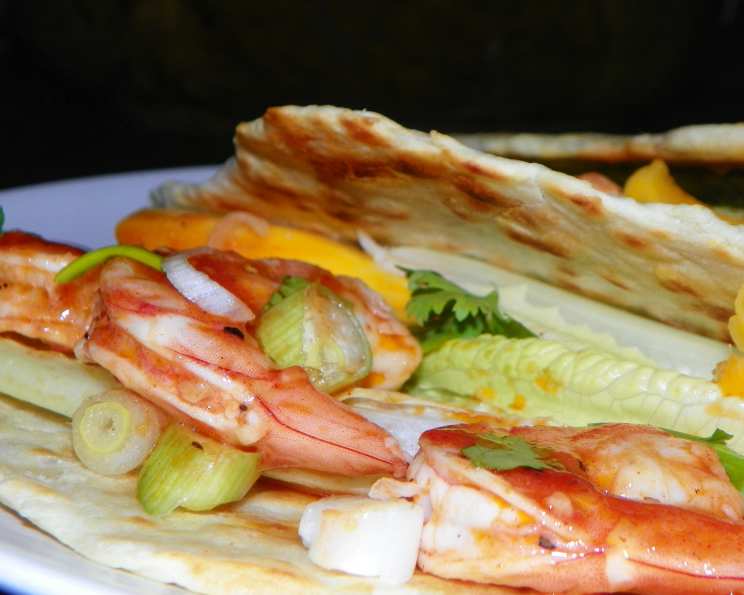
Piadine Romagnole: A Taste of Italian Home
The aroma still takes me back – the warm, slightly nutty scent of these flatbreads sizzling on a well-worn pan, a constant fixture in my grandmother’s kitchen. We’d gather around, impatient hands reaching for the first freshly cooked piadina, eager to fill it with salty prosciutto and peppery arugula, creating a simple yet incredibly satisfying meal. It wasn’t just food; it was a symbol of family, comfort, and the rustic charm of the Italian countryside, a taste I’ve longed to recreate and share with others ever since.
Recipe Overview
- Prep Time: 20 minutes
- Rest Time: 60 minutes
- Cook Time: 24-32 minutes (3-4 minutes per piadina)
- Total Time: 1 hour 44 minutes
- Servings: 8 piadine
- Dietary Type: Vegetarian (can be made vegan by omitting the milk or substituting with plant-based milk)
Ingredients
- 500 g (4 cups) flour (all-purpose or type 00)
- 75 ml (1/3 cup) olive oil (extra virgin)
- 1 teaspoon baking soda
- 1/2 teaspoon salt
- 100 ml (1/2 cup and 1 tablespoon) milk (whole or semi-skimmed)
- 100 ml (1/2 cup and 1 tablespoon) water
Equipment Needed
- Food processor (optional, can be kneaded by hand)
- Large bowl (if kneading by hand)
- Rolling pin
- Skillet or non-stick frying pan
- Parchment paper
- Fork
Instructions
-
Combine the dry ingredients: In a food processor, combine the flour, baking soda, and salt. Pulse a few times to mix thoroughly. Alternatively, in a large bowl, whisk together the flour, baking soda, and salt.
-
Add the wet ingredients: With the food processor running, slowly drizzle in the olive oil. Then, gradually add the milk and water. Continue processing until a dough forms. If kneading by hand, make a well in the center of the dry ingredients. Pour in the olive oil, milk, and water. Using your fingers, gradually incorporate the dry ingredients into the wet ingredients until a shaggy dough forms.
-
Knead the dough: Transfer the dough to a lightly floured surface. Knead for 5-7 minutes, or until the dough is smooth and elastic. Adjust the humidity by adding a little more flour if the dough is too sticky or a little more water if it’s too dry. The dough should be easy to roll out. If using a food processor, process until the dough forms a ball and is smooth, adding flour or water as needed.
-
Rest the dough: Place the dough in a lightly oiled bowl, cover with plastic wrap, and let it rest at room temperature for at least 60 minutes. This allows the gluten to relax, making the dough easier to roll out.
-
Divide the dough: After the resting period, turn the dough out onto a lightly floured surface. Divide the dough into 8 equal pieces.
-
Shape the dough: Roll each piece of dough into a ball.
-
Roll out the piadine: On a lightly floured surface, roll out each ball into a circle about 10 inches in diameter. The dough should be thin, but not so thin that it tears easily. You shouldn’t need flour on the table as you roll, but you can use a little to prevent sticking if necessary.
-
Prepare for cooking: Place the rolled-out piadine on a tray lined with parchment paper to prevent them from sticking together.
-
Cook the piadine: Heat a skillet or a non-stick frying pan over medium-high heat. The pan should be hot before you start cooking the piadine.
-
Bake the first side: Place one piadina in the hot pan and cook until the underside is golden brown and has dark brown spots, about 2-3 minutes. Keep an eye on it to prevent burning.
-
Flip and bake the second side: Flip the piadina and cook the other side until it is also golden brown and has dark brown spots, about 1-2 minutes.
-
Pinch and prick: During baking, use a fork to prick the piadina all over. This helps to prevent it from puffing up too much and ensures even cooking. You can also pinch it to create some characteristic bubbles and textures.
-
Repeat: Remove the cooked piadina from the pan and set aside. Repeat the process with the remaining piadine, rolling out the next one while the previous one is cooking.
-
Serve immediately: Piadine are best served warm, straight from the pan.
Note: Using milk in the dough will result in a softer piadina. If you prefer a crispier texture, replace the milk with water. You can also adjust the ratio of milk to water to achieve your desired texture.
Tip: For faster cooking, use two pans simultaneously. Cook a batch of 4 piadine, serve them immediately, and then cook the remaining ones. Freshly cooked piadine are always the most delicious.
Expert Tips & Tricks
- Rendered Lard Variation: While the recipe uses olive oil, the traditional Romagnole recipe uses rendered lard. This will give the piadina a richer flavor and slightly different texture. If you choose to use lard, substitute it for the olive oil in the recipe.
- Dough Consistency: The key to a good piadina is the dough consistency. It should be smooth and elastic, but not too sticky. Adjust the amount of flour or water as needed to achieve the desired consistency.
- Cooking Temperature: The pan should be hot enough to cook the piadina quickly, but not so hot that it burns. Adjust the heat as needed to achieve the perfect golden brown color.
- Don’t Overcook: Overcooked piadine will be dry and brittle. Cook them just until they are golden brown and have dark brown spots.
- Rolling Technique: Roll the dough out thinly and evenly for the best results. If the dough is too thick, the piadine will be doughy and undercooked in the center.
- Hot Pan is Key: Make sure the skillet is hot before adding the piadina for optimal browning.
Serving & Storage Suggestions
Piadine are best served warm, straight from the pan. Fold them in half and fill them with your favorite ingredients, such as:
- Prosciutto and arugula
- Grilled vegetables
- Soft cheese (such as stracchino or mozzarella)
- Pesto
- Sausage and peppers
Leftover piadine can be stored at room temperature in a loosely covered container for up to 24 hours. They will become slightly softer as they sit. To reheat, warm them in a dry skillet or in a microwave for a few seconds. They can also be stored in the refrigerator for up to 3 days. To freeze, wrap them tightly in plastic wrap and store them in a freezer bag for up to 2 months. Reheat them directly from frozen in a dry skillet.
Nutritional Information
Estimated nutritional information per piadina. Values may vary based on specific ingredients and portion sizes.
| Nutrient | Amount per Serving | % Daily Value |
|---|---|---|
| Calories | 320 kcal | 16% |
| Total Fat | 12g | 18% |
| Saturated Fat | 2g | 10% |
| Cholesterol | 3mg | 1% |
| Sodium | 350mg | 15% |
| Total Carbohydrate | 48g | 17% |
| Dietary Fiber | 2g | 7% |
| Sugars | 1g | 2% |
| Protein | 8g | 16% |
Variations & Substitutions
- Vegan Piadine: Substitute the milk with plant-based milk, such as almond milk, soy milk, or oat milk. You can also use water.
- Gluten-Free Piadine: Use a gluten-free all-purpose flour blend. You may need to add a little more liquid to the dough to achieve the desired consistency.
- Whole Wheat Piadine: Substitute half of the all-purpose flour with whole wheat flour for a nuttier flavor and added fiber.
- Herb-Infused Piadine: Add chopped fresh herbs, such as rosemary, thyme, or oregano, to the dough for a flavorful twist.
- Spiced Piadine: Add a pinch of red pepper flakes or other spices to the dough for a little heat.
FAQs (Frequently Asked Questions)
Q: Can I make the dough ahead of time?
A: Yes, you can make the dough a day ahead of time. Store it in the refrigerator, wrapped tightly in plastic wrap. Bring it to room temperature before rolling it out.
Q: Why are my piadine tough?
A: Over-kneading the dough can lead to tough piadine. Also, avoid overcooking them in the pan.
Q: How do I prevent the piadine from puffing up too much?
A: Prick the piadine all over with a fork during baking. This will release steam and prevent them from puffing up excessively.
Q: Can I use a different type of oil?
A: While olive oil is recommended, you can use other oils, such as vegetable oil or canola oil. However, olive oil will give the piadine a more authentic flavor.
Q: My dough is too sticky. What should I do?
A: Add a little more flour, a tablespoon at a time, until the dough is no longer sticky.
Final Thoughts
Now it’s your turn to create your own memories with these simple yet delightful Piadine Romagnole. Experiment with different fillings, share them with loved ones, and let the warm, comforting flavors transport you to the heart of Italy. Don’t be afraid to adapt the recipe to your own preferences – that’s the beauty of home cooking! Buon appetito!