
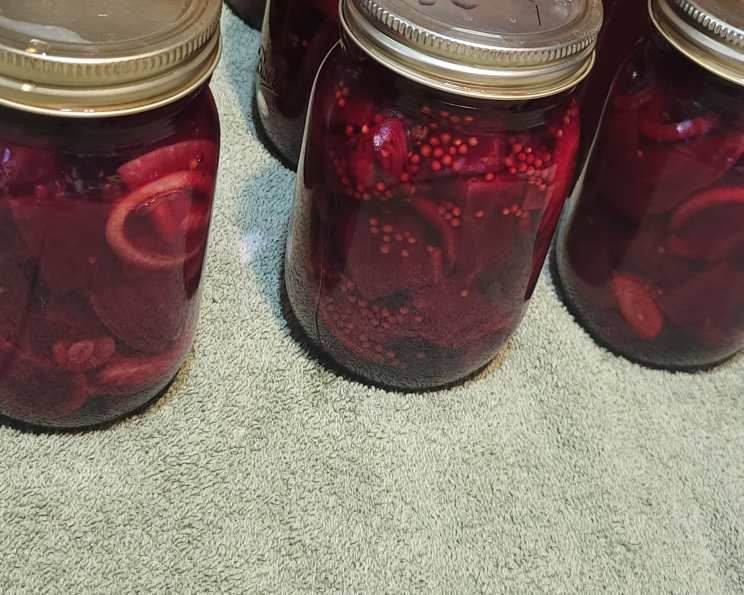
The Jewel-Toned Pantry: Canning Pickled Beets
I’ll never forget my grandmother’s cellar, a cool, earthy space lined with jars of vibrant colors. Among the glistening rows, the pickled beets always caught my eye. Their deep ruby hue, intensified by the pickling brine, promised a burst of sweet and tangy flavor that brightened even the dullest winter day. Taking a bite was like a concentrated shot of sunshine in the middle of January. Now, carrying on the tradition, I find a unique satisfaction in filling my own pantry with these crimson treasures.
Recipe Overview
- Prep Time: 30 minutes
- Cook Time: 45 minutes
- Total Time: 1 hour 15 minutes
- Yields: 6 pints
- Dietary Type: Vegetarian, Gluten-Free
Ingredients
- 35-40 small beets, unpeeled
- 2 cups sugar
- 2 cups water
- 2 cups white vinegar
- 1 teaspoon ground cloves
- 1 teaspoon allspice
- 1 tablespoon cinnamon
- 1 teaspoon whole cloves
Equipment Needed
- Large pot
- Large saucepan
- Canning jars (6 pint-sized)
- Jar lifter
- Boiling water bath canner
- Cooling rack
- Sharp knife or mandoline
Instructions
-
Begin by thoroughly washing the beets. Place the unpeeled beets in a large pot and cover them with water.
-
Bring the water to a boil over high heat, then reduce the heat to medium and simmer until the beets are fork-tender. This typically takes about 30-45 minutes, depending on the size of the beets. Be careful not to overcook them, as they will become mushy.
-
Once the beets are cooked, drain the hot water and run cold water over them until they are cool enough to handle. The skins should slip off easily at this point; you can use your fingers or a paring knife to remove them.
-
Slice the peeled beets into approximately 1/4-inch thick slices, or cut them into cubes if you prefer. A mandoline can be helpful for achieving uniform slices, but a sharp knife works just as well.
-
Prepare your canning jars by washing them thoroughly with hot, soapy water. Rinse well. Keep the jars hot until ready to fill by placing them in a simmering pot of water. Sterilizing them is recommended, especially for long-term storage; follow the manufacturer’s instructions for your jars.
-
Carefully pack the sliced or cubed beets snugly into the hot canning jars, leaving about 3/4-inch headspace at the top of each jar. Be gentle to avoid bruising the beets.
-
In a large saucepan, combine the sugar, water, white vinegar, ground cloves, allspice, cinnamon, and whole cloves. Bring the mixture to a boil over medium-high heat, stirring occasionally to ensure the sugar dissolves completely.
-
Once the mixture is boiling, reduce the heat and simmer for about 10 minutes, stirring occasionally. This allows the flavors to meld together and ensures that all the sugar granules are fully dissolved.
-
Carefully ladle the hot pickling liquid over the beets in the jars, maintaining the 3/4-inch headspace. The liquid should reach no higher than the shoulder of the jar.
-
Use a clean utensil (like a chopstick or thin spatula) to gently release any trapped air bubbles from the jars. Run the utensil along the inside of each jar to dislodge the bubbles.
-
Wipe the rims of the jars clean with a damp cloth. This is crucial for ensuring a proper seal.
-
Place the lids on the jars and screw the bands on fingertip-tight. Do not overtighten the bands, as this can prevent the jars from sealing properly.
-
Carefully lower the filled jars into a boiling water bath canner. Make sure the jars are completely submerged in the water; the water level should be at least 1 inch above the tops of the jars.
-
Bring the water in the canner to a rolling boil and process the jars for 12 minutes. Adjust processing time for altitude, if necessary, by adding additional time as per canning guidelines.
-
After processing, turn off the heat and carefully remove the jars from the canner using a jar lifter. Place the hot jars on a cooling rack, leaving some space between them to allow for air circulation.
-
Let the jars cool completely, undisturbed, for 12-24 hours. As the jars cool, you should hear a “pop” sound as the lids seal.
-
After the jars have cooled completely, check the seals by pressing down on the center of each lid. If the lid doesn’t flex or move, it is properly sealed. If the lid flexes, the jar is not sealed and should be reprocessed with a new lid, or refrigerated and used within a few weeks.
Expert Tips & Tricks
- For a deeper, richer flavor, consider using apple cider vinegar instead of white vinegar. The apple cider vinegar adds a subtle sweetness and complexity.
- If you prefer a less sweet pickle, reduce the amount of sugar by 1/4 to 1/2 cup.
- Add a small piece of horseradish root to each jar for a spicy kick.
- Roasting the beets before pickling intensifies their natural sweetness and adds a smoky dimension to the flavor profile. To roast, toss the unpeeled beets with a little olive oil and roast in a 400°F (200°C) oven until tender, about 45-60 minutes.
- Don’t discard the beet greens! They can be sautéed, steamed, or added to salads.
- Always use a clean jar lifter to avoid contaminating the jars.
- Ensure accurate headspace. Too little headspace can cause the jars to buckle during processing, while too much can lead to seal failure.
Serving & Storage Suggestions
Pickled beets are a versatile addition to any meal. Serve them chilled as a side dish, tossed in salads, or as a colorful topping for sandwiches and burgers. They pair well with goat cheese, walnuts, and balsamic vinaigrette.
Properly sealed jars of pickled beets can be stored in a cool, dark place for up to one year. Once opened, refrigerate the beets and consume them within a few weeks. Unsealed jars should be refrigerated immediately and used within a few weeks as well.
Nutritional Information
| Nutrient | Amount per Serving | % Daily Value |
|---|---|---|
| Calories | 409.5 kcal | N/A |
| Calories from Fat | 6 g | 2% |
| Total Fat | 0.7 g | 1% |
| Saturated Fat | 0.1 g | 0% |
| Cholesterol | 0 mg | 0% |
| Sodium | 233.7 mg | 9% |
| Total Carbohydrate | 98.2 g | 32% |
| Dietary Fiber | 6.8 g | 27% |
| Sugars | 90.1 g | 360% |
| Protein | 5 g | 10% |
Nutritional information is an estimate and may vary based on specific ingredients and preparation methods.
Variations & Substitutions
- Spiced Pickled Beets: Add a few star anise pods to the pickling liquid for a warm, licorice-like flavor.
- Pickled Golden Beets: Use golden beets instead of red beets for a milder, sweeter flavor and a beautiful golden color.
- Pickled Beet Relish: Dice the pickled beets and combine them with chopped onions, celery, and a little mustard for a tangy relish.
- Maple-Sweetened Pickled Beets: Replace some of the sugar with maple syrup for a more complex sweetness.
- Balsamic Pickled Beets: Use balsamic vinegar instead of white vinegar for a richer, more intense flavor.
FAQs (Frequently Asked Questions)
Q: Why do I need to leave headspace in the jars?
A: Headspace allows for expansion of the contents during processing and helps create a vacuum seal as the jars cool.
Q: Can I use larger beets for this recipe?
A: Yes, you can use larger beets, but you will need approximately 15-18 larger beets. Be sure to adjust the cooking time accordingly.
Q: How do I know if my jars are properly sealed?
A: After the jars have cooled, press down on the center of each lid. If the lid doesn’t flex or move, it is properly sealed. You should also hear a “pop” sound as the lids seal during cooling.
Q: Can I reuse canning lids?
A: No, canning lids are designed for single use only. The sealing compound on the lid is only effective once.
Q: What if my pickled beets turn a brownish color?
A: This can happen if the beets are exposed to too much air during processing. Make sure the jars are completely submerged in the water bath canner and that the headspace is correct.
Final Thoughts
Embrace the joy of preserving the season’s bounty with these vibrant pickled beets! This recipe is a wonderful way to enjoy the sweet and tangy flavors of beets year-round. Don’t be afraid to experiment with different spices and variations to create your own unique signature pickle. Share your creations with friends and family, and let the jewel-toned jars in your pantry bring a touch of sunshine to every meal. I encourage you to embark on this delicious journey, and I’d love to hear about your experiences and any creative twists you add to this classic recipe!