
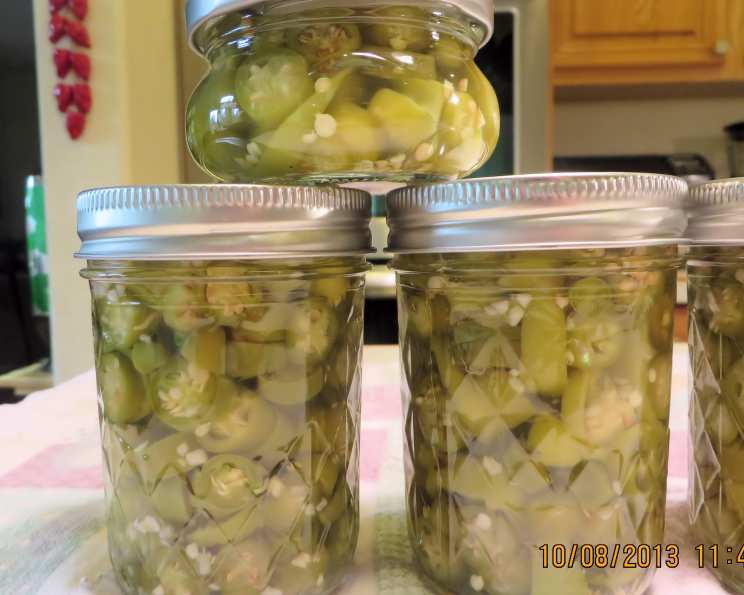
Pickled Hot Jalapeno Peppers: A Fiery Kitchen Staple
The clink of the jar, the vinegary tang that hits your nose as you pop the lid – it all screams “taco night!” But for me, pickled jalapenos are so much more. They’re a flash of memory, transporting me back to my grandmother’s kitchen, where jars of vibrant green peppers lined the shelves, a testament to her garden’s bounty and her love for adding a kick to everything. She’d sneak them into cornbread, top her famous chili with a generous heap, and even chop them finely into her deviled eggs. Those little peppers were a symbol of her zest for life, and every time I pickle a batch, I feel a little closer to her.
Recipe Overview
- Prep Time: 20 minutes
- Cook Time: 25 minutes
- Total Time: 45 minutes
- Yields: 4 pints
- Dietary Type: Vegan, Gluten-Free
Ingredients
- 2 quarts jalapeno peppers
- 2 cups white vinegar (that’s 5% acidity)
- 2 cups water
- 1 teaspoon salt
- Optional: 4 cloves garlic, peeled
Equipment Needed
- Large pot
- Sterilized canning jars (4 pint-sized)
- Canning tools (jar lifter, funnel)
- Large stockpot with rack for water bath canning
Instructions
-
Begin by preparing your jalapeno peppers. This involves taking safety precautions as capsaicin, the compound that makes jalapenos spicy, can irritate the skin and eyes. Wearing gloves is highly recommended. Seed, stem, and slice the peppers, aiming for rings about ¼-inch thick. Alternatively, you can leave the peppers whole if they are small.
-
If you opt to leave the peppers whole, it’s crucial to cut 2 small slits in each pepper. This step is not optional; it prevents the peppers from exploding during the canning process due to the build-up of steam inside.
-
In a large pot, combine the white vinegar and water. Place the pot on the stovetop over medium-high heat and bring the mixture to a simmer. It’s important to simmer, not boil. Boiling can concentrate the vinegar and affect the final taste and texture of the peppers.
-
While the vinegar and water mixture is heating, pack the prepared jalapeno peppers tightly into your sterilized canning jars. Leave about ½ inch of headspace at the top of each jar – the space between the top of the peppers and the lid.
-
Pour the hot vinegar/water mixture over the peppers in the jars, again leaving ½ inch of headspace. Make sure the peppers are fully submerged in the liquid. Use a utensil to gently press down on the peppers and release any trapped air bubbles.
-
Add the salt to each jar, dividing it evenly. Taste as you go and adjust if needed. Remember, the pickling process will enhance the saltiness, so it’s better to err on the side of caution. You can also add 1 clove of garlic to each jar at this stage for added flavor.
-
Wipe the rims of the jars with a clean, damp cloth to remove any drips or residue. Place the lids on the jars, followed by the rings, tightening them until they are fingertip tight – not too loose, not too tight.
-
Process the filled jars in a boiling water bath for 15 minutes. To do this, place a canning rack in the bottom of a large stockpot. Fill the pot with enough water to cover the jars by at least 1 inch. Bring the water to a rolling boil.
-
Carefully lower the filled jars into the boiling water using a jar lifter. Ensure the jars are not touching each other or the sides of the pot.
-
Once the water is boiling again, begin timing for 15 minutes. Maintain a gentle, steady boil throughout the processing time.
-
After 15 minutes, turn off the heat and carefully remove the jars from the water bath using the jar lifter. Place them on a towel-lined surface to cool completely.
-
As the jars cool, you should hear a “pop” sound as the lids seal. This indicates that the jars have been properly processed and are shelf-stable.
-
After the jars have cooled completely (about 12-24 hours), check the seals by pressing down on the center of each lid. If the lid doesn’t flex or pop, the jar is sealed properly. If a lid flexes or pops, it didn’t seal properly. You can either reprocess the jar with a new lid, or store it in the refrigerator and use the peppers within a few weeks.
Expert Tips & Tricks
- Adjust the heat: For a milder flavor, remove more of the seeds and membranes from the peppers. For extra heat, leave the seeds intact or add a pinch of red pepper flakes to each jar.
- Use fresh, firm peppers: Avoid using peppers that are soft or have blemishes, as these will not hold up well during the pickling process.
- Proper headspace is key: Leaving the correct amount of headspace ensures a proper seal and prevents spoilage.
- Don’t over-tighten the rings: Over-tightening the rings can prevent air from escaping during processing, which can lead to seal failure.
- Patience is a virtue: Allow the peppers to sit in the brine for at least a week before eating to allow the flavors to fully develop.
Serving & Storage Suggestions
Pickled jalapenos are incredibly versatile. Serve them as a condiment with tacos, nachos, burgers, and chili. Chop them up and add them to salsa, guacamole, or cornbread. They’re also delicious on pizza or mixed into creamy dips.
Properly sealed jars of pickled jalapenos can be stored in a cool, dark place for up to a year. Once opened, store the jars in the refrigerator, where they will last for several months.
Nutritional Information
Here’s an estimated nutritional breakdown per serving (based on a serving size of approximately 1/4 cup):
| Nutrient | Amount per Serving | % Daily Value |
|---|---|---|
| Calories | 77 kcal | N/A |
| Calories from Fat | 6 kcal | N/A |
| Total Fat | 0.7 g | 1% |
| Saturated Fat | 0.2 g | 0% |
| Cholesterol | 0 mg | 0% |
| Sodium | 596 mg | 24% |
| Total Carbohydrate | 13 g | 4% |
| Dietary Fiber | 5 g | 20% |
| Sugars | 8 g | N/A |
| Protein | 2 g | 3% |
Note: Nutritional information is an estimate and can vary based on specific ingredients and serving sizes.
Variations & Substitutions
- Sweet Heat: Add a tablespoon of sugar to the brine for a touch of sweetness.
- Spicy Garlic: Infuse the brine with roasted garlic cloves for a deeper, richer flavor.
- Carrot & Onion: Add sliced carrots and onions to the jars along with the jalapenos for a pickled vegetable medley.
- Different Vinegars: Experiment with different types of vinegar, such as apple cider vinegar or rice vinegar, for a unique flavor profile. Be sure to maintain the 5% acidity level for safe canning.
FAQs (Frequently Asked Questions)
Q: Do I really need to wear gloves when handling jalapenos?
A: Yes, it’s highly recommended! Capsaicin, the compound that makes jalapenos spicy, can cause burning and irritation to the skin, especially if you touch your face or eyes.
Q: Why do I need to cut slits in whole jalapenos before pickling?
A: Cutting slits allows steam to escape during the canning process, preventing the peppers from exploding inside the jars.
Q: How do I know if my jars have sealed properly?
A: After the jars have cooled completely, press down on the center of each lid. If the lid doesn’t flex or pop, the jar is sealed properly.
Q: What do I do if a jar doesn’t seal?
A: If a jar doesn’t seal, you can either reprocess it with a new lid, making sure the rim is clean, or store it in the refrigerator and use the peppers within a few weeks.
Q: How long do pickled jalapenos last?
A: Properly sealed jars of pickled jalapenos can be stored in a cool, dark place for up to a year. Once opened, store them in the refrigerator, where they will last for several months.
Final Thoughts
Pickling jalapenos is a simple and rewarding process that allows you to enjoy these fiery peppers year-round. Whether you’re a seasoned canner or a beginner, this recipe is easy to follow and yields delicious results. So, gather your ingredients, put on your gloves, and get ready to add a kick to your kitchen creations! Don’t be afraid to experiment with different variations and flavor combinations to create your own signature pickled jalapenos. I encourage you to share your feedback and variations with me. Consider pairing these fiery peppers with a cool and creamy avocado crema for the perfect balance.