
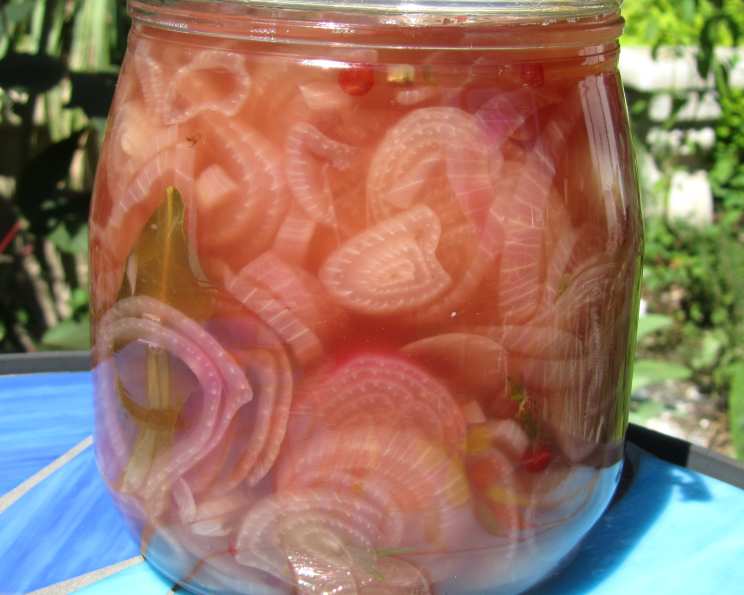
Pickled Pink Shallots: A Culinary Jewel
I’ll never forget the first time I tasted pickled shallots. It was at a bustling farmers market in Provence, France, where a wizened old woman with hands stained purple from the local wine was offering samples of her homemade confit d’échalotes. The sweet and tangy shallots, bursting with the aroma of thyme and peppercorns, were a revelation. They cut through the richness of a creamy goat cheese like a knife, and I knew then that I had to learn the secrets of her craft. Now, years later, I’m excited to share my own version of this culinary gem.
Recipe Overview
- Prep Time: 20 minutes
- Cook Time: 15 minutes
- Total Time: 35 minutes (plus processing or refrigeration time)
- Yields: Approximately 1 quart
- Dietary Type: Vegan, Gluten-Free
Ingredients
- 4 cups lightly packed shallots, peeled and thinly sliced
- 1 cup red wine vinegar (5% acidity or greater)
- ½ cup filtered water or ½ cup red wine
- ¼ cup honey or ¼ cup organic agave
- ½ teaspoon pickling salt
- 1 teaspoon pink peppercorns
- 3-4 sprigs fresh thyme
- 1 sprig rosemary
- 1 bay leaf
- 1 pinch lavender buds (optional)
- 1 teaspoon juniper berries (optional)
Equipment Needed
- Sterilized pint jar(s)
- Large saucepan
- Boiling water bath canner (optional)
- Wooden spoon or spatula
Instructions
-
If you choose to can the shallots for longer shelf life, begin by preparing your canner, jars, and lids according to standard canning procedures. This usually involves sterilizing the jars in boiling water for 10 minutes.
-
In a large saucepan, combine the red wine vinegar, water (or red wine), honey (or agave), pickling salt, pink peppercorns, thyme sprigs, rosemary sprig, and bay leaf.
-
Bring the mixture to a boil over high heat, stirring occasionally to dissolve the salt and honey (or agave).
-
Once boiling, reduce the heat to low and simmer gently for 5 minutes to allow the herbs to infuse their flavor into the brine. This step is crucial for developing a complex and aromatic pickle.
-
Add the thinly sliced shallots to the simmering brine.
-
Cook the shallots just until they are heated through. Avoid overcooking, as they will become mushy. This typically takes only 1-2 minutes. You want them to retain a bit of bite.
-
Pack the sliced shallots into a clean, sterilized pint jar, leaving a generous ½-inch headspace at the top. Press gently to ensure they are snug but not overly compacted.
-
Return the brine in the saucepan to high heat and bring it back to a rolling boil. This ensures that the brine is hot enough to properly seal the jars during processing.
-
Carefully pour the boiling hot brine over the shallots in the jar, ensuring that they are completely submerged and that the liquid reaches the ½-inch headspace mark.
-
Remove any trapped air bubbles by gently running the handle of a wooden spoon or a specialized bubble remover tool along the inside of the jar. This step is essential for a good seal.
-
Wipe the rim of the jar clean with a damp cloth. Even a tiny bit of food residue can prevent a proper seal.
-
Affix a new lid and screw on the rim until it is fingertip tight. Do not overtighten, as this can prevent the air from escaping during processing.
-
Process the filled jar in a boiling water bath for 10 minutes. Make sure the water covers the jars by at least an inch. Once processed, remove the jar carefully and let cool completely.
-
Alternatively, if you prefer to store the pickled shallots in the refrigerator without processing, skip the boiling water bath step. Allow the jar to cool completely before refrigerating.
Expert Tips & Tricks
-
Shallot Slicing: Use a mandoline for perfectly even and thin slices. This ensures uniform pickling and a more appealing texture.
-
Vinegar Acidity: Red wine vinegar with 5% acidity or greater is crucial for proper preservation. Don’t substitute with weaker vinegars.
-
Honey vs. Agave: Both honey and agave add sweetness and complexity. Honey will impart a slightly floral note, while agave offers a cleaner, more neutral sweetness.
-
Herb Infusion: Don’t skip the simmering step for the brine. It allows the herbs to fully release their essential oils, resulting in a more flavorful pickle.
-
Jar Sealing: After processing, you should hear a “pop” sound as the jars cool, indicating that a vacuum seal has formed. Press down on the center of the lid; it should not flex. If the lid flexes, the jar didn’t seal properly and must be reprocessed with a new lid or stored in the refrigerator.
Serving & Storage Suggestions
Pickled pink shallots are incredibly versatile. They are fantastic as a salad topper, adding a tangy and slightly sweet crunch. They make an excellent condiment for sandwiches, especially those with grilled meats or vegetarian fillings. Serve them on a cheese tray alongside your favorite cheeses and crackers. Top a platter of sliced ripe tomatoes with the sliced shallots and sprinkle some crumbled feta or goat cheese over for a simple yet elegant appetizer. They also pair wonderfully with pate or terrines.
-
Canned shallots: Once properly processed, can be stored in a cool, dark place for up to one year.
-
Refrigerated shallots (unprocessed): Should be stored in the refrigerator and consumed within 2-3 weeks.
Nutritional Information
(Estimated per serving, assuming approximately 16 servings per quart)
| Nutrient | Amount per Serving | % Daily Value |
|---|---|---|
| Calories | 48 kcal | 2% |
| Total Fat | 0.04g | 0% |
| Saturated Fat | 0.01g | 0% |
| Cholesterol | 0 mg | 0% |
| Sodium | 79 mg | 3% |
| Total Carbohydrate | 11.1 g | 4% |
| Dietary Fiber | 0.01 g | 0% |
| Sugars | 4.3 g | |
| Protein | 1.0 g | 2% |
Variations & Substitutions
- Spicy Pickled Shallots: Add a pinch of red pepper flakes or a few slices of fresh chili to the brine for a kick.
- Maple Syrup: Substitute maple syrup for honey or agave for a slightly different flavor profile.
- Other Herbs: Experiment with different herbs like oregano, marjoram, or savory.
- Different Vinegar: White wine vinegar can be used in place of red wine vinegar for a milder flavor.
- Add garlic: add a clove or two of sliced garlic to the jar.
FAQs (Frequently Asked Questions)
Q: Can I use white shallots instead of pink shallots?
A: Yes, you can use white shallots, but the pink shallots will give the pickles a more beautiful color. The flavor will be slightly different, but both will work well.
Q: Do I have to process the jars in a boiling water bath?
A: No, processing is only necessary if you want to store the pickled shallots at room temperature for an extended period. If you plan to keep them refrigerated, you can skip the processing step.
Q: My pickled shallots taste too acidic. What can I do?
A: The acidity will mellow over time. If they are still too tart after a week, you can add a touch more honey or agave to the brine.
Q: Can I reuse the brine after the shallots are gone?
A: It’s not recommended to reuse the brine for pickling other vegetables, as it may have lost some of its acidity and could harbor bacteria. However, you can use it as a marinade for meats or a vinaigrette for salads.
Q: How long do I have to wait before eating the pickled shallots?
A: While you can eat them immediately, it’s best to wait at least a few days (or even a week) to allow the flavors to fully develop and meld together.
Final Thoughts
Pickled pink shallots are more than just a condiment; they are a culinary expression, a burst of flavor that can elevate even the simplest dish. I encourage you to try this recipe and experience the delightful combination of sweet, tangy, and herbaceous notes. Feel free to experiment with different herbs and spices to create your own signature pickle. Share your creations with friends and family, and don’t be afraid to let your culinary creativity shine! Serve them with a crisp glass of white wine or alongside a hearty charcuterie board for a truly unforgettable experience. Happy pickling!