
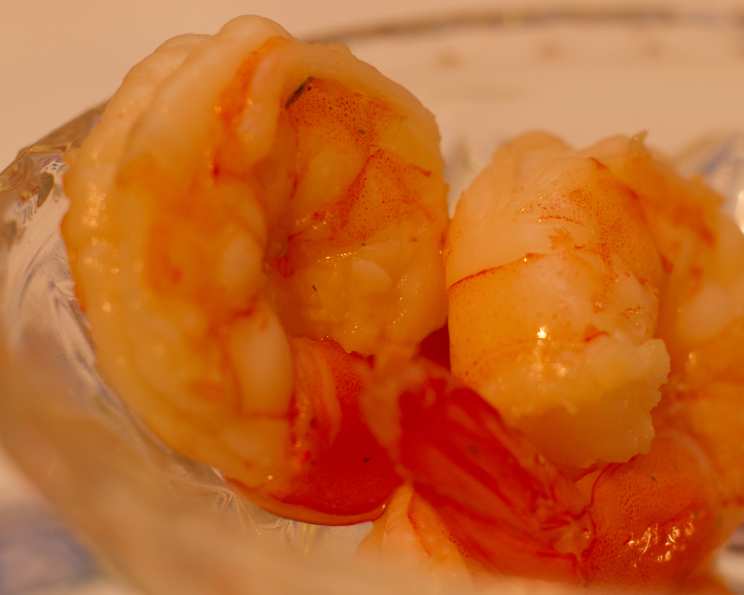
Pickled Shrimp in a Jar: A Southern Delicacy
The first time I tasted pickled shrimp was at a weathered picnic table overlooking the shimmering Gulf of Mexico. My Aunt Carol, a true Southern matriarch, had pulled out a Mason jar filled with these rosy, fragrant morsels. The briny tang, the subtle sweetness, the kick of spice – it was an explosion of flavor that perfectly complemented the salty air and the icy beer in my hand. It was more than just a snack; it was a taste of home, of family, of sunshine and lazy afternoons. Ever since, I’ve been hooked on this delightful Southern tradition.
Recipe Overview
- Prep Time: 30 minutes
- Cook Time: 23 minutes
- Total Time: 53 minutes (plus 3 days pickling time)
- Yields: 6 8-ounce jars
- Dietary Type: Pescatarian
Ingredients
For the Cooking Liquid:
- 8 cups water
- 1 large stalk celery, coarsely chopped (2/3 cup)
- 1 large carrot, peeled and coarsely chopped (2/3 cup)
- 1 medium onion, chopped (1/2 cup)
- 3 fresh parsley sprigs
- 3 fresh thyme sprigs
- 2 garlic cloves
- 5 peppercorns
- 1 bay leaf
- 1 teaspoon salt
For the Shrimp:
- 2 lbs uncooked medium shrimp, peeled and deveined
- ½ cup cider vinegar
- 2 tablespoons fresh lemon juice
- 1 tablespoon sugar
- 2 teaspoons salt
- 1 teaspoon dill seed
- 1 large onion, thinly sliced
- 12 peppercorns
- 6 bay leaves
- 6 garlic cloves
- 6 whole cloves
Equipment Needed
- Large pot
- Strainer
- Large bowl
- Whisk
- Six 8-ounce jars with lids
Instructions
-
Prepare the Cooking Liquid: In a large pot, combine the 8 cups of water, 1 large coarsely chopped celery stalk, 1 large peeled and coarsely chopped carrot, 1 medium chopped onion, 3 fresh parsley sprigs, 3 fresh thyme sprigs, 2 garlic cloves, 5 peppercorns, 1 bay leaf, and 1 teaspoon of salt.
-
Simmer the Liquid: Bring the mixture to a boil over high heat. Once boiling, reduce the heat to low and simmer for 15 minutes. This allows the flavors to meld beautifully and creates a flavorful base for the shrimp.
-
Strain and Cool: Carefully strain the cooking liquid through a fine-mesh strainer, discarding all the solids (celery, carrots, onion, herbs, and spices). Let the strained liquid cool completely in the pot. This step is crucial to prevent the shrimp from overcooking later.
-
Cook the Shrimp: Add the 2 lbs of peeled and deveined shrimp to the cooled cooking liquid. Heat the pot over medium-high heat for 8 minutes. It’s okay if the liquid doesn’t come to a simmer or a boil; the goal is to gently cook the shrimp.
-
Finish Cooking: Turn off the heat, cover the pot, and let the shrimp sit in the cooking liquid for 2 to 3 minutes more, or until they turn opaque and pink. Be careful not to overcook the shrimp, as they will become rubbery.
-
Drain and Reserve: Drain the shrimp, reserving the cooking liquid. You’ll need this liquid to top off the jars later.
-
Prepare the Vinegar Mixture: In a large bowl, whisk together ½ cup of cider vinegar, 2 tablespoons of fresh lemon juice, 1 tablespoon of sugar, 2 teaspoons of salt, and 1 teaspoon of dill seed. This mixture will provide the tangy and slightly sweet flavor that characterizes pickled shrimp.
-
Marinate the Shrimp: Add the cooked shrimp to the vinegar mixture and let them stand for 15 minutes, allowing the flavors to penetrate.
-
Assemble the Jars: In each of the six 8-ounce jars, layer the shrimp and thinly sliced onion. To each jar, add 2 peppercorns, 1 bay leaf, 1 garlic clove, and 1 whole clove. These aromatics will infuse the shrimp with even more flavor as they pickle.
-
Divide the Vinegar Mixture: Divide the vinegar mixture evenly among the jars.
-
Top Off with Cooking Liquid: Top off each jar with the reserved cooking liquid, ensuring the shrimp are submerged.
-
Seal and Refrigerate: Screw the lids on tightly and store the jars in the refrigerator for at least 3 days before serving. This pickling time is essential for the flavors to fully develop. Discard the bay leaves before serving.
Expert Tips & Tricks
- Don’t Overcook the Shrimp: The most common mistake is overcooking the shrimp. They should be just opaque and slightly firm.
- Use Fresh Ingredients: The quality of your ingredients will directly impact the flavor of the pickled shrimp. Use fresh herbs and spices whenever possible.
- Adjust the Sweetness: If you prefer a less sweet pickle, reduce the amount of sugar. Conversely, if you like it sweeter, add a little more.
- Spice It Up: For a spicier kick, add a pinch of red pepper flakes to each jar.
- Jar Sterilization: For longer storage (though it’s unlikely they’ll last that long!), sterilize the jars before filling them. Boil the jars and lids in water for 10 minutes, then let them air dry on a clean towel.
- Even Layering: Ensure an even distribution of ingredients across all jars for uniform flavor and appearance.
Serving & Storage Suggestions
Pickled shrimp are best served chilled, straight from the jar. They make a fantastic appetizer, snack, or addition to a seafood platter. Arrange them in a small bowl with toothpicks for easy serving. Serve with crackers, crusty bread, or alongside a cold beer or crisp white wine.
Stored properly in the refrigerator, pickled shrimp will last for up to 3 days. Ensure the lids are tightly sealed to prevent spoilage. Do not freeze pickled shrimp, as freezing will affect the texture and flavor. Discard any shrimp that have an off odor or appearance.
Nutritional Information
Note: Nutritional information is an estimate and may vary based on specific ingredients and serving size.
| Nutrient | Amount per Serving | % Daily Value |
|---|---|---|
| Calories | 206 kcal | – |
| Calories from Fat | 25 g | – |
| Total Fat | 2.8 g | 4% |
| Saturated Fat | 0.5 g | 2% |
| Cholesterol | 230.4 mg | 76% |
| Sodium | 1413.3 mg | 58% |
| Total Carbohydrate | 11.5 g | 3% |
| Dietary Fiber | 1.3 g | 5% |
| Sugars | 4.9 g | 19% |
| Protein | 31.7 g | 63% |
Variations & Substitutions
- Spicy Pickled Shrimp: Add a pinch of red pepper flakes or a thinly sliced jalapeño pepper to each jar for a spicy kick.
- Herbed Pickled Shrimp: Experiment with different herbs, such as tarragon or oregano, in addition to or instead of dill.
- Citrus Variation: Use a combination of lemon, lime, and orange juice for a more complex citrus flavor.
- Sweet Onion Swap: Vidalia onions are excellent for their sweetness.
- Vinegar Variety: Try using white wine vinegar or rice vinegar instead of cider vinegar for a different flavor profile.
FAQs (Frequently Asked Questions)
Q: Can I use frozen shrimp for this recipe?
A: Yes, you can use frozen shrimp, but make sure to thaw them completely before cooking. Pat them dry before adding them to the cooking liquid to remove excess moisture.
Q: How long does it take for the flavors to develop?
A: While you can technically eat the pickled shrimp after a day, the flavors really develop and meld together after 3 days of pickling in the refrigerator.
Q: Can I reuse the cooking liquid?
A: It is not recommended to reuse the cooking liquid. It has already extracted the flavors from the celery, carrot, and onion, and it’s best to discard it after the initial cooking process.
Q: How do I know if the shrimp are cooked through?
A: Shrimp are cooked through when they turn opaque and pink. Be careful not to overcook them, or they will become rubbery.
Q: Can I add other vegetables to the jars?
A: Absolutely! Sliced bell peppers, cucumbers, or even pickled okra would be great additions to the jars.
Final Thoughts
Pickled Shrimp in a Jar is more than just a recipe; it’s a taste of Southern hospitality and culinary tradition. It’s a delightful way to elevate your appetizer game, impress your guests, or simply treat yourself to a tangy and flavorful snack. So, gather your ingredients, grab a few Mason jars, and get ready to create a batch of these irresistible morsels. Don’t be afraid to experiment with the flavors and make it your own. And most importantly, share the deliciousness with friends and family! I’d love to hear about your personal twist on this classic recipe – feel free to share your feedback! Pair it with a crisp Sauvignon Blanc for the perfect accompaniment.