
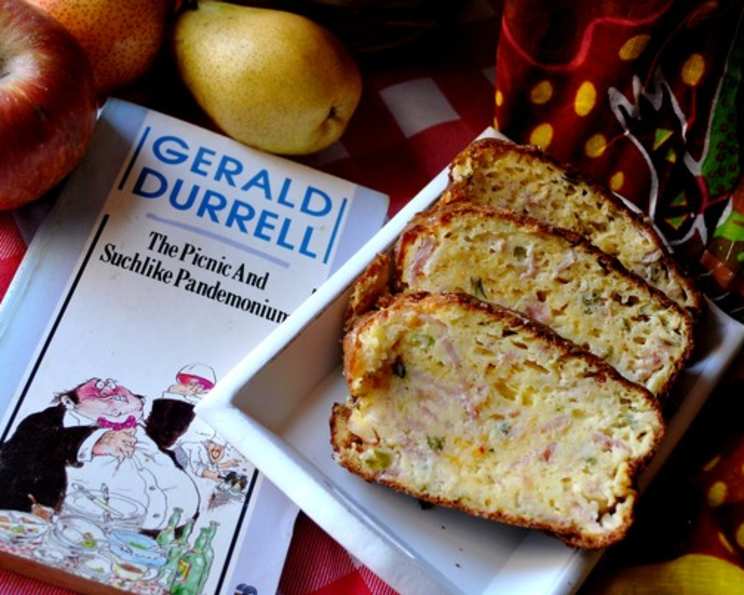
South African Picnic Bread: A Savory Slice of Sunshine
The scent of this bread instantly transports me back to childhood holidays in the Drakensberg mountains. We’d spend our days hiking, the crisp air filled with the scent of pine and wildflowers. And without fail, my aunt would bring a loaf of this incredible savoury bread, its cheesy, bacon-studded interior providing the perfect fuel for our adventures. It wasn’t just food; it was sunshine captured in a slice, a taste of home amidst breathtaking scenery.
Recipe Overview
- Prep Time: 20 minutes
- Cook Time: 1 hour
- Total Time: 1 hour 20 minutes
- Servings: 8-12
- Yield: 2 loaves
- Dietary Type: Not Gluten-Free
Ingredients
- 2 1/2 cups flour
- 4 teaspoons baking powder (not baking soda)
- 1 cup chopped spring onion
- 3 cups coarsely grated cheddar cheese
- 1 lb fairly lean bacon, chopped into smallish pieces (about 2 packets)
- 8 large eggs, beaten
- 2 teaspoons seasoning salt, such as Aromat
- Fresh coarse ground black pepper to taste
- 1 tablespoon chili sauce
- 3 tablespoons melted butter
- 1 cup buttermilk (may not need all of it)
Equipment Needed
- 2 small bread tins
- Large mixing bowl
- Measuring cups and spoons
- Whisk or fork
- Cooling rack
- Grease or cooking spray
Instructions
-
Preheat your oven to 350°F (175°C). Make sure your oven rack is in the center position for even baking.
-
Thoroughly grease two small bread tins. This is crucial to prevent the bread from sticking. You can use butter, shortening, or cooking spray.
-
In a large mixing bowl, combine the flour, baking powder, spring onion, cheddar cheese, and chopped bacon. It’s important to use fairly lean bacon as the bread is already rich; excess fat will make it greasy. Do not fry the bacon beforehand; it will cook during baking and release its flavor throughout the bread.
-
In a separate bowl, lightly beat the eggs. Add the seasoning salt, black pepper, and chili sauce to the eggs, mixing well. This creates a flavorful base for the wet ingredients.
-
Pour the beaten egg mixture and melted butter into the dry ingredients. Stir until just combined.
-
Gradually add the buttermilk, mixing until you achieve a soft, almost sticky dough – similar in consistency to scone dough. Be careful not to overmix; this can result in a tough bread. The amount of buttermilk needed may vary depending on the size of your eggs, so add it slowly until you reach the desired consistency. You might not need the entire cup.
-
Divide the batter evenly between the two prepared bread tins. Spread the batter to fill each tin.
-
Bake in the preheated oven for approximately 1 hour, or until a skewer inserted into the center comes out clean. If the top of the bread starts to brown too quickly, you can loosely cover it with foil during the last 15-20 minutes of baking.
-
Once baked, remove the bread tins from the oven and let them cool slightly in the tins for about 5-10 minutes. This helps the bread to firm up and makes it easier to remove.
-
Turn the loaves out onto a cooling rack and let them cool completely before slicing. This is essential to prevent the bread from crumbling.
-
Once cooled, wrap in foil for picnics or storage.
Expert Tips & Tricks
- For a richer flavor, use a mature cheddar cheese.
- If you don’t have buttermilk, you can make a substitute by adding 1 tablespoon of lemon juice or vinegar to 1 cup of milk and letting it sit for 5 minutes until slightly thickened.
- Experiment with different cheeses. A combination of cheddar and Gruyère would be delicious.
- Add a pinch of cayenne pepper for a little extra heat.
- If your oven tends to bake unevenly, rotate the bread tins halfway through baking.
- To ensure the bacon cooks through, chop it into small, even pieces.
- If the dough seems too wet, add a tablespoon of flour at a time until you reach the desired consistency. Conversely, if it seems too dry, add a little more buttermilk.
- Make sure to grease the bread tins very well. You can even line the bottoms with parchment paper for extra insurance.
Serving & Storage Suggestions
This South African Picnic Bread is fantastic served at room temperature or even slightly chilled. It’s perfect on its own, sliced and enjoyed as is, or you can spread it with a little cream cheese or chutney. It’s an ideal addition to picnics, lunchboxes, or as a savory snack.
To store, wrap the cooled bread tightly in foil or plastic wrap and keep it at room temperature for up to 2 days, or in the refrigerator for up to 5 days. It also freezes exceptionally well. To freeze, wrap the cooled bread tightly in freezer-safe wrap and store for up to 3 months. Thaw overnight in the refrigerator before serving. You can also reheat individual slices in the microwave or toaster oven.
Nutritional Information
(Note: These values are estimates and may vary based on specific ingredients and portion sizes.)
| Nutrient | Amount per Serving | % Daily Value |
|---|---|---|
| Calories | 450 kcal | 23% |
| Total Fat | 25g | 38% |
| Saturated Fat | 15g | 75% |
| Cholesterol | 150mg | 50% |
| Sodium | 600mg | 25% |
| Total Carbohydrate | 30g | 10% |
| Dietary Fiber | 2g | 8% |
| Sugars | 3g | – |
| Protein | 20g | 40% |
Variations & Substitutions
- Vegetarian: Omit the bacon and add more vegetables, such as chopped bell peppers, mushrooms, or zucchini.
- Spicy: Increase the amount of chili sauce or add a pinch of cayenne pepper to the batter. You can also use a spicy cheese like pepper jack.
- Herbaceous: Add fresh herbs, such as rosemary, thyme, or chives, to the batter.
- Gluten-Free: Substitute the all-purpose flour with a gluten-free blend, but be aware that the texture may be slightly different. You may also need to adjust the amount of buttermilk.
- Different Cheese: Use any cheese you like. Feta, Gruyere, or a mix of cheeses can add interesting flavors.
FAQs (Frequently Asked Questions)
Q: Can I use self-raising flour instead of all-purpose flour and baking powder?
A: No, it’s best to use all-purpose flour and baking powder separately to ensure the correct rise and texture. Self-raising flour might make the bread too dense.
Q: Can I make this bread ahead of time?
A: Absolutely! This bread is perfect for making ahead of time. It actually tastes even better the next day after the flavors have had a chance to meld together.
Q: My bread is browning too quickly on top. What should I do?
A: If the top of the bread starts to brown too quickly, loosely cover it with foil during the last 15-20 minutes of baking.
Q: Can I freeze this bread?
A: Yes, this bread freezes very well. Wrap it tightly in freezer-safe wrap and store for up to 3 months. Thaw overnight in the refrigerator before serving.
Q: What can I serve with this bread?
A: This bread is delicious on its own, but it also pairs well with soups, salads, or as a side dish to grilled meats.
Final Thoughts
This South African Picnic Bread is more than just a recipe; it’s a taste of tradition, a slice of sunshine, and a reminder of happy memories. I encourage you to try this recipe and create your own memories with it. Feel free to experiment with different variations and substitutions to make it your own. And don’t forget to share your creations and feedback! Pair it with a refreshing glass of iced tea or a crisp Sauvignon Blanc for the ultimate picnic experience. Enjoy!