
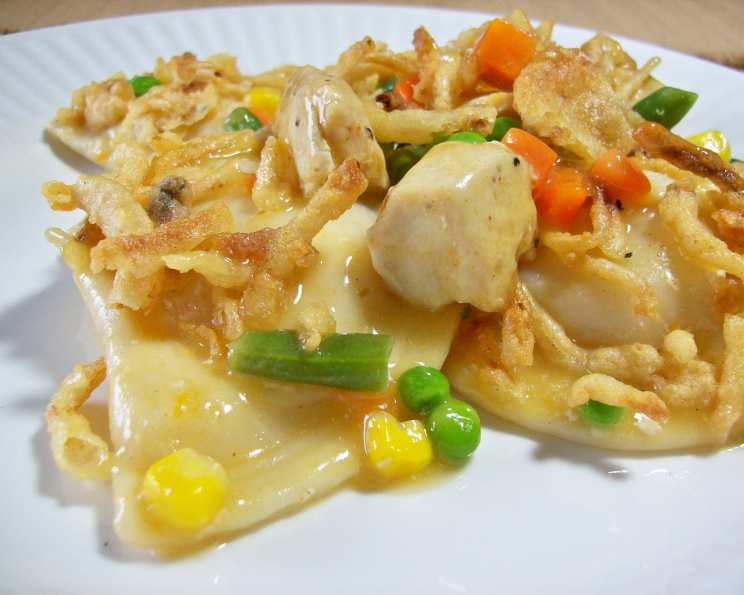
Pierogi Chicken Bake: A Comfort Food Classic
The scent of golden-brown French-fried onions always takes me back to my childhood kitchen. My grandmother, Babcia, wasn’t one for fancy cuisine. She was all about hearty, stick-to-your-ribs dishes that could feed a crowd. This Pierogi Chicken Bake reminds me so much of her cooking: simple, unpretentious, and utterly satisfying. It’s the kind of meal that brings everyone to the table, ready to share stories and enjoy each other’s company. It’s a modern, comforting take on classic Polish flavors.
Recipe Overview
- Prep Time: 15 minutes
- Cook Time: 55 minutes
- Total Time: 1 hour 10 minutes
- Servings: 6
- Dietary Type: Not Gluten-Free
Ingredients
- 1 1/2 lbs boneless, skinless chicken breasts, cut into chunks
- 2 (12 ounce) cans chicken gravy
- 1 (16 ounce) package frozen potato pierogi, thawed
- 1 (10 ounce) package frozen mixed vegetables
- Salt and pepper to taste
- 1 (2 7/8 ounce) can French-fried onions
Equipment Needed
- Large bowl
- 13×9 inch baking dish
- Aluminum foil
Instructions
- Preheat your oven to 350°F (175°C). This ensures that the dish cooks evenly and the flavors meld together perfectly.
- In a large bowl, combine the chicken chunks, chicken gravy, thawed pierogi, frozen mixed vegetables, and salt and pepper to taste. Mix everything thoroughly until the chicken and vegetables are evenly coated in the gravy. Don’t be shy with the seasoning – it really brings out the flavors.
- Transfer the mixture to a 13×9 inch baking dish. Spread it out evenly in the dish.
- Cover the baking dish tightly with aluminum foil. This will help to trap the moisture and prevent the top from drying out while the chicken cooks through.
- Bake at 350°F (175°C) for 50 minutes. Baking it covered for the majority of the cooking time helps the chicken become incredibly tender and the pierogi soften.
- Take the baking dish out of the oven and carefully remove the foil. Be careful of escaping steam!
- Evenly top the bake with the French-fried onions. The onions will add a delightful crunch and savory flavor to the dish.
- Return the baking dish to the oven and bake, uncovered, for 5 more minutes, or until the onions are golden brown and crispy. Keep a close eye on them, as they can burn quickly.
- Remove from the oven and let stand for a few minutes before serving. This allows the bake to settle slightly and makes it easier to serve.
Expert Tips & Tricks
- Thawing the Pierogi: Ensure the pierogi are fully thawed to prevent a watery bake. Placing them in the refrigerator overnight is ideal, or you can use the microwave on a defrost setting with caution, making sure not to cook them.
- Chicken Prep: Cutting the chicken into uniform chunks ensures even cooking. Consider marinating the chicken in a little garlic powder, paprika, and olive oil for extra flavor before adding it to the bowl.
- Gravy Enhancement: For a richer gravy flavor, whisk in a tablespoon of sour cream or cream cheese after baking (before adding the onions).
- Vegetable Boost: Feel free to add other vegetables like sliced mushrooms, diced carrots, or chopped celery for added nutrients and flavor.
- Make-Ahead Option: Assemble the bake up to the point of adding the French-fried onions. Cover and refrigerate for up to 24 hours. Add the onions just before baking.
- Preventing a Soggy Bottom: If you are concerned about a soggy bottom, consider lightly sautéing the pierogi in a pan with a bit of butter before adding them to the bake. This will create a slight crust and help them hold their shape.
- Adjusting for Altitude: At higher altitudes, you may need to increase the baking time slightly. Check the chicken for doneness with a meat thermometer; it should reach an internal temperature of 165°F (74°C).
Serving & Storage Suggestions
Serve the Pierogi Chicken Bake hot, straight from the oven. A dollop of sour cream or a sprinkle of fresh parsley adds a nice finishing touch. This dish is also wonderful with a simple green salad or a side of steamed green beans to balance out the richness.
Leftovers can be stored in an airtight container in the refrigerator for up to 3 days. To reheat, microwave individual portions until heated through, or bake in a preheated oven at 350°F (175°C) until warmed through. The French-fried onions will soften upon reheating, so you might consider adding a few fresh ones on top just before serving to restore some of the crunch. Freezing is not recommended as the texture of the pierogi and vegetables may change.
Nutritional Information
| Nutrient | Amount per Serving | % Daily Value |
|---|---|---|
| Calories | 256.7 kcal | N/A |
| Calories from Fat | 90 g | 35% |
| Total Fat | 10 g | 15% |
| Saturated Fat | 2.4 g | 11% |
| Cholesterol | 75 mg | 25% |
| Sodium | 660.7 mg | 27% |
| Total Carbohydrate | 13.5 g | 4% |
| Dietary Fiber | 2.6 g | 10% |
| Sugars | 0.9 g | 3% |
| Protein | 28.1 g | 56% |
Note: Nutritional information is an estimate and may vary based on specific ingredients and portion sizes.
Variations & Substitutions
- Spicy Kick: Add a pinch of red pepper flakes to the gravy for a touch of heat.
- Creamy Base: Use cream of mushroom or cream of chicken soup instead of chicken gravy for a creamier consistency.
- Cheesy Goodness: Sprinkle shredded cheddar cheese or mozzarella cheese over the top of the bake during the last 5 minutes of baking.
- Different Protein: Substitute the chicken with cooked sausage, ground beef, or even leftover turkey.
- Vegetarian Option: Replace the chicken with chickpeas or lentils for a vegetarian version. Use vegetable gravy instead of chicken gravy.
- Pierogi Variety: Experiment with different flavors of pierogi, such as cheese, sauerkraut, or even sweet varieties like blueberry.
- Gluten-Free: While the base recipe isn’t gluten-free, you can adapt it. Substitute the regular pierogi with gluten-free pierogi (they are available at many specialty stores) and ensure the gravy is also gluten-free. You can also use gluten-free French fried onions.
FAQs (Frequently Asked Questions)
Q: Can I use fresh vegetables instead of frozen?
A: Absolutely! Fresh vegetables will work just fine. You might want to lightly sauté them before adding them to the bake to ensure they are cooked through.
Q: Can I add cheese to this dish?
A: Yes, shredded cheddar, mozzarella, or even a sprinkle of Parmesan cheese would be a delicious addition. Add it during the last few minutes of baking so it melts beautifully.
Q: Can I make this ahead of time and freeze it?
A: While you can assemble the bake ahead of time and refrigerate it for up to 24 hours, freezing is not recommended as the texture of the pierogi and vegetables may change.
Q: The French-fried onions burned. What did I do wrong?
A: The onions can burn quickly. Keep a close eye on them during the last 5 minutes of baking. If they start to brown too quickly, you can loosely tent the baking dish with foil to prevent further browning.
Q: Can I use different flavors of pierogi?
A: Definitely! Feel free to experiment with different flavors of pierogi, such as cheese, sauerkraut, or even sweet varieties like blueberry (for a more unconventional, sweet-and-savory dish).
Final Thoughts
This Pierogi Chicken Bake is a guaranteed crowd-pleaser, perfect for busy weeknights or casual gatherings. It’s the kind of recipe that’s easy to customize and adapt to your own tastes. Don’t be afraid to get creative with the ingredients and make it your own. I hope you enjoy this comforting and flavorful dish as much as my family does. Please share your feedback and any variations you try – I’d love to hear about your culinary adventures! Consider serving it with a crisp, dry white wine for a delightful pairing.