
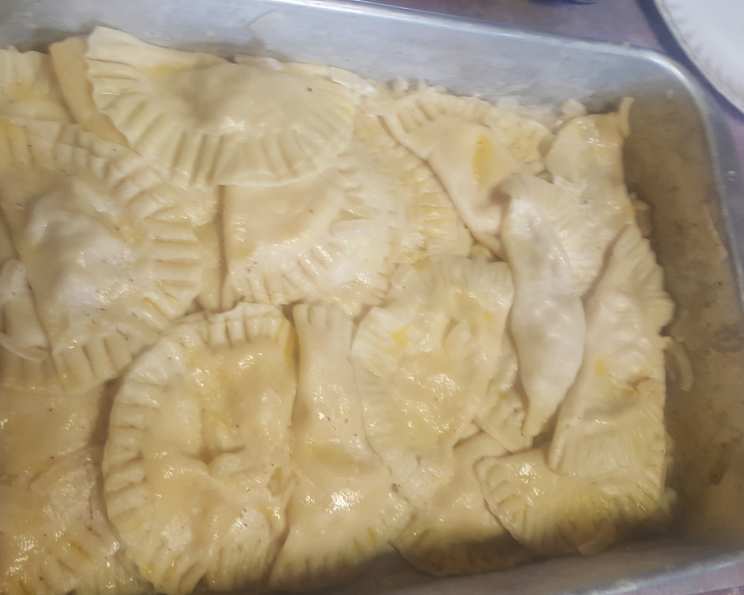
Perfect Pierogi Dough: A Culinary Journey
My grandmother’s kitchen was always filled with the comforting aroma of simmering potatoes and onions, a prelude to her legendary pierogi. I remember standing on a rickety stool, mesmerized as she expertly pinched each dumpling shut, her hands moving with a practiced grace that only years of love and tradition could instill. Those pierogi, born from simple ingredients and boundless affection, were more than just food; they were edible memories, and this dough recipe is my humble attempt to recreate that magic.
Recipe Overview
- Prep Time: 30 minutes
- Cook Time: 5-8 minutes per batch
- Total Time: 1 hour (including resting)
- Servings: Varies based on pierogi size
- Yield: Approximately 24 Pierogi
- Dietary Type: Vegetarian (can be made vegan)
Ingredients
- 2 cups flour, all-purpose
- 1 egg (can substitute with flax egg for vegan version: 1 tbsp flaxseed meal + 3 tbsp water, sit for 5 minutes)
- ½ cup warm water
- 1 teaspoon salt
- 2 tablespoons oil, vegetable or canola
Equipment Needed
- Large mixing bowl
- Clean work surface for kneading
- Rolling pin
- Biscuit cutter or drinking glass (for cutting circles)
- Large pot
- Slotted spoon or spider strainer
- Frying pan (optional, for frying after boiling)
Instructions
- In a large mixing bowl, gently combine the flour, egg, warm water, salt, and oil. Work the ingredients together until a shaggy dough forms. Don’t overmix at this stage; you just want everything to come together.
- Turn the dough out onto a lightly floured work surface. Knead the dough for about 8-10 minutes, until it becomes smooth and elastic. The dough should be firm but pliable, not sticky. If it’s too sticky, add a little more flour, one tablespoon at a time. If it’s too dry, add a teaspoon of water at a time.
- Once the dough is kneaded, form it into a ball. Place it back in the mixing bowl, cover with a clean kitchen towel or plastic wrap, and let it rest for at least 30 minutes at room temperature. This allows the gluten to relax, making the dough easier to roll out.
- After the resting period, divide the dough in half. Keep one half covered while you work with the other to prevent it from drying out.
- On a lightly floured surface, roll out the dough to about 1/8 inch thickness. You want it thin enough to be tender but not so thin that it tears easily.
- Use a biscuit cutter or a floured drinking glass (about 3-inch diameter) to cut out circles from the rolled dough. Gather the scraps, re-roll them, and cut out more circles until all the dough is used.
- Place a golf-ball sized amount of your desired filling (potato and cheese is classic!) in the center of each circle.
- To seal the pierogi, fold the dough over the filling to form a half-moon shape. Pinch the edges tightly to seal, making sure there are no air pockets. A good seal is crucial to prevent the filling from escaping during boiling. For extra security, you can crimp the edges with a fork.
- Bring a large pot of salted water to a rolling boil. Gently drop the pierogi into the boiling water, a few at a time, to avoid overcrowding the pot.
- Boil the pierogi for 5-8 minutes, or until they float to the surface. Once they float, give them another minute or two to ensure they are cooked through.
- Use a slotted spoon or spider strainer to remove the pierogi from the boiling water and drain them well.
- (Optional) For extra flavor and texture, you can fry the boiled pierogi in butter until golden brown and crisp. Serve immediately.
Expert Tips & Tricks
- Dough Consistency is Key: The ideal pierogi dough should be smooth, elastic, and easy to work with. Adjust flour or water as needed during kneading to achieve the right consistency.
- Preventing Sticking: To prevent the dough from sticking to the work surface, keep it lightly floured. Also, dust your biscuit cutter or glass with flour before each use.
- Filling Considerations: Avoid overfilling the pierogi, as this can make them difficult to seal and prone to bursting during boiling. Also, make sure your filling is not too wet, as this can weaken the dough.
- Freezing Pierogi: Pierogi can be made ahead and frozen. Place the unboiled pierogi on a baking sheet lined with parchment paper, making sure they don’t touch. Freeze them until solid, then transfer them to a freezer bag. Cook them directly from frozen, adding a few extra minutes to the boiling time.
- Vegan Variation: A flax egg (1 tbsp flaxseed meal + 3 tbsp water, sit for 5 minutes) can be used as an egg replacement. This works very well in the recipe without negatively impacting texture or flavor.
Serving & Storage Suggestions
Serve your freshly cooked pierogi hot, ideally straight from the boiling water or after a quick pan-fry in butter. They are delicious on their own or topped with sour cream, caramelized onions, fried bacon, or a sprinkle of fresh herbs like dill or parsley.
Leftover pierogi can be stored in an airtight container in the refrigerator for up to 3 days. To reheat, you can pan-fry them in butter, microwave them (although they may become a bit soft), or re-boil them briefly.
Frozen pierogi should be cooked directly from frozen. They will keep for about 2-3 months in the freezer.
Nutritional Information
Note: Nutritional information is an estimate and will vary based on specific ingredients and serving size.
| Nutrient | Amount per Serving | % Daily Value |
|---|---|---|
| Calories | 150 kcal | 8% |
| Total Fat | 5g | 6% |
| Saturated Fat | 1g | 5% |
| Cholesterol | 20mg | 7% |
| Sodium | 150mg | 7% |
| Total Carbohydrate | 22g | 8% |
| Dietary Fiber | 1g | 4% |
| Sugars | 1g | 2% |
| Protein | 3g | 6% |
Variations & Substitutions
- Whole Wheat Pierogi: Substitute half of the all-purpose flour with whole wheat flour for a nuttier flavor and added fiber.
- Gluten-Free Pierogi: Use a gluten-free all-purpose flour blend. You might need to adjust the amount of water to achieve the right dough consistency.
- Herb-Infused Dough: Add finely chopped fresh herbs like dill, parsley, or chives to the dough for a flavorful twist.
- Sweet Pierogi: Add a tablespoon of sugar to the dough for sweet fillings like fruit or cheese.
FAQs (Frequently Asked Questions)
Q: Why is my pierogi dough so sticky?
A: The dough is likely too wet. Gradually add more flour, one tablespoon at a time, kneading until it reaches a smooth, elastic consistency.
Q: Can I use cold water instead of warm water?
A: Warm water helps to activate the gluten in the flour, resulting in a more pliable dough. Using cold water will still work, but it may require more kneading.
Q: How do I prevent the pierogi from sticking together while boiling?
A: Add the pierogi to the boiling water in batches, making sure not to overcrowd the pot. Stir them gently to prevent them from sticking to the bottom.
Q: Can I bake the pierogi instead of boiling them?
A: While boiling is the traditional method, you can bake them at 375°F (190°C) for about 20-25 minutes, or until golden brown. Brush them with melted butter before baking for extra flavor.
Q: My pierogi burst open while boiling. What did I do wrong?
A: This usually happens when the pierogi are overfilled or not sealed properly. Make sure to use a moderate amount of filling and pinch the edges tightly to create a good seal.
Final Thoughts
Making pierogi from scratch might seem daunting, but trust me, the effort is incredibly rewarding. The taste of homemade pierogi, filled with your favorite flavors and made with love, is simply unparalleled. So gather your ingredients, roll up your sleeves, and embark on this culinary adventure. And don’t forget to share your creations (and your pierogi-making memories) with the people you love!