
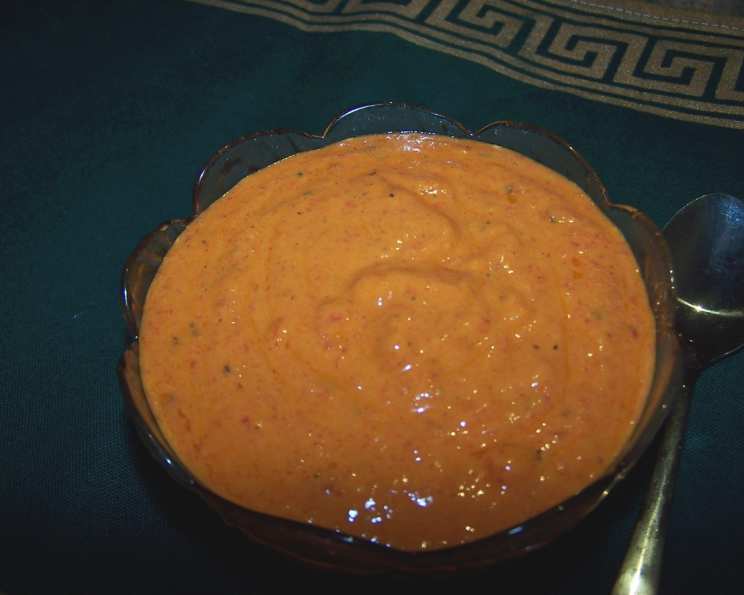
Homemade Pimiento Paste: A Taste of Sunshine
The scent of roasting red peppers instantly transports me back to my Nonna Emilia’s kitchen in Sicily. Every autumn, the air would be thick with the sweet, smoky aroma as she charred mountains of peppers over an open fire. She would then transform them, with a few simple ingredients and a whole lot of love, into a vibrant, flavorful paste that we spread on everything – crusty bread, grilled fish, even scrambled eggs. That pimiento paste, imbued with sunshine and Nonna’s magic, was a taste of home, a taste of joy, and a taste I’ve been chasing ever since.
Recipe Overview
- Prep Time: 15 minutes
- Cook Time: 35-40 minutes
- Total Time: 50-55 minutes
- Servings: 4
- Yield: About 1 cup
- Dietary Type: Vegan, Gluten-Free, Dairy-Free
Ingredients
- 2 red bell peppers
- 1 tablespoon olive oil
- 1 ounce white bread, crusts removed
- 2 garlic cloves, crushed
- 1 teaspoon cayenne pepper
- 1/2 cup extra virgin olive oil
- Salt and pepper to taste
- Crusty bread, toasted, to serve (optional)
Equipment Needed
- Roasting tray
- Large plastic food bag
- Food processor or blender
Instructions
- Preheat your oven to 400°F (200°C).
- Place the red bell peppers on a roasting tray. Drizzle them with the 1 tablespoon of olive oil, ensuring they are lightly coated.
- Roast the peppers in the preheated oven for 35-40 minutes, or until their skins have slightly blackened. Remember to turn them occasionally for even cooking. You want the skins to blister and char; this will make them easy to peel later and impart a wonderful smoky flavor.
- Carefully transfer the roasted peppers to a large plastic food bag. Seal the bag tightly and allow the peppers to cool completely inside. This steaming process will further loosen the skins.
- While the peppers are cooling, prepare the bread. Soak the 1 ounce of white bread (crusts removed) in a little cold water until it’s completely saturated.
- Once the bread is thoroughly soaked, drain it well and squeeze out any excess moisture with your hands. You want to remove as much water as possible; this will prevent the paste from becoming watery.
- Remove the cooled peppers from the plastic bag. Reserve any juices that have accumulated in the bag, as they contain valuable flavor.
- Peel the blackened skin off the peppers. This should be easy to do now that they have steamed. Halve the peeled peppers and remove the seeds and membranes.
- Place the red pepper halves in a food processor or blender. Add the squeezed-out bread, crushed garlic cloves, cayenne pepper, and the reserved pepper juices.
- Blend the mixture until it is smooth and creamy. You may need to scrape down the sides of the food processor occasionally to ensure everything is evenly processed.
- With the motor running on low speed, slowly drizzle in the 1/2 cup of extra virgin olive oil. Continue blending until the oil is fully incorporated and the paste is emulsified. The olive oil will contribute richness and body to the final product.
- Season the pimiento paste with salt and freshly ground black pepper to taste. Remember to start with a small amount and adjust as needed.
- Toast or griddle some slices of crusty bread and spread the paste generously over the top. Serve immediately and enjoy!
Expert Tips & Tricks
- Roasting Perfection: For the best flavor, ensure the peppers are properly charred during roasting. Don’t be afraid of a little blackening! This imparts a wonderful smoky depth to the paste.
- Bread Matters: Using high-quality white bread, like a country loaf, will give the paste a better texture. Avoid using overly processed bread, as it can become gummy.
- Spice Level: Adjust the amount of cayenne pepper to suit your taste. If you prefer a milder flavor, reduce the amount or omit it entirely. For a spicier kick, add a pinch of red pepper flakes in addition to the cayenne.
- Texture Control: If the paste is too thick, add a tablespoon of water or olive oil at a time until you reach the desired consistency. If it’s too thin, you can add a small amount of breadcrumbs.
- Make-Ahead Marvel: Pimiento paste can be made a day or two in advance. Store it in an airtight container in the refrigerator. The flavors will meld and deepen over time.
Serving & Storage Suggestions
Serve your homemade pimiento paste as a spread for toasted crusty bread, crackers, or vegetables. It’s also delicious as a dip for crudités, a topping for grilled meats or fish, or a flavorful addition to sandwiches and wraps.
For storage, keep the pimiento paste in an airtight container in the refrigerator. It will last for up to 5 days. The high olive oil content helps to preserve it. It’s not recommended to freeze pimiento paste, as the texture can change upon thawing.
Nutritional Information
| Nutrient | Amount per Serving | % Daily Value |
|---|---|---|
| Calories | 306.6 kcal | N/A |
| Calories from Fat | 277 g | 91% |
| Total Fat | 30.9 g | 47% |
| Saturated Fat | 4.3 g | 21% |
| Cholesterol | 0 mg | 0% |
| Sodium | 50.8 mg | 2% |
| Total Carbohydrate | 8 g | 2% |
| Dietary Fiber | 1.5 g | 6% |
| Sugars | 2.9 g | N/A |
| Protein | 1.3 g | 2% |
Variations & Substitutions
- Smoked Paprika: For an even smokier flavor, add a teaspoon of smoked paprika to the food processor along with the cayenne pepper.
- Roasted Garlic: Roast the garlic cloves along with the peppers for a sweeter, more mellow garlic flavor. Simply wrap the cloves in foil with a drizzle of olive oil and roast until softened.
- Fresh Herbs: Add a handful of fresh herbs, such as parsley, basil, or oregano, to the food processor for a burst of freshness.
- Spicy Peppers: For extra heat, add a small piece of Scotch bonnet pepper or other hot pepper, being mindful of the heat index.
- Nuts: Incorporate a small amount of toasted almonds or walnuts for an interesting flavor and textural contrast.
FAQs (Frequently Asked Questions)
Q: Can I use different colored bell peppers?
A: While you can use yellow or orange bell peppers, the flavor will be different, and the color of the paste won’t be the same vibrant red.
Q: Do I have to remove the bread crusts?
A: Yes, removing the crusts will give the pimiento paste a smoother texture. The crusts can be tough and may not blend as easily.
Q: Can I use a blender instead of a food processor?
A: Yes, a blender will work, but you may need to add a little more olive oil to help it blend smoothly. Be careful not to over-blend, as this can make the paste too thin.
Q: How long does homemade pimiento paste last?
A: Homemade pimiento paste will last for up to 5 days in the refrigerator, stored in an airtight container.
Q: Can I use this paste in other recipes?
A: Absolutely! Pimiento paste is a versatile ingredient that can be used in many dishes. Try adding it to sauces, soups, stews, or even marinades for a boost of flavor.
Final Thoughts
This simple pimiento paste recipe is a testament to the power of fresh, flavorful ingredients. It’s a taste of sunshine in a jar, perfect for brightening up any meal. I encourage you to try it, experiment with different variations, and share your creations with friends and family. And if you happen to discover any secrets for making it even better, I’d love to hear about them! Buon appetito!