
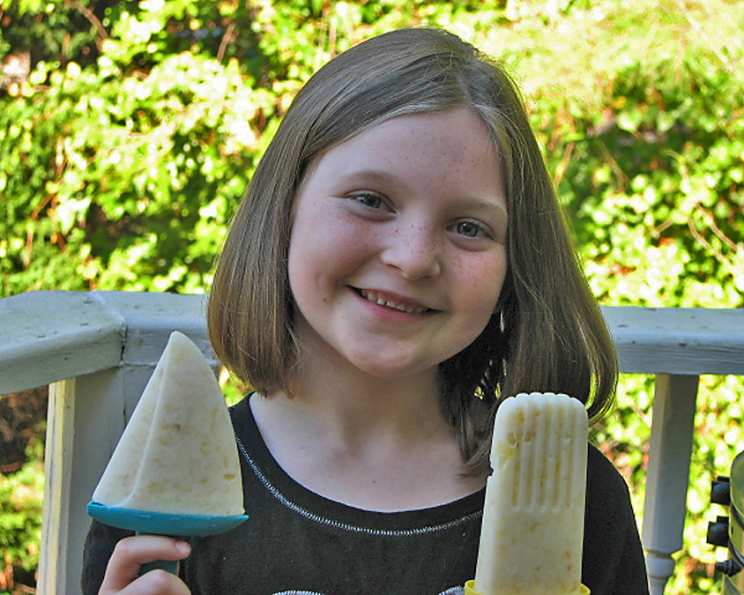
Pina Colada Popsicles: A Taste of Paradise on a Stick
The first time I tasted a true piña colada, I was perched on a weathered stool at a beachside bar in Puerto Rico. The bartender, a man whose smile was as warm as the Caribbean sun, handed me a frosty glass brimming with creamy coconut, sweet pineapple, and a hint of something decidedly more… spirited. It was pure vacation in a glass, a taste of carefree bliss. These Pina Colada Popsicles aim to recapture that magic, offering a non-alcoholic and refreshingly icy treat perfect for scorching summer days.
Recipe Overview
- Prep Time: 5 minutes
- Cook Time: 0 minutes
- Total Time: 2-3 hours (freezing)
- Servings: 8
- Yield: 8 popsicles
- Dietary Type: Gluten-Free
Ingredients
- 1 (5 ounce) can pineapple chunks in light syrup
- 1 (10 1/2 ounce) can coconut milk
- 2 bananas, peeled
- 1 teaspoon vanilla
Equipment Needed
- Blender
- Popsicle molds
- Measuring spoons and cups
Instructions
-
Begin by ensuring your pineapple chunks are drained, reserving the syrup if desired for adjusting sweetness later.
-
In a blender, combine the drained pineapple chunks, the entire can of coconut milk (including the thick cream on top!), the two peeled bananas, and the teaspoon of vanilla.
-
Puree all of the ingredients until the mixture is completely smooth. This might take a minute or two, depending on the power of your blender. Stop occasionally to scrape down the sides to ensure everything is fully incorporated.
-
Taste the mixture. If you prefer a sweeter popsicle, add a tablespoon or two of the reserved pineapple syrup from the canned pineapple. Blend again until the syrup is mixed in.
-
Carefully pour the pureed mixture into your popsicle molds. Leave a little space at the top, as the popsicles will expand slightly as they freeze.
-
Insert popsicle sticks into the molds, ensuring they are centered. If your molds don’t have built-in stick holders, you might need to wait about 30 minutes to an hour after freezing begins before inserting them, so they stand upright on their own in the semi-frozen mixture.
-
Freeze the popsicles for at least 2 to 3 hours, or until they are completely solid. The freezing time will depend on the size of your molds and the temperature of your freezer.
-
To easily remove the popsicles from the molds, run the molds under warm water for a few seconds. Gently wiggle the popsicles to loosen them, and then pull them out carefully.
Expert Tips & Tricks
- Creamy vs. Icy: For a creamier popsicle, use full-fat coconut milk and ensure your bananas are very ripe. Ripe bananas are naturally sweeter and contribute to a smoother texture. For a more icy popsicle, use light coconut milk or add a splash of pineapple juice.
- Preventing Ice Crystals: Adding a small amount of corn syrup or honey (if not vegan) can help prevent ice crystals from forming, resulting in a smoother texture. However, the bananas and coconut milk already contribute to a relatively smooth final product.
- Blending Power: If your blender struggles with frozen fruit, let the pineapple chunks thaw slightly before blending. You can also add a tablespoon or two of water or coconut milk to help the mixture blend more easily. However, don’t add too much liquid, or the popsicles will be too icy.
- Popsicle Stick Placement: Getting the popsicle sticks to stay upright can be tricky. A helpful tip is to partially freeze the mixture for about an hour before inserting the sticks. The slightly thickened mixture will hold the sticks in place. Alternatively, use popsicle molds with built-in stick holders.
- Mold Matters: Silicone molds generally make removing popsicles easier than plastic molds. If using plastic molds, briefly dip the mold in warm water to loosen the popsicles.
Serving & Storage Suggestions
Serve these Pina Colada Popsicles immediately after removing them from the molds for the best flavor and texture. They are perfect for a hot summer day, as a refreshing dessert, or as a fun treat for kids.
Store any leftover popsicles in the freezer, wrapped individually in plastic wrap or placed in a freezer bag. This prevents freezer burn and keeps them tasting fresh. They will last for up to 2-3 months in the freezer. There is no need to reheat them; they are meant to be enjoyed frozen. However, if they become too hard, allow them to thaw slightly for a few minutes before eating.
Nutritional Information
| Nutrient | Amount per Serving | % Daily Value* |
|---|---|---|
| Calories | 175.7 kcal | N/A |
| Calories from Fat | 58 kcal | N/A |
| Total Fat | 6.5 g | 9% |
| Saturated Fat | 6 g | 30% |
| Cholesterol | 0 mg | 0% |
| Sodium | 14.5 mg | 0% |
| Total Carbohydrate | 29.9 g | 9% |
| Dietary Fiber | 1 g | 3% |
| Sugars | 25.9 g | N/A |
| Protein | 0.8 g | 1% |
*Percent Daily Values are based on a 2,000 calorie diet. Your daily values may be higher or lower depending on your calorie needs.
Variations & Substitutions
- Pineapple Juice Boost: For a more intense pineapple flavor, substitute a portion of the coconut milk with pineapple juice.
- Cream of Coconut: For an extra decadent treat, use cream of coconut instead of coconut milk. This will result in a sweeter and richer popsicle. Be mindful of the added sugar!
- Tropical Twist: Add other tropical fruits, such as mango or papaya, to the mixture for a unique flavor combination.
- Adult Version: For an adult-only treat, add a splash of white rum to the mixture before freezing. Start with a small amount (1-2 tablespoons) and adjust to your taste. Remember to label them clearly!
- Dairy-Free Option: This recipe is naturally dairy-free.
FAQs (Frequently Asked Questions)
Q: Can I use frozen pineapple instead of canned?
A: Yes, you can use frozen pineapple. Just make sure to thaw it slightly before blending to ensure a smooth consistency.
Q: What if I don’t have popsicle molds?
A: You can use small paper cups or even an ice cube tray. If using cups, cover them with foil and poke a popsicle stick through the center.
Q: My popsicles are too hard. What can I do?
A: Run them under warm water for a few seconds to loosen them from the molds. If they are still too hard to bite, let them thaw slightly at room temperature before eating.
Q: Can I add sugar to make them sweeter?
A: The pineapple and bananas provide natural sweetness, but if you prefer a sweeter popsicle, you can add a tablespoon or two of sugar, honey, or maple syrup to the mixture before blending.
Q: How do I prevent the popsicles from getting freezer burn?
A: Wrap each popsicle individually in plastic wrap or store them in a freezer bag to protect them from freezer burn. Make sure to press out as much air as possible from the bag.
Final Thoughts
These Pina Colada Popsicles are more than just a frozen treat; they’re a mini vacation in every bite. Easy to make with just a few simple ingredients, they are a delightful way to cool down on a hot day or simply enjoy a taste of the tropics. Don’t hesitate to experiment with different fruit combinations or add-ins to create your own signature popsicle. Share your creations with friends and family and let the taste of paradise transport you to sunnier shores! I’d love to hear about your popsicle adventures – leave a comment below with your variations and tips!