
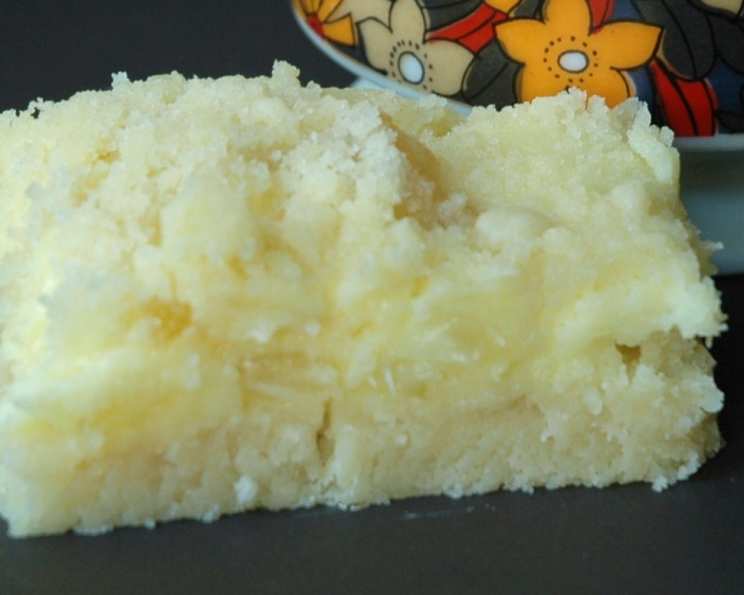
Pineapple & Ginger Cheesecake Bars: A Tropical Treat
There’s something about the bright tang of pineapple paired with the warm spice of ginger that instantly transports me back to my grandmother’s sun-drenched kitchen. She always had a jar of candied ginger on the counter and a pineapple patiently ripening on the windowsill. These cheesecake bars capture that same joyful essence, a little bite of sunshine infused with comforting spice, a perfect balance of sweet and zesty that always brings a smile to my face.
Recipe Overview
- Prep Time: 20 minutes
- Cook Time: 30-35 minutes
- Total Time: 55 minutes
- Servings: 12
- Yields: 24 squares
- Dietary Type: Vegetarian
Ingredients
-
For the Crust:
- 1 1/4 cups flour
- 1/3 cup sugar
- 1/2 cup sweet butter
- 2 tablespoons candied orange peel, thinly chopped (may substitute with 1 tbsp freshly grated orange peel)
-
For the Filling:
- 8 ounces cream cheese, softened
- 1/4 cup sugar
- 1 large egg
- 1 tablespoon fresh lemon juice
- 1/2 cup candied pineapple, coarsely chopped
- 1/8 cup candied ginger, finely chopped
Equipment Needed
- 8-inch square baking pan
- Mixing bowls
- Electric mixer
- Measuring cups and spoons
Instructions
-
Preheat your oven to 350°F (175°C).
-
Prepare the crumb mixture: In a small bowl, combine the flour, sugar, butter, and candied orange peel.
-
Mix the crumb base: Using an electric mixer on low speed, beat the ingredients for about 2 minutes, or until well mixed and the mixture resembles coarse crumbs.
-
Reserve crumb topping: Set aside 1/2 cup of the crumb mixture to use as a topping later.
-
Press the crust: Press the remaining crumb mixture evenly into the bottom of an ungreased 8-inch square baking pan. Ensure it’s compacted firmly to create a solid base.
-
Bake the crust: Bake the crust in the preheated oven for 12-15 minutes, or until the edges are lightly browned. Watch carefully to prevent burning.
-
Cool the crust: Remove the pan from the oven and set aside the crust to cool slightly while you prepare the filling. Keeping the crust warm will help the filling adhere better.
-
Prepare the cheesecake filling: In a separate mixing bowl, combine the softened cream cheese, sugar, egg, and fresh lemon juice.
-
Mix the filling: Using an electric mixer on medium speed, beat the ingredients together for about 2 minutes, until the mixture is light and fluffy. Be sure to scrape down the sides of the bowl occasionally to ensure everything is well incorporated.
-
Incorporate pineapple and ginger: Gently stir in the coarsely chopped candied pineapple and finely chopped candied ginger until they are evenly distributed throughout the cream cheese mixture.
-
Spread the filling: Spread the cream cheese mixture evenly over the warm, partially baked crust.
-
Sprinkle the topping: Sprinkle the reserved crumb mixture evenly over the top of the cream cheese filling.
-
Bake the bars: Return the pan to the oven and bake for an additional 15-20 minutes, or until the filling is set and the topping is golden brown. The center should be just slightly jiggly.
-
Cool completely: Remove the pan from the oven and let the cheesecake bars cool completely at room temperature. This is crucial for the filling to set properly.
-
Chill and cut: Once cooled, cover the pan with plastic wrap and refrigerate for at least 2 hours (or preferably overnight) to allow the bars to firm up completely.
-
Cut into squares: Before serving, use a sharp knife to cut the cheesecake bars into squares. For neat squares, wipe the knife clean between each cut.
-
Serve and enjoy!
Expert Tips & Tricks
- Softening the cream cheese is key: Ensure your cream cheese is properly softened to avoid lumps in the filling. Leave it at room temperature for at least an hour or use the microwave on a low setting in short bursts.
- Don’t overbake: Overbaking cheesecake can lead to a cracked surface. Bake until the center is just slightly jiggly. It will continue to set as it cools.
- Prevent a soggy crust: Partially baking the crust before adding the filling helps prevent it from becoming soggy.
- For easier slicing: Run a long, thin knife under hot water and dry it before each cut. This will give you clean, professional-looking slices.
- Candied Citrus Peel Substitution: If you don’t have candied orange peel, you can substitute with 1 tablespoon of freshly grated orange zest for a bright citrus note.
- Make-ahead tip: These bars can be made 1-2 days in advance. Store them covered in the refrigerator.
Serving & Storage Suggestions
These Pineapple & Ginger Cheesecake Bars are best served chilled. They make a delightful dessert on their own or can be paired with a scoop of vanilla ice cream or a dollop of whipped cream. For an extra touch, garnish with a few pieces of candied pineapple or a sprinkle of finely chopped candied ginger.
To store, keep the bars covered in the refrigerator. They will last for up to 5 days. You can also freeze them for up to 2 months. To freeze, cut the bars into individual squares, wrap them tightly in plastic wrap, and then place them in a freezer-safe container. Thaw in the refrigerator overnight before serving. They are not recommended to be left at room temperature for more than two hours.
Nutritional Information
Here’s an estimate of the nutritional information per serving:
| Nutrient | Amount per Serving | % Daily Value |
|---|---|---|
| Calories | 223.8 kcal | N/A |
| Calories from Fat | 132 kcal | N/A |
| Total Fat | 14.7 g | 22% |
| Saturated Fat | 8.7 g | 43% |
| Cholesterol | 56.7 mg | 18% |
| Sodium | 68.1 mg | 2% |
| Total Carbohydrate | 20.5 g | 6% |
| Dietary Fiber | 0.4 g | 1% |
| Sugars | 10.4 g | N/A |
| Protein | 3.1 g | 6% |
Note: Nutritional information is an estimate and may vary based on specific ingredients and portion sizes.
Variations & Substitutions
- Gluten-Free Crust: Substitute the all-purpose flour in the crust with a gluten-free blend for a gluten-free version.
- Coconut Cream Cheese: For a slightly different flavor profile, try using coconut cream cheese in the filling.
- Spice it up: Add a pinch of ground cardamom or nutmeg to the filling for a warmer, spicier flavor.
- Tropical Twist: Incorporate other tropical fruits like mango or papaya into the filling along with the pineapple and ginger.
- Citrus Variations: Experiment with different citrus zest in the crust, such as lime or grapefruit, to complement the pineapple and ginger.
- Nutty Crust: Add 1/4 cup of finely chopped nuts, like macadamia or almonds, to the crust for added texture and flavor.
FAQs (Frequently Asked Questions)
Q: Can I use fresh pineapple instead of candied pineapple?
A: While you can use fresh pineapple, it will add more moisture to the filling. Be sure to drain the pineapple well and consider reducing the amount of lemon juice slightly.
Q: Can I make this recipe ahead of time?
A: Absolutely! These cheesecake bars are perfect for making ahead of time. They can be stored in the refrigerator for up to 5 days.
Q: What’s the best way to cut the bars neatly?
A: The key is to chill the bars completely and use a warm, sharp knife. Run the knife under hot water and dry it before each cut for clean slices.
Q: Can I freeze these cheesecake bars?
A: Yes, you can freeze them for up to 2 months. Wrap individual bars tightly in plastic wrap and then place them in a freezer-safe container.
Q: My cheesecake bars cracked on top. What did I do wrong?
A: Cracking usually indicates overbaking or rapid temperature changes. Try reducing the baking time slightly and allowing the bars to cool slowly in the oven with the door ajar.
Final Thoughts
I hope you’re inspired to bring a taste of sunshine to your kitchen with these Pineapple & Ginger Cheesecake Bars. They’re surprisingly simple to make, yet deliver a complex and satisfying flavor that’s perfect for any occasion. Don’t hesitate to experiment with the variations and substitutions to create your own unique twist. And be sure to share your creations and feedback! These bars pair wonderfully with a light, crisp white wine or a refreshing iced tea. Happy baking!