
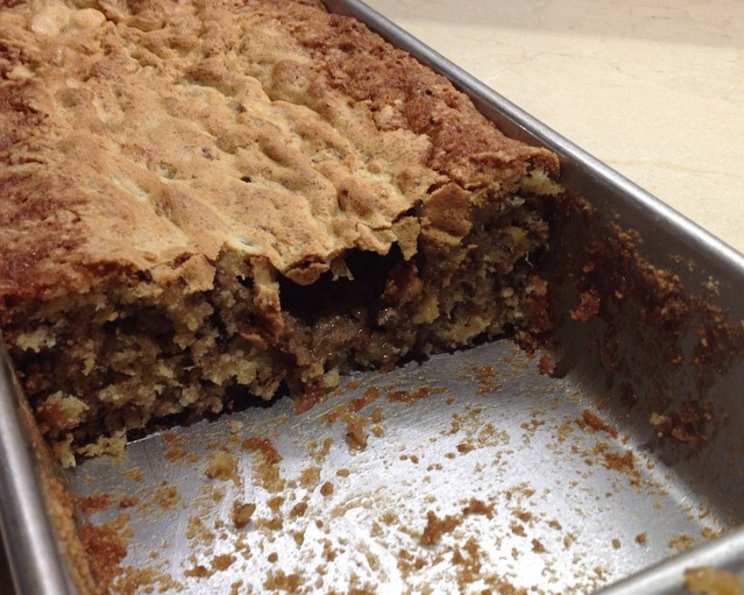
Pineapple-Nut Bars: A Taste of Sunshine in Every Bite
The scent of these bars baking always takes me back to childhood picnics. My grandmother, a master of simple pleasures, would bring a foil-wrapped pan of these to every family gathering. The sweet, tangy aroma of pineapple mingling with the buttery richness of the bars, and the satisfying crunch of nuts – it was sunshine in a bite. Years later, I still cherish the memory of those carefree days and the taste of my grandmother’s love baked into every single square. This recipe is my tribute to her.
Recipe Overview
- Prep Time: 15 minutes
- Cook Time: 45 minutes
- Total Time: 60 minutes
- Yields: 1 9×13 inch pan
- Dietary Type: Not specified
Ingredients
- 1 1/2 cups sugar
- 1/2 cup melted butter
- 4 large eggs
- 1 1/2 cups flour
- 1/2 teaspoon baking soda
- 1/2 teaspoon salt
- 1 (20 ounce) can crushed pineapple, drained well
- Nuts (chopped walnuts, pecans, or your favorite mix)
Equipment Needed
- 9×13 inch baking pan
- Mixing bowls
- Electric mixer (optional, but recommended)
- Measuring cups and spoons
- Spatula
- Cooling rack
Instructions
- Preheat your oven to 350°F (175°C). Prepare your 9×13 inch baking pan by spraying it with non-stick cooking spray. This will prevent the bars from sticking and ensure easy removal.
- In a large mixing bowl, combine the 1 1/2 cups of sugar and 1/2 cup of melted butter. Use an electric mixer or a sturdy spoon to cream the ingredients together until they are light and fluffy. This step is crucial for creating a tender and moist bar.
- Add the 4 large eggs to the sugar and butter mixture, one at a time. Beat well after each addition to ensure that each egg is fully incorporated into the batter. This helps to create an emulsion, which contributes to the bars’ texture.
- In a separate bowl, whisk together the 1 1/2 cups of flour, 1/2 teaspoon of baking soda, and 1/2 teaspoon of salt. This ensures that the leavening agent (baking soda) and salt are evenly distributed throughout the flour.
- Gradually add the dry ingredients (flour mixture) to the wet ingredients (sugar, butter, and eggs). Mix well until just combined. Be careful not to overmix, as this can result in tough bars.
- Add the 1 (20 ounce) can of crushed pineapple (drained well) and the nuts to the batter. Be sure to drain the pineapple thoroughly to avoid a soggy final product. The amount of nuts is up to your preference; about 1 cup is a good starting point.
- Mix well until all the ingredients are evenly distributed throughout the batter.
- Pour the batter into the prepared 9×13 inch baking pan, spreading it evenly with a spatula.
- Bake in the preheated oven for 45 minutes, or until the bars are golden brown and a toothpick inserted into the center comes out clean. Ovens can vary, so start checking for doneness around 40 minutes.
- Remove the pan from the oven and let the bars cool completely in the pan on a wire rack. Cooling completely before cutting is essential for clean slices.
- Once cooled, sprinkle the bars with powdered sugar for a touch of sweetness and visual appeal.
- Cut the cooled bars into squares or rectangles and serve.
Expert Tips & Tricks
- Nutty Variations: Toast the nuts lightly before adding them to the batter for an enhanced nutty flavor. Spread them on a baking sheet and toast in a 350°F oven for 5-7 minutes, watching carefully to prevent burning.
- Pineapple Prep: Ensure the crushed pineapple is drained very well. Excess moisture can lead to a soggy final product. You can even gently squeeze the pineapple in a clean kitchen towel to remove excess liquid.
- Even Baking: For even baking, make sure the oven rack is in the center position and the pan is level.
- Make-Ahead: The batter can be prepared ahead of time and stored in the refrigerator for up to 24 hours. Let it come to room temperature slightly before baking.
- Troubleshooting: If the bars are browning too quickly, tent the pan with aluminum foil for the last 15 minutes of baking.
Serving & Storage Suggestions
These Pineapple-Nut Bars are delicious served at room temperature. They are perfect for picnics, potlucks, or as a simple dessert with coffee or tea.
- Storage: Store the cooled bars in an airtight container at room temperature for up to 3 days, or in the refrigerator for up to a week.
- Freezing: For longer storage, freeze the bars in a single layer on a baking sheet. Once frozen, transfer them to a freezer-safe bag or container. They can be frozen for up to 2 months. Thaw at room temperature before serving.
- Reheating: Reheating is generally not necessary, but you can warm them slightly in the microwave for a few seconds if desired.
Nutritional Information
Please note that these values are estimates and may vary based on specific ingredients and serving sizes.
| Nutrient | Amount per Serving | % Daily Value |
|---|---|---|
| Calories | 274 kcal | 14% |
| Total Fat | 12.6 g | 19% |
| Saturated Fat | 7.2 g | 36% |
| Cholesterol | 90 mg | 30% |
| Sodium | 228 mg | 10% |
| Total Carbohydrate | 39.5 g | 13% |
| Dietary Fiber | 0.8 g | 3% |
| Sugars | 29.5 g | N/A |
| Protein | 4.0 g | 8% |
Variations & Substitutions
- Gluten-Free: Substitute a gluten-free all-purpose flour blend for the regular flour.
- Dairy-Free: Use a dairy-free butter substitute.
- Different Nuts: Experiment with different types of nuts, such as macadamia nuts, almonds, or even shredded coconut.
- Spice it up: Add a teaspoon of cinnamon or nutmeg to the batter for a warm, spiced flavor.
- Citrus Zest: Add the zest of one lemon or orange to enhance the tropical notes.
FAQs (Frequently Asked Questions)
Q: Can I use fresh pineapple instead of canned?
A: While you can, canned crushed pineapple is recommended as it is already broken down and retains more moisture. Fresh pineapple needs to be finely chopped and excess juice removed.
Q: How do I prevent the nuts from sinking to the bottom of the bars?
A: Toss the nuts with a tablespoon of flour before adding them to the batter. This helps them stay suspended.
Q: My bars are too dry. What did I do wrong?
A: Overbaking is the most common cause. Also, ensure you properly drained the pineapple.
Q: Can I add a frosting to these bars?
A: Absolutely! A simple cream cheese frosting or a powdered sugar glaze would be delicious.
Q: How do I know when the bars are done?
A: A toothpick inserted into the center should come out clean or with just a few moist crumbs attached. The top should also be golden brown.
Final Thoughts
These Pineapple-Nut Bars are a simple yet satisfying treat that’s perfect for any occasion. Whether you’re looking for a quick and easy dessert to bring to a party or a nostalgic taste of home, this recipe is sure to please. Don’t be afraid to experiment with different variations and make it your own. I encourage you to give it a try, and I’d love to hear about your experience and any creative twists you add! Perhaps enjoy these bars with a refreshing glass of iced tea on a warm afternoon – pure bliss!