
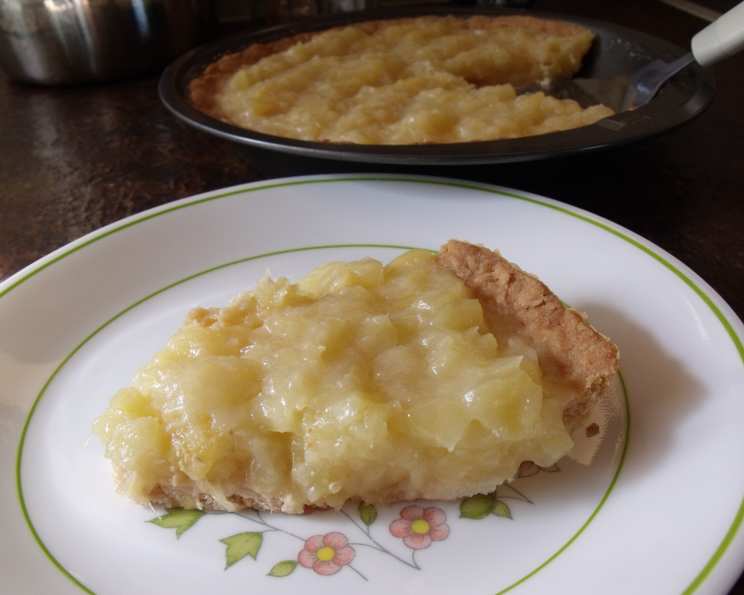
Pineapple Pie With Shortbread Pie Crust: A Taste of Sunshine
I remember baking my first pineapple pie. It was for a summer picnic with my family, and I was determined to bring something that captured the bright, cheerful spirit of the season. The moment that first bite of tangy-sweet pineapple met the buttery, crumbly shortbread, I knew I had created something special. The combination was pure sunshine on a plate, and it has been a family favorite ever since.
Recipe Overview
- Prep Time: 20 minutes
- Cook Time: 20 minutes
- Total Time: 40 minutes
- Servings: 6
- Yield: 1 pie
- Dietary Type: Vegetarian
Ingredients
For the Shortbread Pie Crust:
- 1 cup flour
- 1/2 cup (1 stick) butter, cold and cubed
- 3 teaspoons icing sugar
For the Pineapple Filling:
- 398 ml (1 14-ounce can) crushed pineapple, undrained
- 2 tablespoons cornstarch
- 1/4 teaspoon salt
- 1/4 cup sugar
- 1 tablespoon butter
- 1 tablespoon lemon juice
Equipment Needed
- 9-inch pie plate
- Mixing bowl
- Pastry blender or food processor (optional, for the crust)
- Saucepan
- Whisk
- Measuring cups and spoons
Instructions
-
Prepare the Shortbread Crust: In a mixing bowl, combine the flour and icing sugar. Cut in the cold, cubed butter using a pastry blender or your fingertips until the mixture resembles coarse crumbs. Alternatively, you can pulse the ingredients together in a food processor until just combined. Be careful not to overmix, as this can develop the gluten in the flour and result in a tough crust.
-
Press the Crust: Press the shortbread mixture evenly into the bottom and up the sides of a 9-inch pie plate. Ensure the crust is uniformly thick to prevent uneven baking. You can use the bottom of a measuring cup or your fingers to create a smooth surface.
-
Bake the Crust: Preheat your oven to 350°F (175°C). Bake the pie crust for 20 minutes, or until it is lightly golden brown. Keep a close eye on it during the last few minutes to prevent burning. The shortbread crust should be fragrant and slightly firm to the touch.
-
Make the Pineapple Filling: While the crust is baking, prepare the pineapple filling. In a medium saucepan, combine the crushed pineapple (with its juice), cornstarch, salt, and sugar.
-
Cook the Filling: Cook the pineapple mixture over medium heat, stirring constantly with a whisk, until it thickens. This usually takes about 5-7 minutes. The mixture should become translucent and have a glossy appearance. Make sure to stir constantly to prevent the cornstarch from clumping and burning on the bottom of the pan.
-
Finish the Filling: Remove the saucepan from the heat and stir in the butter and lemon juice. The butter will add richness and a smooth mouthfeel, while the lemon juice will enhance the pineapple’s natural tanginess.
-
Cool the Filling: Allow the pineapple filling to cool slightly before pouring it into the baked shortbread pie crust. This prevents the crust from becoming soggy.
-
Assemble the Pie: Pour the cooled pineapple filling into the baked pie crust, spreading it evenly.
-
Chill the Pie: Refrigerate the pie for at least 2 hours, or until the filling is completely set. This allows the pie to firm up, making it easier to slice and serve.
Expert Tips & Tricks
- Cold Butter is Key: For a truly tender and flaky shortbread crust, ensure the butter is very cold before incorporating it into the flour. Freezing the butter for 15 minutes before using it can help.
- Blind Baking for Extra Crispness: If you prefer a super crisp crust, you can blind bake it before adding the filling. To do this, line the crust with parchment paper and fill it with pie weights (or dried beans). Bake for 15 minutes, then remove the weights and parchment paper and bake for another 5 minutes until golden brown.
- Adjusting Sweetness: Taste the pineapple filling before adding the butter and lemon juice. If the pineapple is particularly tart, you may want to add a little extra sugar to balance the flavors.
- Preventing a Soggy Crust: To prevent the crust from becoming soggy, brush the baked crust with a thin layer of melted white chocolate before adding the filling. The chocolate acts as a barrier, keeping the crust crisp.
- Creative Toppings: While this pie is delicious on its own, you can add a dollop of whipped cream or a sprinkle of toasted coconut flakes for extra visual appeal and flavor.
Serving & Storage Suggestions
Serve the pineapple pie chilled, straight from the refrigerator. It is best enjoyed within 2-3 days for optimal flavor and texture.
- Storage: Store any leftover pie in an airtight container in the refrigerator for up to 3 days.
- Freezing: While the filling freezes well, the crust may become slightly soggy upon thawing. To freeze, wrap the pie tightly in plastic wrap and then in aluminum foil. Freeze for up to 1 month. Thaw in the refrigerator overnight before serving.
- Reheating: Reheating is not recommended, as it can make the crust soggy. It’s best enjoyed cold.
Nutritional Information
| Nutrient | Amount per Serving | % Daily Value |
|---|---|---|
| Calories | 329 kcal | 16% |
| Total Fat | 17.5g | 27% |
| Saturated Fat | 11g | 55% |
| Cholesterol | 45.8mg | 15% |
| Sodium | 221mg | 9% |
| Total Carbohydrate | 41.8g | 14% |
| Dietary Fiber | 1.1g | 4% |
| Sugars | 22.4g | 45% |
| Protein | 2.6g | 5% |
Note: Nutritional information is an estimate and may vary based on specific ingredients and portion sizes.
Variations & Substitutions
- Gluten-Free Crust: Use a gluten-free flour blend specifically formulated for baking to make a gluten-free shortbread crust. You may need to add a binding agent like xanthan gum.
- Vegan Option: Substitute the butter in both the crust and filling with a vegan butter alternative. Ensure the vegan butter is cold for the crust.
- Coconut Infusion: Replace the butter in the filling with coconut oil for a tropical twist. You can also sprinkle toasted coconut flakes on top of the finished pie.
- Spiced Pineapple: Add a pinch of ground ginger or cinnamon to the pineapple filling for a warm, spiced flavor.
- Citrus Zest: Add the zest of one lemon or lime to the filling for an extra burst of citrus flavor.
- Different Fruit: While this recipe is specifically for pineapple, you can adapt it to use other fruits like peaches, blueberries, or raspberries.
FAQs (Frequently Asked Questions)
Q: Can I use fresh pineapple instead of canned?
A: Yes, you can use fresh pineapple, but be sure to peel, core, and finely chop it. You might need to adjust the sugar depending on the sweetness of the pineapple.
Q: How do I prevent the crust from shrinking during baking?
A: Ensure the butter is very cold and don’t overwork the dough. Blind baking with pie weights is also a good way to prevent shrinking.
Q: Can I make the pie crust ahead of time?
A: Absolutely! You can make the pie crust dough ahead of time, wrap it tightly in plastic wrap, and refrigerate it for up to 2 days. You can also freeze it for up to 1 month.
Q: Why is my filling not thickening?
A: Make sure the cornstarch is thoroughly mixed with the pineapple juice before heating. Also, ensure the mixture comes to a simmer and cook it until it thickens.
Q: How do I know when the pie is done chilling?
A: The filling should be firm to the touch and not jiggle excessively when the pie plate is gently shaken. If it’s still too soft, chill it for a longer period.
Final Thoughts
This pineapple pie with shortbread crust is more than just a dessert; it’s a taste of sunshine, a reminder of warm summer days, and a celebration of simple, delicious flavors. I encourage you to try this recipe and experience the delightful combination of tangy pineapple and buttery shortbread for yourself. Feel free to adjust the recipe to your liking and don’t hesitate to share your creations and feedback. Perhaps you’ll find that this pie becomes a cherished tradition in your own family, just as it has in mine. Enjoy!