
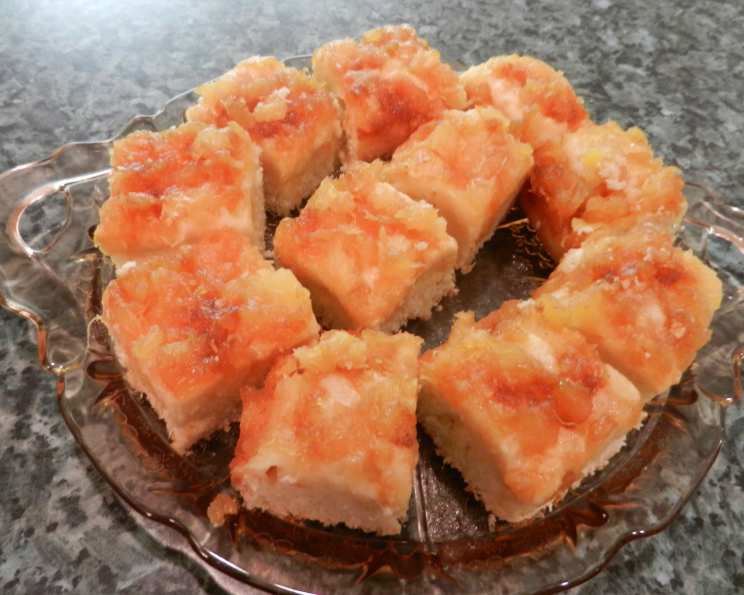
Pineapple Right Side Up Snack Cake: A Nostalgic Treat
The scent of warm pineapple and caramelized brown sugar instantly transports me back to my grandmother’s kitchen. I remember standing on a stool, mesmerized as she transformed simple ingredients into this delightful snack cake. The way the sweet, tangy pineapple melded with the buttery, golden-brown cake was pure magic. It was always a race to get the corner piece, the one with the most caramelized topping! Now, I carry on the tradition, whipping up this cake whenever I crave a comforting taste of childhood.
Recipe Overview
- Prep Time: 15 minutes
- Cook Time: 25-30 minutes
- Total Time: 40-45 minutes
- Servings: 9
- Yield: 1 cake
- Dietary Type: Not specified
Ingredients
- 1 (8 ounce) can crushed pineapple, undrained
- 2 1/2 cups flour
- 1 tablespoon baking powder
- 1/4 teaspoon salt
- 3/4 cup sugar
- 1/3 cup milk
- 1/3 cup butter, melted
- 2 eggs, beaten
- 1/2 teaspoon vanilla extract
- 1/2 cup brown sugar
Equipment Needed
- 9″ x 9″ baking pan
- Mixing bowls
- Measuring cups and spoons
- Wire rack
Instructions
- Begin by draining the crushed pineapple, making sure to reserve 1/3 cup of the juice. Set both the drained pineapple and the reserved juice aside; you’ll need them later.
- In a large mixing bowl, combine the dry ingredients: flour, baking powder, salt, and sugar. Whisk them together thoroughly to ensure the baking powder is evenly distributed. This step is important for a light and airy cake.
- In a separate bowl, prepare the wet ingredients. Combine the reserved pineapple juice, milk, melted butter, beaten eggs, and vanilla extract. Stir well until all the ingredients are fully incorporated.
- Add the wet ingredients to the dry ingredients. Gently stir until just moistened. Be careful not to overmix the batter. Overmixing can lead to a tough cake. A few lumps are perfectly fine!
- Spoon the batter into a greased 9″ x 9″ baking pan. Make sure the batter is evenly distributed across the pan.
- Top the batter with the drained crushed pineapple, spreading it evenly.
- Sprinkle the brown sugar evenly over the pineapple. The brown sugar will caramelize beautifully during baking, creating a delightful topping.
- Bake in a preheated oven at 350 degrees F (175 degrees C) for 25-30 minutes.
- To check for doneness, insert a toothpick into the center of the cake. If the toothpick comes out clean or with just a few moist crumbs, the cake is done. If it comes out with wet batter, bake for a few more minutes and check again.
- Once baked, remove the cake from the oven and let it cool in the pan on a wire rack for 10 minutes before serving. This allows the cake to set slightly and makes it easier to slice.
Expert Tips & Tricks
- Melt the butter completely but don’t let it brown. This will prevent the cake from becoming too dense.
- If you don’t have crushed pineapple on hand, you can use pineapple tidbits or chunks. Just make sure to chop them into smaller pieces before adding them to the cake.
- For an extra touch of flavor, consider adding a pinch of cinnamon or nutmeg to the dry ingredients.
- Don’t overbake the cake! Overbaking will result in a dry and crumbly cake.
- If the top of the cake starts to brown too quickly, you can tent it with foil during the last few minutes of baking.
- To prevent the cake from sticking to the pan, grease the pan thoroughly with butter or cooking spray. You can also line the bottom of the pan with parchment paper.
Serving & Storage Suggestions
This Pineapple Right Side Up Snack Cake is best served warm or at room temperature. A scoop of vanilla ice cream or a dollop of whipped cream complements the cake beautifully.
- Storage: Store leftover cake in an airtight container at room temperature for up to 2 days, or in the refrigerator for up to 5 days.
- Reheating: If desired, you can reheat individual slices of cake in the microwave for a few seconds until warmed through.
Nutritional Information
Please note that this is an estimate, and actual values may vary.
| Nutrient | Amount per Serving | % Daily Value |
|---|---|---|
| Calories | 335.8 kcal | N/A |
| Calories from Fat | N/A | 23% |
| Total Fat | 8.6 g | 13% |
| Saturated Fat | 4.9 g | 24% |
| Cholesterol | 60.7 mg | 20% |
| Sodium | 270.4 mg | 11% |
| Total Carbohydrate | 60 g | 20% |
| Dietary Fiber | 1.1 g | 4% |
| Sugars | 32.3 g | 129% |
| Protein | 5.5 g | 10% |
Variations & Substitutions
- Gluten-Free: Substitute the all-purpose flour with a gluten-free all-purpose flour blend. Ensure the blend contains xanthan gum or add it separately for best results.
- Dairy-Free: Replace the milk with a non-dairy alternative like almond milk, soy milk, or oat milk. Use a dairy-free butter substitute.
- Spice it up: Add a pinch of ground ginger or cardamom to the batter for a warm, spicy twist.
- Nuts: Sprinkle chopped pecans or walnuts over the pineapple before baking for added texture and flavor.
- Citrus Zest: Add the zest of one lemon or orange to the batter for a bright, citrusy flavor.
FAQs (Frequently Asked Questions)
Q: Can I use fresh pineapple instead of canned?
A: Yes, you can! Just make sure to peel, core, and chop the pineapple into small pieces. You’ll need about 1 cup of chopped fresh pineapple. Remember to reserve about 1/3 cup of the pineapple juice.
Q: Can I make this cake ahead of time?
A: Absolutely. You can bake the cake a day ahead of time and store it at room temperature or in the refrigerator.
Q: My cake is browning too quickly on top. What should I do?
A: Tent the cake with foil during the last few minutes of baking to prevent it from burning.
Q: Can I freeze this cake?
A: Yes, you can freeze it. Wrap the cake tightly in plastic wrap and then in foil. It will keep in the freezer for up to 2 months. Thaw overnight in the refrigerator before serving.
Q: What if I don’t have a 9×9 inch pan?
A: A similar sized pan will work. You could use an 8×8 inch pan, or a round cake pan that’s about 9 inches in diameter. Baking time may need to be adjusted slightly.
Final Thoughts
This Pineapple Right Side Up Snack Cake is a simple yet satisfying treat that’s perfect for any occasion. Whether you’re craving a taste of nostalgia or simply looking for a quick and easy dessert, this recipe is sure to deliver. Don’t be afraid to experiment with variations and substitutions to make it your own. I encourage you to try this recipe and share your creations. Pair it with a cup of coffee or tea for the ultimate comfort food experience!