
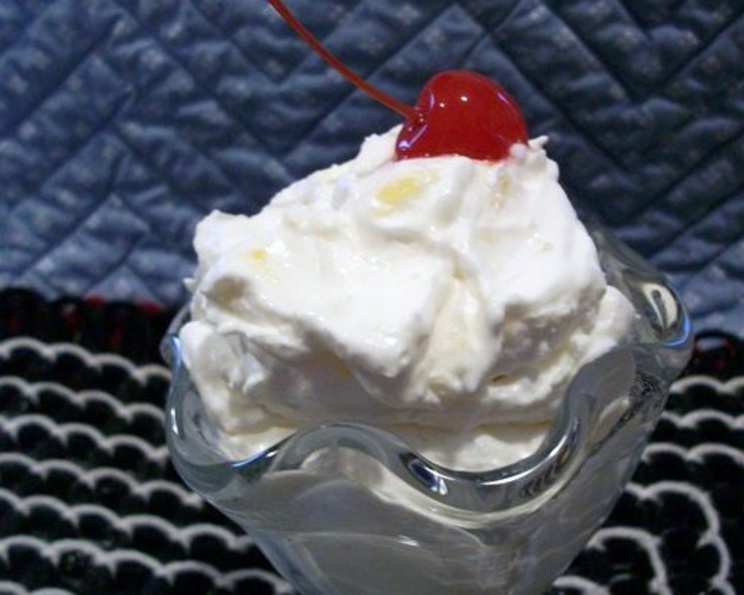
Homemade Pineapple Sherbet: A Taste of Nostalgia
The scent of pineapple always transports me back to childhood summers spent at my grandmother’s house. She had a knack for turning simple ingredients into the most delightful treats, and her pineapple sherbet was legendary. I can almost feel the cool, slightly tangy sweetness melting on my tongue, a welcome relief from the sweltering heat. The clatter of her ice cream maker, the anticipation building with each passing minute – those are memories I cherish. This recipe is my attempt to recreate that magic, to bring a little bit of my grandmother’s sunshine into your kitchen.
Recipe Overview
- Prep Time: 15 minutes
- Cook Time: 5 minutes
- Total Time: Several hours (including freezing time)
- Servings: 10
- Yield: Approximately 1.5 quarts
- Dietary Type: Not specified
Ingredients
- 1 large lemon
- 2 cups granulated sugar
- 1 quart half-and-half
- 1 (15 ounce) can crushed pineapple in juice
- 1 pint whipping cream
Equipment Needed
- Small saucepan
- Lemon zester
- Lemon juicer
- Freezer-safe trays or containers
- Mixing bowl
- Electric mixer
Instructions
- Begin by preparing the lemon. Carefully remove the zest using a zester, ensuring you only get the flavorful outer layer and avoid the bitter white pith. Finely chop the zest. Then, squeeze the juice from the lemon, removing any seeds.
- In a small saucepan, combine the granulated sugar, half-and-half, and chopped lemon zest. Heat the mixture over medium heat, stirring constantly, until the sugar is completely melted. It is crucial to ensure the sugar dissolves fully, but avoid bringing the mixture to a boil. Remove from heat and set aside to cool completely.
- Once the sugar mixture is cooled, add the lemon juice, crushed pineapple, and all of the pineapple juice from the can. Stir to combine thoroughly.
- Pour the mixture into freezer-safe trays or containers. Freeze until the mixture is frozen only about an inch or so from the edge. This stage is crucial for achieving the desired texture.
- Spoon the partially frozen mixture into a mixing bowl. Using an electric mixer, beat the mixture until it is light and fluffy.
- Gently fold in the whipping cream, ensuring it is evenly distributed throughout the mixture.
- Spoon the sherbet mixture back into the freezer trays or containers. Partially freeze again, then beat the mixture again with the electric mixer. This second beating helps to break up any ice crystals and create a smoother, creamier texture.
- Return the sherbet to the freezer and freeze completely before serving.
Expert Tips & Tricks
- Zesting the lemon: Use a microplane zester for the finest zest, which will distribute the lemon flavor more evenly.
- Cooling the sugar mixture: Ensure the sugar mixture is completely cool before adding the lemon juice and pineapple. Adding these ingredients while the mixture is hot can curdle the dairy.
- Freezing Stages: The multiple freezing and beating stages are essential for achieving a smooth, creamy texture. Don’t skip them! If you have an ice cream maker, you can use it after the first partial freeze instead of beating with an electric mixer.
- Adjusting Sweetness: Taste the sherbet mixture before the final freeze and adjust the amount of sugar if necessary. Remember that the sweetness will be less pronounced once the sherbet is frozen.
- Preventing Ice Crystals: Adding a tablespoon of vodka or other clear spirit to the mixture can help prevent ice crystals from forming, resulting in a smoother sherbet. The alcohol content is minimal and won’t be noticeable in the final product.
Serving & Storage Suggestions
Serve the pineapple sherbet in chilled bowls or glasses. Garnish with a wedge of fresh pineapple, a sprig of mint, or a sprinkle of toasted coconut flakes. For a more elegant presentation, try scooping the sherbet into stemmed glasses and layering it with crushed pineapple and whipped cream.
Store leftover sherbet in an airtight container in the freezer. It will keep for up to 2 weeks, although the texture may degrade slightly over time. To soften the sherbet before serving, let it sit at room temperature for a few minutes or transfer it to the refrigerator for about 30 minutes. Avoid refreezing melted sherbet, as this will result in a grainy texture.
Nutritional Information
| Nutrient | Amount per Serving | % Daily Value |
|---|---|---|
| Calories | 473 kcal | N/A |
| Calories from Fat | 259 | 55% |
| Total Fat | 28.8 g | 44% |
| Saturated Fat | 17.9 g | 89% |
| Cholesterol | 101 mg | 33% |
| Sodium | 58.8 mg | 2% |
| Total Carbohydrate | 53 g | 17% |
| Dietary Fiber | 0.6 g | 2% |
| Sugars | 46.5 g | 185% |
| Protein | 4.1 g | 8% |
Variations & Substitutions
- Dairy-Free: Substitute the half-and-half and whipping cream with coconut milk or other non-dairy alternatives. Be aware that the texture and flavor will be different.
- Other Fruits: Experiment with other fruits such as mango, strawberry, or raspberry. Adjust the amount of sugar as needed, depending on the sweetness of the fruit.
- Boozy Sherbet: Add a splash of rum or pineapple liqueur to the mixture for an adult twist.
- Lime Sherbet: Substitute the lemon with lime for a different citrusy flavor.
- Light Sherbet: Use light half-and-half and fat-free whipped topping to reduce the calorie content.
FAQs (Frequently Asked Questions)
Q: Why is it important not to boil the sugar mixture?
A: Boiling the sugar mixture can cause the sugar to crystallize, resulting in a grainy texture in the final sherbet.
Q: Can I use fresh pineapple instead of canned?
A: Yes, you can use fresh pineapple. Make sure to finely crush or blend it before adding it to the mixture. You may need to add a bit more sugar, depending on the sweetness of the pineapple.
Q: What if I don’t have freezer trays?
A: You can use any freezer-safe container, such as a loaf pan or a large plastic container.
Q: How can I tell if the sherbet is ready to be beaten for the second time?
A: The mixture should be frozen about an inch or so from the edge of the container. It should be firm but not completely solid.
Q: Can I make this recipe ahead of time?
A: Yes, you can make the sherbet several days in advance. Store it in an airtight container in the freezer until ready to serve.
Final Thoughts
I sincerely hope this recipe brings you as much joy as it brings me, transporting you back to cherished memories or helping you create new ones. Don’t be afraid to experiment with different flavors and ingredients to make it your own. After all, the best recipes are those that are shared and adapted with love. So, grab your ingredients, put on some music, and get ready to create a refreshing and delightful treat that everyone will enjoy! And please, let me know in the comments how your sherbet turned out – I’d love to hear your feedback and any creative twists you’ve added! Cheers to sweet memories and even sweeter sherbet!