
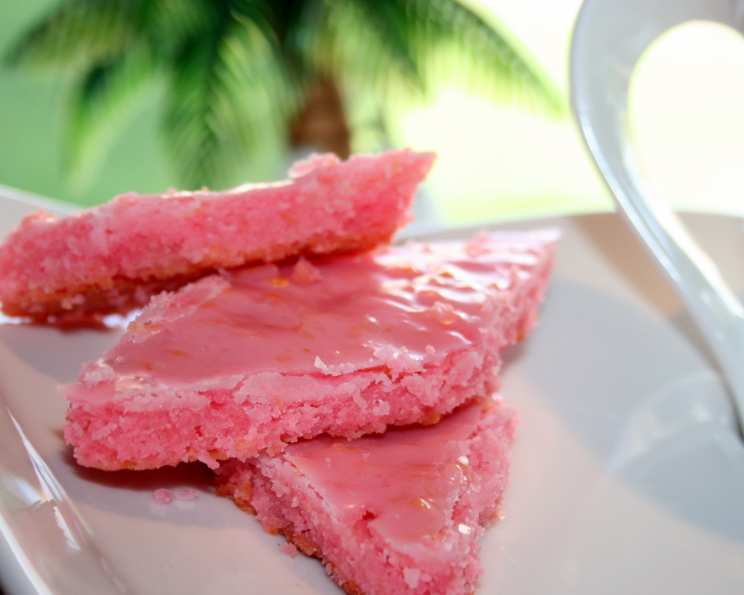
Pink Lemonade Thins: A Slice of Sunshine
There’s something undeniably cheerful about pink lemonade. It’s the color of summer sunsets, of whimsical birthday parties, and of pure, unadulterated joy. As a child, my grandmother always had a pitcher of it ready, particularly on sweltering summer afternoons after hours spent exploring in the garden. She called it “sunshine in a glass,” and these Pink Lemonade Thins evoke that same feeling. One bite, and I’m instantly transported back to her sun-drenched porch, the sweet-tart flavor a reminder of simpler, sweeter times.
Recipe Overview
- Prep Time: 20 minutes
- Cook Time: 20-25 minutes
- Total Time: 1 hour 20 minutes (includes cooling time)
- Servings: Approximately 64 bars
- Dietary Type: Not specified (contains dairy and gluten)
Ingredients
For the Bars:
- 1 ½ cups butter or margarine, softened
- ⅔ cup powdered sugar
- 2 tablespoons grated lemon peel
- 1 tablespoon lemon juice
- 2 drops red food coloring, if desired (optional)
- 2 ⅔ cups all-purpose flour
For the Pink Lemonade Glaze:
- 1 ½ cups powdered sugar
- 2 teaspoons grated lemon peel
- 5-6 teaspoons lemon juice
- 1 drop red food coloring
Equipment Needed
- 15 x 10 x 1-inch baking pan
- Large bowl
- Electric mixer (or sturdy spoon)
- Medium bowl
- Flat-edged metal pancake turner
Instructions
-
Preheat your oven to 350 degrees F (175 degrees C). Lightly grease the bottom only of a 15 x 10 x 1-inch baking pan with shortening. The sides do not need to be greased, as this helps the bars release cleanly after baking.
-
In a large bowl, cream together the softened butter (or margarine) and ⅔ cup of powdered sugar with an electric mixer on medium speed until the mixture is light and fluffy. Alternatively, if you don’t have a mixer, you can use a sturdy spoon – just be prepared to put in a bit more elbow grease!
-
Add the 2 tablespoons of grated lemon peel, 1 tablespoon of lemon juice, and 2 drops of red food coloring (if using) to the butter mixture. Mix until well combined. The food coloring is optional but adds to the visual appeal of the cookies. If you prefer a more natural color, you could use a small amount of beet juice.
-
Gradually stir in the 2 ⅔ cups of all-purpose flour until a dough forms. Be careful not to overmix the dough, as this can result in a tougher cookie. Mix until just combined.
-
Press the dough evenly into the prepared baking pan. To prevent the dough from sticking to your fingers, flour your fingers lightly several times during the pressing process. This makes it much easier to spread the dough thinly and uniformly across the pan.
-
Bake in the preheated oven for 20 to 25 minutes, or until the edges are lightly golden brown. The center should still be slightly pale. Keep a close eye on the bars towards the end of the baking time to prevent them from burning.
-
While the bars are baking, prepare the Pink Lemonade Glaze. In a medium bowl, whisk together the 1 ½ cups of powdered sugar, 2 teaspoons of grated lemon peel, 5-6 teaspoons of lemon juice, and 1 drop of red food coloring until smooth and spreadable. Start with 5 teaspoons of lemon juice and add the additional teaspoon only if needed to reach the desired consistency.
-
Once the bars are out of the oven, immediately pour the glaze over the warm bars and spread it evenly across the surface. The warmth of the bars will help the glaze to melt and spread easily. Note that the glaze will be quite thin, which is perfectly fine.
-
Allow the bars to cool completely in the pan, about 1 hour. This is essential, as the bars are very tender when warm and will be difficult to remove without breaking.
-
Once cooled, carefully remove the bars from the pan using a very flat-edged metal pancake turner. Slide the turner underneath the bars to gently lift them out.
-
To cut the bars into traditional squares, cut into 8 rows by 8 rows, yielding 64 bars.
-
For a more decorative presentation, cut diamond shapes. First, cut parallel lines, 1 ½ inches apart, down the length of the pan. Then, cut diagonal lines, 1 ½ inches apart, across the straight cuts.
Expert Tips & Tricks
- For a more intense lemon flavor, add a pinch of lemon zest to the dough.
- If your dough is too sticky to work with, chill it in the refrigerator for 15-20 minutes before pressing it into the pan.
- To prevent the glaze from becoming too thick, add the lemon juice gradually, mixing well after each addition.
- If you want to get ahead, you can bake the bars a day in advance and store them in an airtight container at room temperature. Glaze them just before serving.
- If your glaze is too thin, gradually add more powdered sugar, a tablespoon at a time, until you reach the desired consistency. Conversely, if it’s too thick, add a tiny bit more lemon juice.
Serving & Storage Suggestions
These Pink Lemonade Thins are best served at room temperature. They’re a perfect accompaniment to a glass of iced tea, pink lemonade, or even a scoop of vanilla ice cream. Store leftover bars in an airtight container at room temperature for up to 3-4 days. You can also freeze them for longer storage; wrap them tightly in plastic wrap and then place them in a freezer-safe bag. They can be frozen for up to 2 months. Thaw them at room temperature before serving. They don’t typically need to be reheated, as they’re delicious cold or at room temperature.
Nutritional Information
| Nutrient | Amount per Serving | % Daily Value (Approximate) |
|---|---|---|
| Calories | 73 kcal | N/A |
| Total Fat | 4.4g | 6% |
| Saturated Fat | 2.7g | 13% |
| Cholesterol | 11.4mg | 3% |
| Sodium | 30.8mg | 1% |
| Total Carbohydrate | 8.1g | 2% |
| Dietary Fiber | 0.2g | 0% |
| Sugars | 4g | N/A |
| Protein | 0.6g | 1% |
Please note that these are approximate values and may vary depending on the specific ingredients used.
Variations & Substitutions
- Gluten-Free: Substitute the all-purpose flour with a gluten-free all-purpose flour blend. Be sure to choose a blend that contains xanthan gum for best results.
- Dairy-Free: Use a dairy-free margarine alternative for the butter.
- Citrus Variety: Experiment with other citrus fruits! Try using orange zest and juice for a more orangey flavor, or lime for a zesty twist.
- Berry Infusion: Add a handful of fresh or frozen raspberries to the dough for a berry lemonade flavor. Gently fold them in at the end to avoid overmixing.
FAQs (Frequently Asked Questions)
Q: Can I use bottled lemon juice instead of fresh?
A: While fresh lemon juice is always preferred for its brighter flavor, bottled lemon juice can be used in a pinch. However, the flavor may not be as vibrant.
Q: Why are my bars crumbling when I try to cut them?
A: This likely means that the bars haven’t cooled completely. Ensure they are thoroughly cooled before attempting to cut them. You can also try using a very sharp knife and cutting with a gentle sawing motion.
Q: Can I make the dough ahead of time?
A: Yes, you can make the dough ahead of time. Wrap it tightly in plastic wrap and store it in the refrigerator for up to 2 days. Let it sit at room temperature for about 15-20 minutes before pressing it into the pan.
Q: My glaze is too runny. What can I do?
A: Gradually add more powdered sugar, one tablespoon at a time, until you reach the desired consistency. Mix well after each addition.
Q: Can I add sprinkles to the glaze?
A: Absolutely! Sprinkles are a fun way to add some extra color and texture to these bars. Add them immediately after glazing, before the glaze sets.
Final Thoughts
These Pink Lemonade Thins are more than just a cookie; they’re a little burst of sunshine, a reminder of warm summer days and happy memories. Don’t be afraid to experiment with the variations and make them your own. Whether you’re baking them for a party, a picnic, or simply for a sweet treat at home, I encourage you to try this recipe and share the joy. I’d love to hear about your baking adventures and any creative twists you add!