
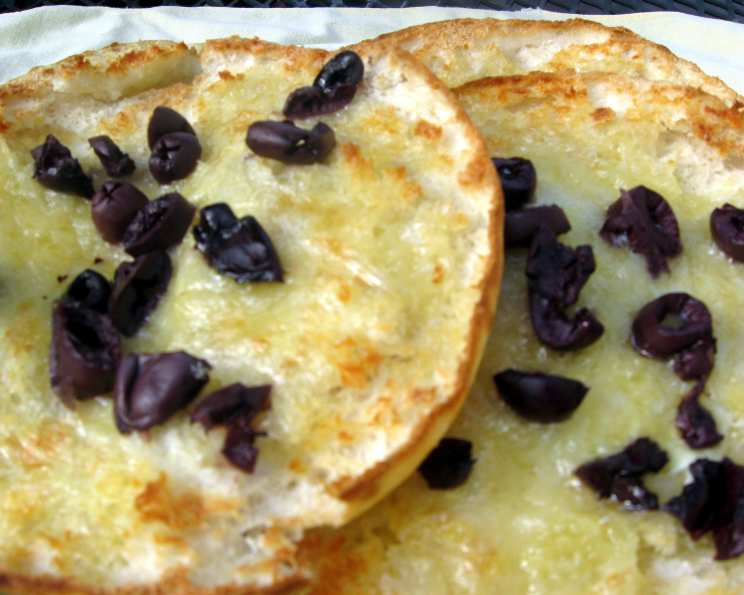
Grilled Pita with Halloumi and Olives: A Taste of the Mediterranean
The first time I tasted halloumi, it was on a sun-drenched Greek island, grilled over charcoal until golden brown and squeaky, then drizzled with local honey. The salty, savory cheese, paired with the smoky sweetness, was an epiphany. It was a simple pleasure, a taste of summer that I’ve tried to recreate ever since, and this pita bread version comes delightfully close, bringing those memories flooding back with every bite.
Recipe Overview
- Prep Time: 5 minutes
- Cook Time: 5 minutes
- Total Time: 10 minutes
- Servings: 2
- Dietary Type: Vegetarian
Ingredients
- 2 pita bread
- 100g halloumi cheese, thinly sliced
- 8 black olives, pitted
Equipment Needed
- Grill or grill pan
Instructions
- Preheat your grill to medium-high heat. If using a grill pan, place it over medium-high heat.
- Carefully heat the pita bread for about 2 minutes under the grill, turning once. This will soften the pita and make it easier to work with. Watch carefully to prevent burning.
- Once the pita bread is warmed through, split each pita lengthways along one edge to create two pockets.
- Lay the thinly sliced halloumi on the inside surfaces of the pita pockets. Make sure the halloumi is evenly distributed to ensure consistent grilling.
- Dot the pitted black olives over the cheese in each pita pocket.
- Grill the filled pitas until the halloumi cheese bubbles and begins to turn golden brown, and the bread is just beginning to char slightly. This should take approximately 3-5 minutes, depending on the heat of your grill. Watch closely to prevent burning the pita.
- Remove from the grill and serve immediately.
Expert Tips & Tricks
- Choosing the Right Halloumi: Halloumi varies in saltiness. Taste a small piece before grilling; if it seems very salty, you can soak it in cold water for 30 minutes to draw out some of the salt.
- Preventing Sticking: Lightly brush the grill or grill pan with olive oil before grilling to prevent the halloumi from sticking.
- Even Cooking: For more even grilling, you can gently press down on the pita pockets with a spatula as they cook.
- Boosting the Flavor: A squeeze of fresh lemon juice over the grilled pita just before serving adds a bright, tangy element that complements the salty halloumi and olives beautifully.
- Spice it Up: For a touch of heat, sprinkle a pinch of red pepper flakes over the halloumi before grilling.
- Herbs: Fresh mint or oregano sprinkled over the finished pita adds a refreshing herbal note.
- Prepping Ahead: You can slice the halloumi and pit the olives ahead of time. Store them separately in the refrigerator until you’re ready to assemble and grill.
- If you don’t have a grill: A panini press or even a skillet can be used to cook these, however the grill adds a unique flavor.
Serving & Storage Suggestions
Serve these grilled pita pockets immediately while the halloumi is hot and bubbly and the bread is still warm and slightly crisp. They are delicious on their own as a quick snack or light lunch.
Serving Suggestions:
*Serve with a side of hummus or tzatziki for dipping.
*Add a simple green salad with a lemon vinaigrette for a more complete meal.
*Serve alongside grilled vegetables, such as bell peppers, zucchini, and eggplant.
Storage:
- Leftovers can be stored in an airtight container in the refrigerator for up to 2 days.
- To reheat, warm them in a preheated oven at 350°F (175°C) for about 5-7 minutes, or until the halloumi is heated through. You can also reheat them in a skillet over medium heat.
- Reheating in the microwave is not recommended as it can make the pita soggy.
Nutritional Information
| Nutrient | Amount per Serving | % Daily Value |
|---|---|---|
| Calories | 350 kcal | 18% |
| Total Fat | 18g | 28% |
| Saturated Fat | 11g | 55% |
| Cholesterol | 50mg | 17% |
| Sodium | 750mg | 31% |
| Total Carbohydrate | 30g | 10% |
| Dietary Fiber | 2g | 8% |
| Sugars | 2g | – |
| Protein | 15g | 30% |
Note: Nutritional information is an estimate and may vary based on specific ingredients and portion sizes.
Variations & Substitutions
- Vegetarian Option: This recipe is already vegetarian-friendly.
- Gluten-Free: Use gluten-free pita bread for a gluten-free version.
- Cheese Variations: While halloumi is the star of this dish, you could experiment with other grilling cheeses like paneer or even feta (though feta will melt more).
- Add Vegetables: Sliced tomatoes, cucumbers, or red onions can be added to the pita pockets for extra flavor and nutrients.
- Herbs and Spices: Experiment with different herbs and spices to customize the flavor profile. Fresh mint, dill, oregano, paprika, or cumin all work well.
- Mediterranean Twist: Add sun-dried tomatoes, artichoke hearts, or roasted red peppers for a truly Mediterranean flavor.
FAQs (Frequently Asked Questions)
Q: Can I use pre-grilled halloumi?
A: While you can use pre-grilled halloumi to save time, grilling it fresh will give you the best flavor and texture. Pre-grilled halloumi tends to be a little dry.
Q: What if I don’t have a grill?
A: You can use a grill pan on the stovetop or even bake the pita pockets in a preheated oven at 375°F (190°C) until the cheese is melted and bubbly.
Q: Can I make this ahead of time?
A: It’s best to assemble and grill the pita pockets just before serving. You can prep the ingredients ahead of time (slice the halloumi and pit the olives) and store them separately.
Q: How do I prevent the halloumi from sticking to the grill?
A: Lightly brush the grill grates with olive oil before grilling. This will help prevent the cheese from sticking.
Q: Can I add other ingredients to the pita pockets?
A: Absolutely! Feel free to add your favorite vegetables, herbs, or sauces to customize the flavor.
Final Thoughts
This grilled pita with halloumi and olives is a simple yet satisfying dish that’s perfect for a quick lunch, snack, or light dinner. It’s a taste of the Mediterranean that you can easily recreate in your own kitchen. So, gather your ingredients, fire up the grill, and let the flavors transport you to sun-drenched shores. Don’t be afraid to experiment with different variations to find your perfect pita creation. I’m confident this will become a new favorite. And be sure to let me know what twists and turns you explore, as well as your overall experience!