
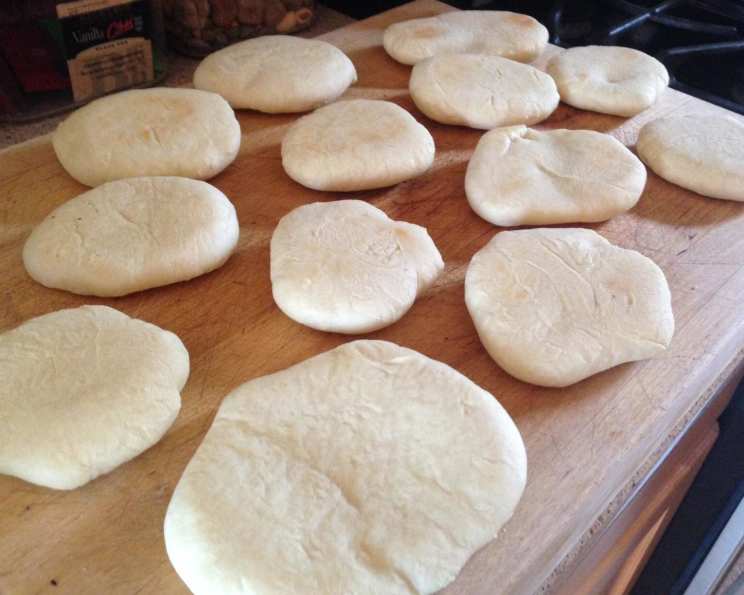
Homemade Pita Bread Made Easy with Your Bread Machine
The smell of freshly baked bread has always been a siren song to me. I remember one summer afternoon, probably close to thirty years ago, my grandmother was making pita bread and called me over to help. She showed me how to gently stretch the dough, careful not to tear it, and then laid it on the scorching hot baking stone. The magic of watching that flat disc puff up into a perfect pocket still thrills me today. This bread machine version doesn’t quite replicate grandma’s wood-fired oven, but it’s surprisingly close and so incredibly simple. It brings back those happy, sun-drenched afternoons in her kitchen.
Recipe Overview
- Prep Time: 1 hour 20 minutes (plus bread machine cycle time)
- Cook Time: 4 minutes
- Total Time: Approximately 2 hours 30 minutes (including bread machine cycle)
- Servings: 12
- Yield: 12 pitas
- Dietary Type: Vegetarian (easily made vegan)
Ingredients
- 1 cup water
- 3 tablespoons olive oil
- 3 cups bread flour
- 1 1/2 teaspoons salt
- 1 teaspoon sugar
- 1 tablespoon active dry yeast or 1 tablespoon bread machine yeast
Equipment Needed
- Bread Machine
- Baking Sheet
- Rolling Pin
- Damp Towel
- Floured Surface
Instructions
-
Add the ingredients to your bread machine pan in the order listed: water, olive oil, bread flour, salt, sugar, and finally, the active dry yeast or bread machine yeast. Be sure to add ingredients in the order specified by your bread machine manufacturer for best results.
-
Select the dough cycle on your bread machine. The dough cycle typically includes kneading and a rise. The exact duration will vary depending on your machine.
-
Once the dough cycle is complete, carefully remove the dough from the bread machine pan.
-
On a lightly floured surface, divide the dough into 12 equal portions. A bench scraper or sharp knife works well for this.
-
Shape each portion of dough into a smooth ball.
-
Cover the dough balls with a clean, damp towel and let them rest for 10 minutes. This allows the gluten to relax, making them easier to roll out.
-
Lightly grease a baking sheet. Set aside.
-
On a floured surface, using a rolling pin, roll each ball of dough into circles approximately 6-7 inches in diameter. For pitas that will puff up and create pockets, aim for slightly smaller circles that are a little thicker. If you want them to be more like tortillas, roll them out thinly to 6-7 inches.
-
Place 2 circles of dough on the prepared baking sheet, ensuring they are not touching.
-
Bake in a preheated oven at 450 degrees F (232 degrees C) for 2 minutes.
-
Carefully turn the pitas over and bake for an additional 2 minutes. They should be puffed up and lightly golden brown.
-
Continue baking, 2 at a time, until all the pitas are cooked.
Expert Tips & Tricks
- Water Temperature: While this recipe surprisingly works even with cold water, using warm water (around 120-130°F or 49-54°C) will generally yield a more consistent and faster rise.
- Flour Power: Bread flour is recommended for its higher gluten content, resulting in a chewier texture and better rise. All-purpose flour can be used, but the texture might be slightly different.
- Puffing Perfection: The secret to a good pita pocket lies in the heat and thickness of the dough. A very hot oven and slightly thicker circles are key.
- Stone Baking (Optional): If you have a pizza stone, preheat it in the oven at 450°F (232°C). Place the pita directly on the hot stone and bake for 4 minutes without turning. This method often results in even better puffing.
- Dough Handling: Be gentle when rolling out the dough. Overworking it can make it tough.
- Prevent Sticking: Make sure the baking sheet is well-greased to prevent the pitas from sticking.
Serving & Storage Suggestions
Serve your freshly baked pita bread warm with your favorite fillings. They’re perfect for gyros, falafel, hummus, salads, or simply enjoyed with a drizzle of olive oil and some za’atar.
- Room Temperature: Store cooled pita bread in an airtight container at room temperature for up to 2 days.
- Refrigerator: For longer storage, keep them in an airtight container in the refrigerator for up to a week.
- Freezer: Pita bread freezes exceptionally well. Place them in a freezer-safe bag or container and freeze for up to 2 months.
- Reheating: To reheat, wrap the pita in a damp paper towel and microwave for 10-20 seconds. You can also warm them in a dry skillet or toaster oven.
Nutritional Information
(Estimates will vary based on specific ingredients used)
| Nutrient | Amount per Serving | % Daily Value |
|---|---|---|
| Calories | 148 kcal | 7% |
| Total Fat | 3.7 g | 5% |
| Saturated Fat | 0.5 g | 3% |
| Cholesterol | 0 mg | 0% |
| Sodium | 292 mg | 12% |
| Total Carbohydrate | 24.6 g | 8% |
| Dietary Fiber | 1.1 g | 4% |
| Sugars | 0.4 g | 1% |
| Protein | 3.6 g | 7% |
Variations & Substitutions
- Whole Wheat Pita: Substitute up to half of the bread flour with whole wheat flour for a nuttier flavor and added fiber.
- Gluten-Free Pita: Use a gluten-free bread flour blend specifically designed for bread making. You may need to adjust the liquid content.
- Herb-Infused Pita: Add a tablespoon of dried herbs like rosemary, thyme, or oregano to the dough for extra flavor.
- Garlic Pita: Mix minced garlic into the dough for a savory twist.
- Vegan Option: This recipe is naturally vegan as is. Simply ensure that your yeast is certified vegan.
FAQs (Frequently Asked Questions)
Q: My pitas aren’t puffing up. What could be the reason?
A: The oven may not be hot enough, or the dough might be too thin. Ensure your oven is preheated to 450°F (232°C) and that the dough circles are slightly thicker, especially if you desire pockets.
Q: Can I make the dough ahead of time?
A: Yes, you can make the dough ahead of time. After the dough cycle is complete, place the dough in a lightly oiled bowl, cover it with plastic wrap, and refrigerate for up to 24 hours. Allow the dough to come to room temperature before rolling it out.
Q: Why is my pita bread tough?
A: Over-kneading the dough or using too much flour while rolling can result in tough pita bread. Be gentle with the dough and use flour sparingly.
Q: Can I use instant yeast instead of active dry yeast?
A: Yes, you can. Simply add the instant yeast directly to the dry ingredients. No need to proof it in water first.
Q: How do I prevent the pitas from getting hard after baking?
A: Wrap the warm pitas in a clean kitchen towel as they come out of the oven. This helps to trap moisture and keep them soft.
Final Thoughts
This bread machine pita bread recipe is a delightful and straightforward way to bring the taste of homemade goodness to your table. With minimal effort and maximum flavor, you’ll be amazed at how easily you can create these versatile pockets of deliciousness. Don’t be afraid to experiment with different fillings and seasonings to customize them to your liking. So, go ahead, fire up your bread machine and enjoy the simple pleasure of freshly baked pita bread. Share your creations and culinary adventures with friends and family – they’re sure to be impressed!