
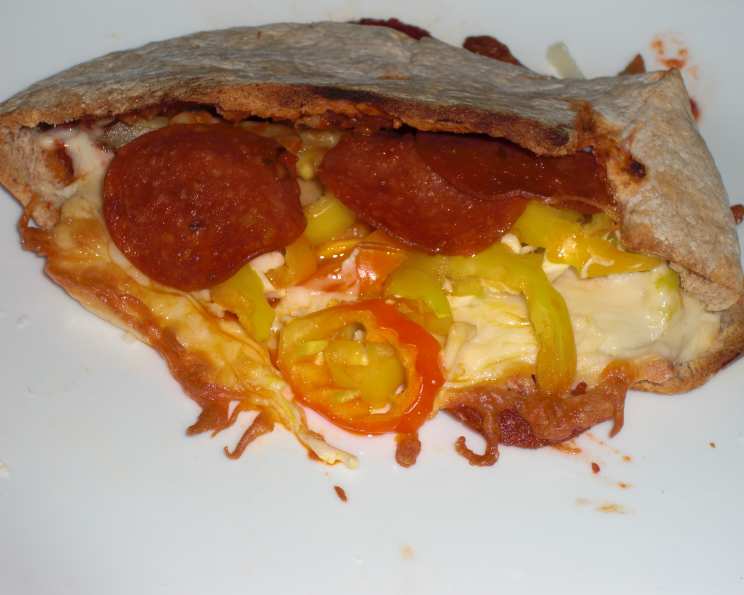
Pita Pizza Pocket: A Weight Watchers Delight
There’s something deeply comforting about pizza, isn’t there? As a kid, Friday night pizza was a sacred ritual. The aroma of warm dough, bubbling cheese, and savory toppings always filled our small kitchen with anticipation. But as a working chef and someone mindful of healthy eating, I’ve learned to adapt those cherished memories. This Pita Pizza Pocket is my guilt-free nod to those Friday nights – all the satisfying pizza flavors nestled in a light and healthy pita, perfect for a quick lunch or a light dinner.
Recipe Overview
- Prep Time: 5 minutes
- Cook Time: 8-10 minutes
- Total Time: 13-15 minutes
- Servings: 1
- Yield: 1 pizza pocket
- Dietary Type: Weight Watchers friendly
Ingredients
- 1 salad pita pocket
- 5 slices pepperoni
- ¼ cup Ragu pizza sauce (or other low-calorie brand)
- ¼ cup mushrooms, sliced
- ¼ cup banana peppers, sliced
- ¼ cup fat-free mozzarella cheese, shredded
Equipment Needed
- Oven or toaster oven
- Aluminum foil (optional)
Instructions
-
Preheat your oven to 350°F (175°C). If using a toaster oven, adjust the temperature and time as needed, keeping a close eye to prevent burning. Toaster ovens can vary widely in their heating capabilities.
-
Carefully open the salad pita pocket. These pockets are designed to be stuffed, so the opening should be fairly wide.
-
Spoon the pizza sauce into the pita pocket. Distribute it evenly, ensuring the sauce reaches all corners. The goal is to coat the inside of the pita without making it soggy.
-
Now, layer in the toppings. Start with the mushrooms and banana peppers, spreading them across the sauced surface.
-
Add the pepperoni slices. Arrange them so that each bite will have a bit of pepperoni flavor. If you prefer, you could chop the pepperoni into smaller pieces for more even distribution.
-
Finally, top everything with the shredded fat-free mozzarella cheese. Make sure the cheese covers all the other toppings.
-
Chef’s Tip: To prevent the cheese from melting out of the open side of the pita pocket during baking, use a small piece of aluminum foil to gently prop up the opening. This creates a little barrier and helps keep everything inside.
-
Bake in the preheated oven for 8 to 10 minutes, or until the cheese is fully melted and bubbly. The pita pocket should be slightly crisp, but not burnt. Keep a close watch, as cooking times can vary based on your oven.
-
Remove from the oven and let cool for a minute or two before serving. This will allow the cheese to set a bit and prevent burning your mouth.
Expert Tips & Tricks
- Pre-cook your veggies: If you like your vegetables softer, give your mushrooms and peppers a quick sauté in a pan before adding them to the pita. This will help them cook through better in the short baking time.
- Spice it up: A pinch of red pepper flakes or a dash of hot sauce can add a fiery kick.
- Garlic lovers: A light brushing of garlic-infused olive oil on the pita before adding the sauce will give it an extra layer of flavor (just remember to adjust Weight Watchers points accordingly).
- Make-ahead tip: You can assemble the pita pizza pockets ahead of time and store them in the refrigerator until you’re ready to bake. This is a great time-saver for busy weeknights.
- Prevent a soggy pita: Lightly toast the pita pocket before adding sauce and toppings to create a barrier against moisture.
Serving & Storage Suggestions
Serve your Pita Pizza Pocket immediately for the best flavor and texture. A side salad with a light vinaigrette makes a great accompaniment.
If you have leftovers (though it’s unlikely!), store them in an airtight container in the refrigerator. They will keep for up to 2 days.
To reheat, you can use the oven, toaster oven, or microwave. For the oven or toaster oven, bake at 350°F (175°C) until heated through and the cheese is melted again. Microwaving will be quicker, but the pita may become a bit soft.
Nutritional Information
| Nutrient | Amount per Serving | % Daily Value |
|---|---|---|
| Calories | 344.6 kcal | N/A |
| Calories from Fat | N/A | 32% |
| Total Fat | 12.3 g | 18% |
| Saturated Fat | 5.6 g | 27% |
| Cholesterol | 34.5 mg | 11% |
| Sodium | 783.9 mg | 32% |
| Total Carbohydrate | 41.7 g | 13% |
| Dietary Fiber | 3.8 g | 15% |
| Sugars | 3.1 g | N/A |
| Protein | 16.4 g | 32% |
Note: Nutritional information is an estimate and can vary based on specific ingredients and brands used.
Variations & Substitutions
- Turkey Pepperoni: For a lower-fat option, substitute turkey pepperoni for regular pepperoni.
- Vegetarian Delight: Omit the pepperoni entirely and load up on extra vegetables like bell peppers, onions, spinach, or olives.
- Different Cheeses: Experiment with other low-fat cheeses, such as provolone or cheddar.
- Gluten-Free: Use a gluten-free pita pocket if needed.
- Mediterranean Twist: Add sun-dried tomatoes, artichoke hearts, and feta cheese for a Mediterranean-inspired pizza pocket.
FAQs (Frequently Asked Questions)
Q: Can I use a regular pita bread instead of a salad pita pocket?
A: Yes, you can, but a salad pita pocket is preferred as it has a larger opening, making it easier to stuff with toppings. Just be careful not to overfill a regular pita, or it might tear.
Q: Can I freeze these pizza pockets?
A: While you can freeze them, the texture of the pita may change upon thawing and reheating. It’s best to enjoy them fresh for optimal taste and texture.
Q: What if I don’t like banana peppers?
A: Feel free to substitute with your favorite pizza toppings! Green bell peppers, black olives, or even a sprinkle of red pepper flakes would work well.
Q: How do I prevent the pita from getting soggy?
A: Toasting the pita lightly before adding the sauce creates a barrier that helps prevent sogginess. Also, avoid using too much sauce.
Q: Can I grill these instead of baking them?
A: Yes, you can grill them! Place the assembled pita pizza pocket on a grill over medium heat. Close the grill and cook for about 5-7 minutes, or until the cheese is melted and the pita is slightly charred. Watch carefully to prevent burning.
Final Thoughts
This Pita Pizza Pocket is more than just a quick and easy meal – it’s a testament to the fact that you can enjoy your favorite comfort foods without compromising your health goals. So go ahead, gather your ingredients, preheat your oven, and create your own personalized pizza pocket masterpiece. Don’t be afraid to experiment with different toppings and flavor combinations! And most importantly, share your creations and feedback – I’d love to hear what delicious twists you come up with. Perhaps pair it with a crisp, refreshing salad for a complete and satisfying meal. Bon appétit!