
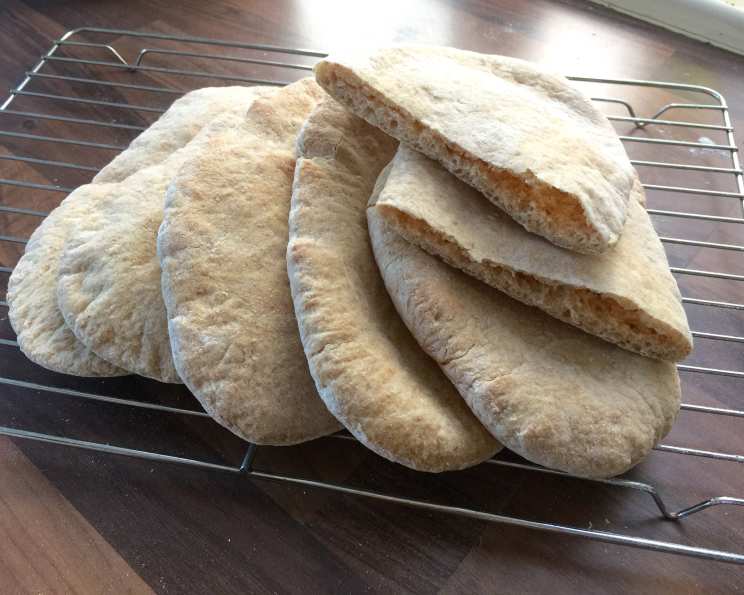
Homemade Pita Pocket Bread (Bread Machine Recipe)
The scent of freshly baked bread, still warm from the oven, is one of my most cherished childhood memories. My grandmother, a master of simple yet profound cooking, would often whip up a batch of pita bread. I remember eagerly watching as she flattened the dough, the rhythmic thud of her rolling pin a comforting soundtrack to my afternoons. The best part? Filling those warm, pliable pockets with whatever delicious bits she had on hand – leftover roasted chicken, crisp cucumbers, and a generous dollop of creamy yogurt. Today, I’m excited to share this bread machine version, that makes her delicious pita bread recipe even more accessible to busy cooks.
Recipe Overview
- Prep Time: 25 minutes
- Cook Time: 30 minutes (includes rising time)
- Total Time: 55 minutes
- Servings: 10
- Yield: 10 pockets
- Dietary Type: Vegetarian (easily vegan)
Ingredients
- 1 1/3 cups warm water
- 2 tablespoons olive oil
- 1 tablespoon sugar
- 1 1/4 teaspoons salt
- 2 cups white flour
- 1 1/3 cups whole wheat flour
- 2 1/2 teaspoons yeast
Equipment Needed
- Bread machine
- Baking sheets
- Rolling pin (optional, for shaping)
Instructions
- Add the ingredients to your bread machine in the order recommended by the manufacturer’s instructions for your specific model. Typically, this means starting with the wet ingredients: the warm water and olive oil.
- Next, add the dry ingredients: the sugar, salt, white flour, whole wheat flour, and finally, the yeast. Ensure the salt and yeast are not directly touching to prevent inhibiting the yeast’s activity.
- Select the DOUGH or MANUAL program on your bread machine. This cycle will mix and knead the dough, then allow it to rise.
- Once the dough cycle is complete, gently remove the dough from the bread machine.
- On a lightly floured surface, divide the dough into 10 equal pieces. I find it helpful to use a kitchen scale to ensure uniformity, but you can also simply eyeball it.
- Shape each piece of dough into a smooth ball by tucking the edges underneath. This helps create a nice, even surface for when you flatten them later.
- Place five dough balls on each of two baking sheets. Give them some space to expand during the second rise.
- Let the dough balls rise for 20 minutes. While they are rising, preheat your oven to 500°F (260°C). This high temperature is crucial for creating the characteristic pita pocket.
- After the rising time, gently flatten each dough ball into a 6-inch disk. You can use a rolling pin for this, or simply press down with your fingertips. Be careful not to press too hard, as you want to keep some air in the dough.
- Bake for 5 minutes. Keep a close eye on them; they should puff up dramatically and begin to brown lightly on top. If they don’t puff up, your oven may not be hot enough.
- Remove the baked pitas from the oven and let them cool slightly on a wire rack.
- Once cooled enough to handle, cut each circle in half to form two pockets. A serrated knife works well for this.
- Fill your homemade pita pockets with your favorite fillings. The possibilities are endless!
Traditional Bread-Making (If you don’t have a bread machine):
- In a mixing bowl, combine the warm water, sugar, and yeast. Let this mixture sit for 3-5 minutes until it becomes foamy. This indicates that the yeast is active.
- Add the olive oil and salt to the yeast mixture and mix well.
- In a separate bowl, whisk together the white flour and whole wheat flour.
- Gradually add the flour mixture to the wet ingredients, mixing until a dough forms.
- Turn the dough out onto a lightly floured surface and knead for 5-7 minutes until it is smooth and elastic.
- Place the dough ball in a well-greased bowl, turning to coat.
- Cover the bowl with plastic wrap and let it rise in a warm place until doubled in volume, about 1-1.5 hours.
- Continue from Step 5 above.
Expert Tips & Tricks
- High Heat is Key: The super-hot oven is what creates the steam that puffs up the pita and forms the pocket. Make sure your oven is fully preheated.
- Don’t Overwork the Dough: Over-kneading can result in tough pitas. Let the bread machine do its job, or knead by hand just until the dough is smooth and elastic.
- Consistent Size Matters: Dividing the dough into equal pieces ensures even baking and consistent pocket size.
- Experiment with Flours: While this recipe calls for a mix of white and whole wheat, you can experiment with other flours like spelt or rye for different flavors and textures.
- If Your Pitas Don’t Puff: Don’t despair if your pitas don’t puff up perfectly. They’ll still taste delicious! The key is a hot oven and a relatively thin disk of dough.
- Brush with Oil Before Baking: For extra flavor and a slightly crispier crust, brush the flattened pitas with a little olive oil before baking.
Serving & Storage Suggestions
Serve your freshly baked pita pockets warm, filled with your favorite ingredients. They are perfect for lunch, dinner, or a quick snack.
Filling ideas:
- Hummus and vegetables
- Falafel and tahini sauce
- Grilled chicken or lamb with tzatziki
- Tuna salad or chicken salad
- Leftover roasted vegetables
- Even pizza toppings!
Storage:
- Store leftover pita pockets in an airtight container at room temperature for up to 2 days.
- For longer storage, freeze them in a freezer bag for up to 2 months. Thaw at room temperature before reheating.
- To reheat, you can wrap them in foil and warm them in a low oven (300°F/150°C) for a few minutes, or toast them lightly in a toaster.
Nutritional Information
| Nutrient | Amount per Serving | % Daily Value |
|---|---|---|
| Calories | 176.9 kcal | N/A |
| Calories from Fat | 29 kcal | N/A |
| Total Fat | 3.3 g | 5% |
| Saturated Fat | 0.5 g | 2% |
| Cholesterol | 0 mg | 0% |
| Sodium | 293.2 mg | 12% |
| Total Carbohydrate | 32.3 g | 10% |
| Dietary Fiber | 2.8 g | 11% |
| Sugars | 1.4 g | N/A |
| Protein | 5.2 g | 10% |
Note: Nutritional information is an estimate and may vary depending on specific ingredients and portion sizes.
Variations & Substitutions
- Gluten-Free Pita: Substitute the white and whole wheat flour with a gluten-free all-purpose flour blend. You may need to add a binder like xanthan gum for best results.
- Vegan Pita: This recipe is already vegan! Just ensure your fillings are also plant-based.
- Herb-Infused Pita: Add a tablespoon of dried herbs like rosemary, thyme, or oregano to the dough for extra flavor.
- Garlic Pita: Mix a teaspoon of garlic powder into the dough, or brush the baked pitas with garlic-infused olive oil.
- Sweet Pita: Reduce the salt to 1 teaspoon and add an extra tablespoon of sugar for a slightly sweet pita, perfect for filling with fruit and yogurt.
FAQs (Frequently Asked Questions)
Q: Why didn’t my pitas puff up?
A: The most common reason for pitas not puffing up is an oven that isn’t hot enough. Make sure your oven is fully preheated to 500°F (260°C) before baking.
Q: Can I use all white flour instead of whole wheat?
A: Yes, you can use all white flour. However, the whole wheat flour adds a slightly nutty flavor and more fiber.
Q: How can I prevent the dough from sticking?
A: Make sure to lightly flour your work surface and baking sheets.
Q: Can I make the dough ahead of time?
A: Yes, you can make the dough ahead of time and store it in the refrigerator for up to 24 hours. Let it come to room temperature before shaping and baking.
Q: My pitas are too hard. What did I do wrong?
A: Over-baking can result in hard pitas. Reduce the baking time by a minute or two. You can also brush them with olive oil after baking to soften them.
Final Thoughts
I hope you enjoy making these pita pockets as much as I do! There’s something incredibly satisfying about creating your own bread from scratch. Don’t be afraid to experiment with different fillings and flavors to create your perfect pita pocket masterpiece. Grab a friend or loved one, fill up those warm pitas, and share the deliciousness. Happy baking!