
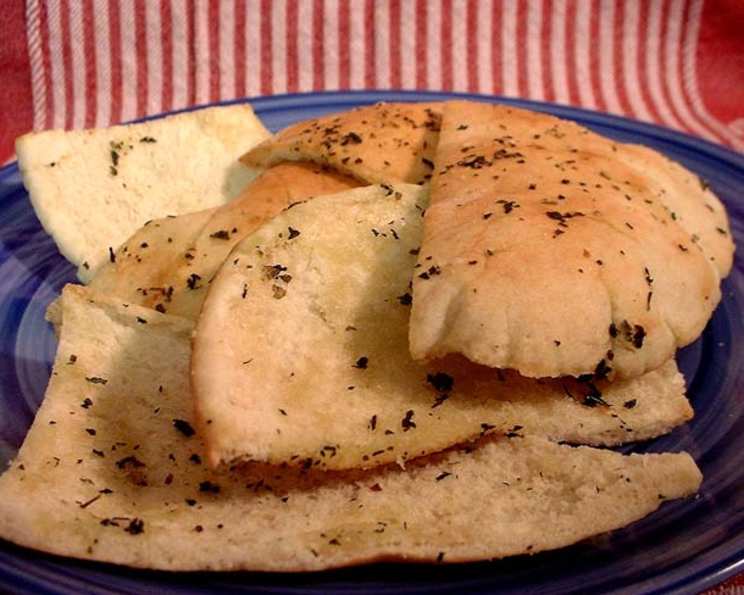
Pita Triangles: The Perfect Party Bite
There’s something so inherently comforting about the aroma of warm, cheesy bread filling the kitchen. I remember being a kid, perched on a stool, watching my grandmother meticulously assemble these little pita triangles for every family gathering. The air would be thick with anticipation, and I knew that once those golden-brown snacks emerged from the oven, they’d disappear in a flash. They were always a crowd-pleaser, and to this day, the taste transports me back to those happy, carefree moments.
Recipe Overview
- Prep Time: 15 minutes
- Cook Time: 15-20 minutes
- Total Time: 30-35 minutes
- Yields: 48 pieces (using 8 mini pitas)
- Dietary Type: Vegetarian (can be easily adapted to be Gluten-Free)
Ingredients
- 1 cup sour cream
- ½ cup mayonnaise
- ½ cup freshly grated parmesan cheese
- 2 teaspoons dried basil
- 2 teaspoons dried oregano
- 1-2 garlic cloves, minced
- Salt and pepper to taste
- 8 mini pita pockets, split into circles
Equipment Needed
- Sharp knife
- Mixing bowl
- Cookie sheet
- Freezer-safe plastic bag
Instructions
-
In a mixing bowl, combine the sour cream, mayonnaise, and freshly grated parmesan cheese.
-
Add the dried basil, dried oregano, and minced garlic to the mixture.
-
Season the mixture with salt and pepper to your liking. Don’t be shy; a well-seasoned filling makes all the difference.
-
Using a sharp knife, carefully split each mini pita pocket into two circles. This step requires a bit of finesse to avoid tearing the pita.
-
Spread each pita round with approximately one tablespoon of the prepared sour cream mixture. Ensure that each circle is evenly coated for a consistent flavor.
-
Place the spread pita circles on a cookie sheet in a single layer.
-
Freeze the cookie sheet of pita circles uncovered for at least 30 minutes, or until they are firm. This will make them easier to cut into triangles later.
-
Once frozen, transfer the pita circles into a freezer-safe plastic bag. They can be stored in the freezer for several weeks.
-
When ready to bake, preheat your oven to 375°F (190°C).
-
Remove the frozen pita circles from the freezer. Using a sharp carving knife, cut each circle into sixths (for a smaller size) or eighths (for larger loaves).
-
Spread the pita triangles on a cookie sheet in a single layer, ensuring they are not overlapping.
-
Bake for 15-20 minutes, or until the pita triangles start to brown slightly and the filling is bubbly and golden. Keep a close eye on them to prevent burning.
-
Remove the cookie sheet from the oven and let the pita triangles cool slightly before serving.
Expert Tips & Tricks
- Freezing the pita circles before cutting is crucial. It makes them much easier to handle and prevents the filling from smearing. If you skip this step, you’ll likely end up with a messy, uneven result.
- For a richer flavor, use freshly grated parmesan cheese instead of the pre-shredded variety. The difference is significant.
- Don’t be afraid to experiment with different herbs and spices. A pinch of red pepper flakes adds a subtle kick, while a sprinkle of dried thyme offers a more earthy note.
- If the filling seems too thick, add a tablespoon of milk or cream to thin it out slightly.
- To prevent the pita triangles from becoming soggy, make sure they are spread in a single layer on the cookie sheet and bake them until they are crisp and golden brown.
- For extra crispy pita triangles, lightly brush the cookie sheet with olive oil before placing the pita triangles on it.
- If you’re short on time, you can skip the freezing step, but be prepared for a slightly messier cutting process.
Serving & Storage Suggestions
Serve the pita triangles warm as an appetizer, snack, or side dish. They are perfect for parties, potlucks, or casual gatherings.
-
Serving: Arrange the pita triangles on a platter and garnish with fresh parsley or basil for a pop of color. Serve them with a dipping sauce, such as marinara sauce, ranch dressing, or hummus.
-
Storage: Store leftover pita triangles in an airtight container in the refrigerator for up to 3 days. To reheat, bake them in a preheated oven at 350°F (175°C) for 5-10 minutes, or until warmed through and crispy. They can also be reheated in a microwave, but they may lose some of their crispness. For long-term storage, freeze the baked pita triangles in a freezer-safe bag for up to 2 months. Reheat directly from frozen in a preheated oven.
Nutritional Information
(Note: Values are approximate and may vary based on specific ingredients used.)
| Nutrient | Amount per Serving (1 triangle) | % Daily Value |
|---|---|---|
| Calories | 25 kcal | 1% |
| Total Fat | 1.5g | 2% |
| Saturated Fat | 0.8g | 4% |
| Cholesterol | 2mg | 1% |
| Sodium | 40mg | 2% |
| Total Carbohydrate | 2g | 1% |
| Dietary Fiber | 0.1g | 0% |
| Sugars | 0.2g | 0% |
| Protein | 0.8g | 2% |
Variations & Substitutions
- Gluten-Free: Use gluten-free pita bread to make this recipe gluten-free.
- Dairy-Free: Substitute the sour cream and parmesan cheese with dairy-free alternatives. There are many great vegan sour creams and parmesan-style cheeses available on the market.
- Vegan: Use vegan sour cream, vegan mayonnaise, and vegan parmesan cheese to make this recipe completely vegan.
- Spicy: Add a pinch of red pepper flakes or a dash of hot sauce to the sour cream mixture for a spicy kick.
- Italian Herbs: Experiment with different combinations of Italian herbs, such as thyme, rosemary, or sage.
- Cheese Variations: Use different types of cheese, such as mozzarella, provolone, or cheddar, in place of or in addition to the parmesan cheese.
- Vegetable Additions: Add finely chopped vegetables, such as spinach, mushrooms, or bell peppers, to the sour cream mixture for added flavor and nutrients.
FAQs (Frequently Asked Questions)
Q: Can I make these pita triangles ahead of time?
A: Yes, you can prepare the pita circles, freeze them, and then bake them when you’re ready to serve. This makes them perfect for parties or gatherings.
Q: How do I prevent the pita triangles from getting soggy?
A: Make sure to spread the pita triangles in a single layer on the cookie sheet and bake them until they are crisp and golden brown.
Q: Can I use regular-sized pita bread instead of mini pita pockets?
A: Yes, you can use regular-sized pita bread, but you’ll need to adjust the baking time accordingly. You may also want to cut them into smaller triangles.
Q: What can I serve with these pita triangles?
A: These pita triangles are delicious on their own, but they also pair well with dips, sauces, or salads.
Q: How long can I store the leftover pita triangles?
A: Store leftover pita triangles in an airtight container in the refrigerator for up to 3 days. They can also be frozen for longer storage.
Final Thoughts
These pita triangles are a versatile and delicious appetizer that is sure to be a hit at any gathering. With their crispy texture, flavorful filling, and easy preparation, they are a perfect addition to your recipe repertoire. Don’t hesitate to experiment with different variations and substitutions to create your own unique twist on this classic recipe. I encourage you to try this recipe, share it with your friends and family, and let me know what you think. Perhaps pair them with a crisp glass of white wine or a refreshing homemade lemonade for the ultimate summer treat!